Introduction
The User Management screen allows you to manage Avanan portal users. You can view and update user information, and add or delete users.
Note - You must have Admin privileges to access the User Management screen.
Viewing User Information
To view user information, click System Settings > User Management.
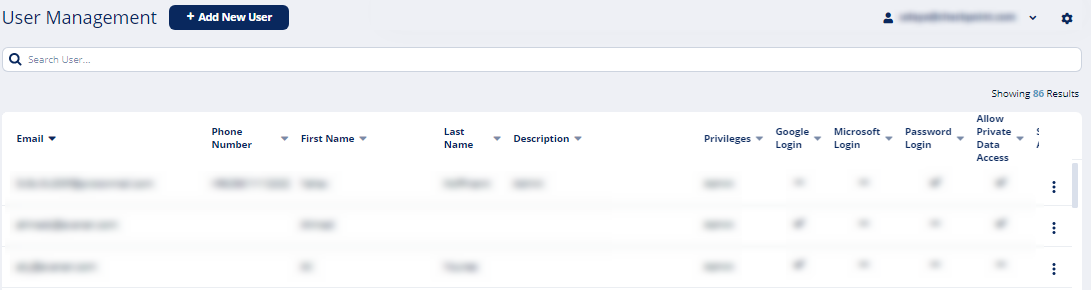
The User Management screen displays this information:
| Item | Description |
| User email ID. | |
| First name | User first name. |
| Last name | User last name. |
| Description | Brief description. |
| Privileges |
User privilege level.
|
| View Policy | Allows the user to view the policy rules and does not allow to edit the rules. |
| Google Login | Indicates whether login authentication through Google credentials is enabled. |
| Microsoft login | Indicated whether login authentication through Microsoft credentials is enabled. |
| SAML Login | Indicates whether login authentication through SAML is enabled. |
| Password login | Indicates whether the user can use the email ID and password to log in. |
| MFA | Indicates whether login authentication through Multi-factor authentication (MFA) is enabled. |
| Allow Private Data Access | Indicates whether the user can access private data. |
| Send Alerts | Indicates whether the user can receive alerts. |
| Receive Periodic Alerts | Indicates whether the user can receive periodic alerts. |
| Last Login | The date and time when the user last logged in to the portal. |
Adding a New User
- Log in to the Avanan portal.
- Click System Settings > User Management.
- Click Add New User.
- In the Email field, enter the user email ID.
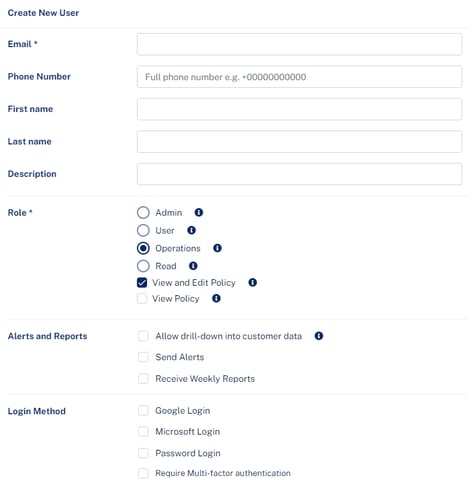
- Optional fields:
- First name
- Last name
- Description
- Select the privilege type for the user.
Privilege Description Admin Can access all the pages and can perform all operations. User Similar privileges to the Admin role, but cannot access the User Management screen or create new SaaS applications. Operations Can perform all operations except:
- Start, stop or authorize SaaS applications.
- Interact with policy rules
- Perform actions on custom queries.
Read Read-only access to the portal. - To allow the user to view the policy rules and not allow to edit the rules, select the View Policy checkbox.
- To allow the user to view, create, and edit the policy rules, select the View and Edit Policy checkbox.
- (Optional) Under Alerts and Reports, select the relevant options:
- Allow drill-down into customer data.
When selected, the user is allowed to access the email header, body, attachments, links to external resources, and text identified as DLP. - Send Alerts.
- Receive Weekly Reports.
When selected, the user receives a weekly report by email.
Note - This option is also available in the Analytics section of the Avanan portal.
- Allow drill-down into customer data.
- (Optional) Select the relevant authentication methods.
Note - You must enable at least one of the uthentication methodsogin authentication login authentication methods; login authentication methodslogin authentication methodsGoogle, Password, Microsoft, or SAML.- Google Login
- Password Login
- Microsoft Login
- SAML Login
- Require Multi-factor Authentication
- Click Create.
Updating User Information
- Log in to the Avanan portal.
- Click System Settings > User Management.
- Click the
 icon of the user you want to update and select Edit.
 - Continue from Step 4 of Adding a New User.
- Click Update.
Deleting a User
- Log in to the Avanan portal.
- Click System Settings > User Management.
- Click the icon of the user you want to delete and select Delete User.
- Click Delete.