Integrations - Configuring AWS S3 to Receive Avanan Logs
Configuring AWS S3 to Receive Avanan Logs
Step-1:
Step-2:
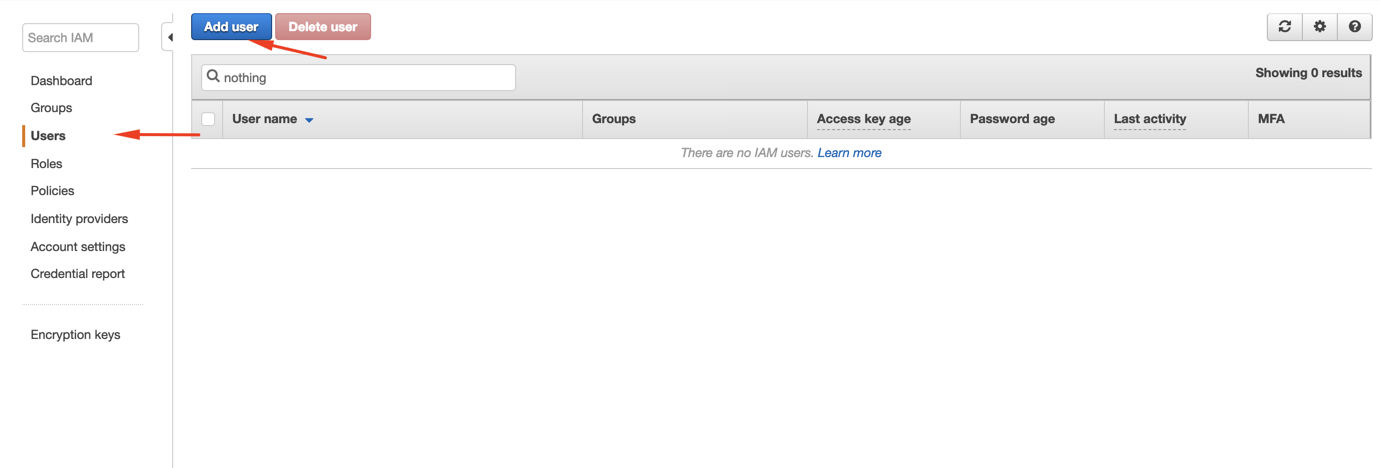
- Click on Users > Add user
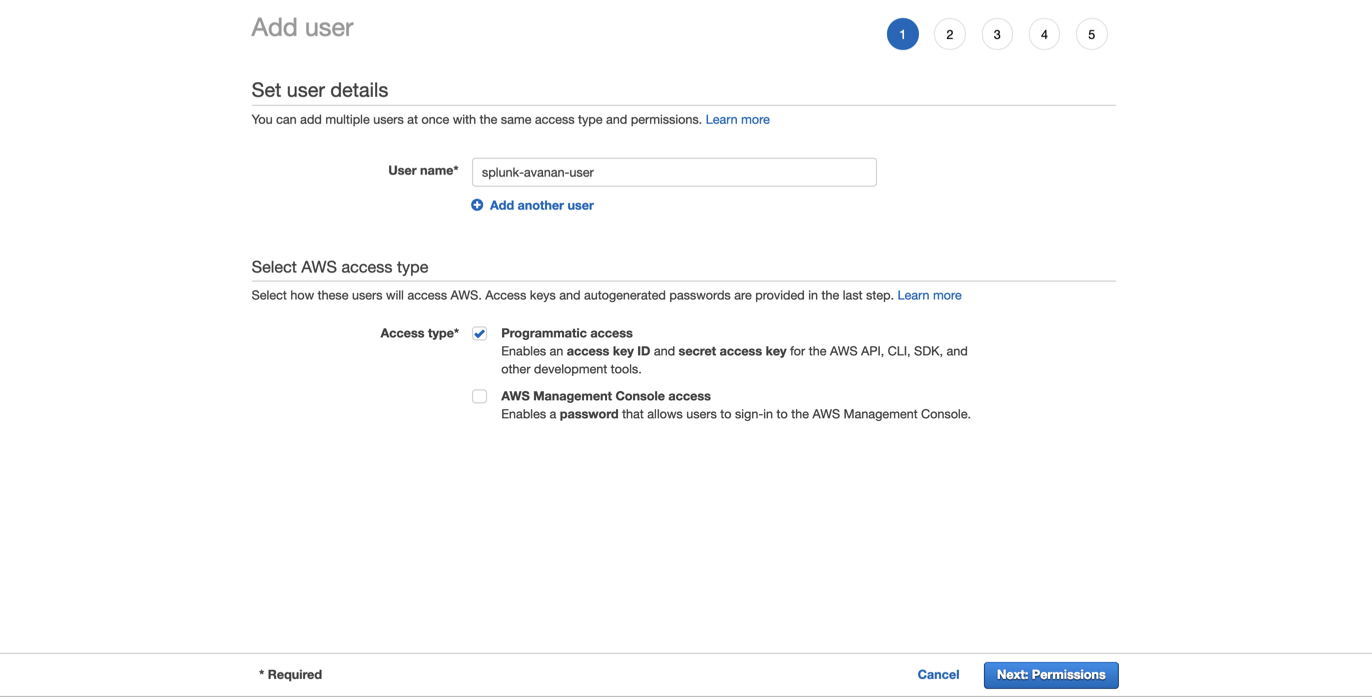
Step-3:
- Select a name and enable “Programmatic access”, click “Next: Permissions”
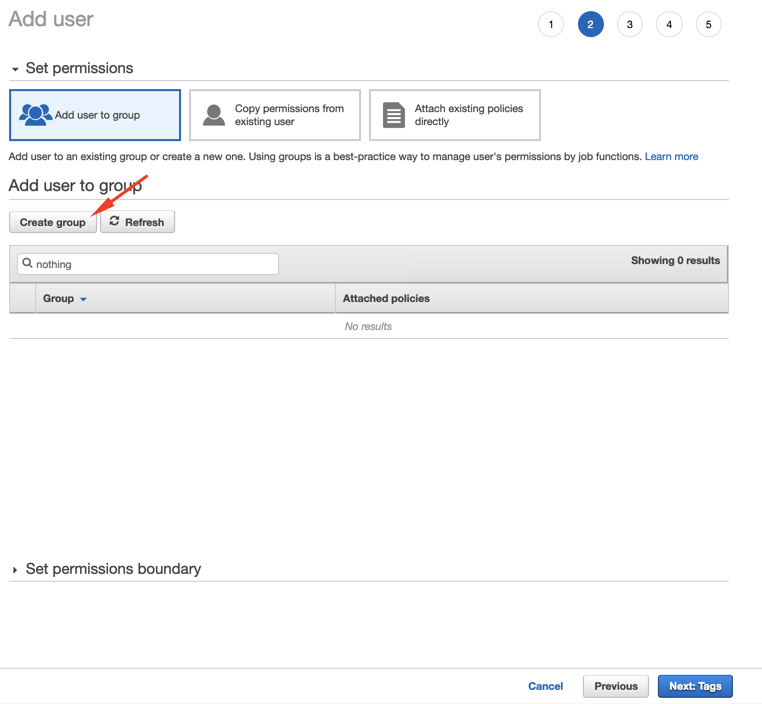
Step-4:
- Click on “Create group” (or the right group if already created)
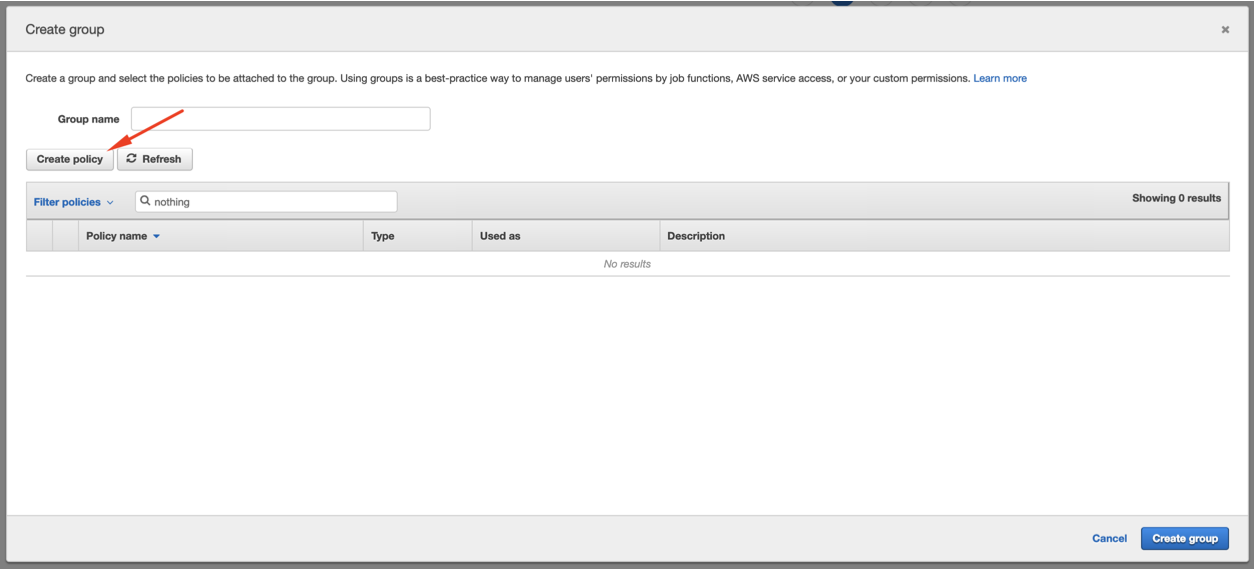
Step-5:
- Click on “Create policy” (or select the right policy if already created)
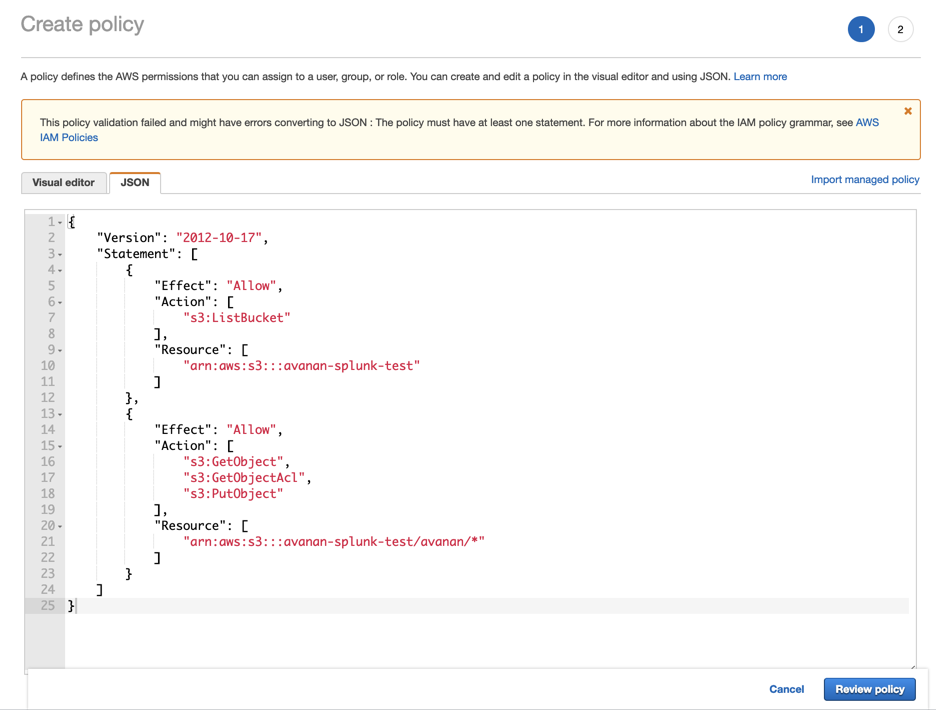
Step-6:
- On the new tab, click on JSON and copy this over:
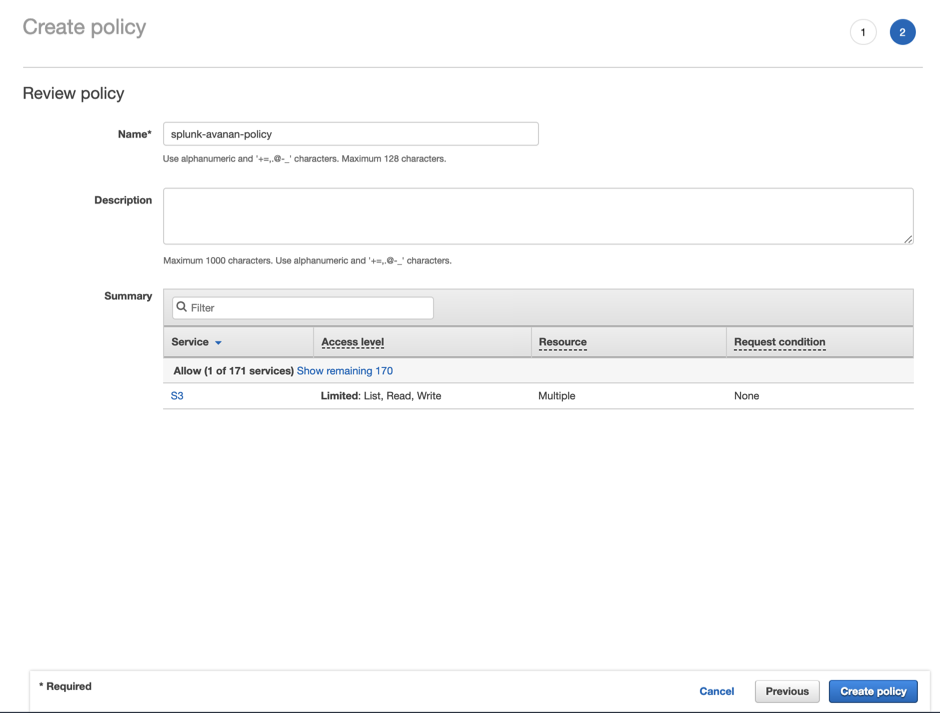
Step-7:
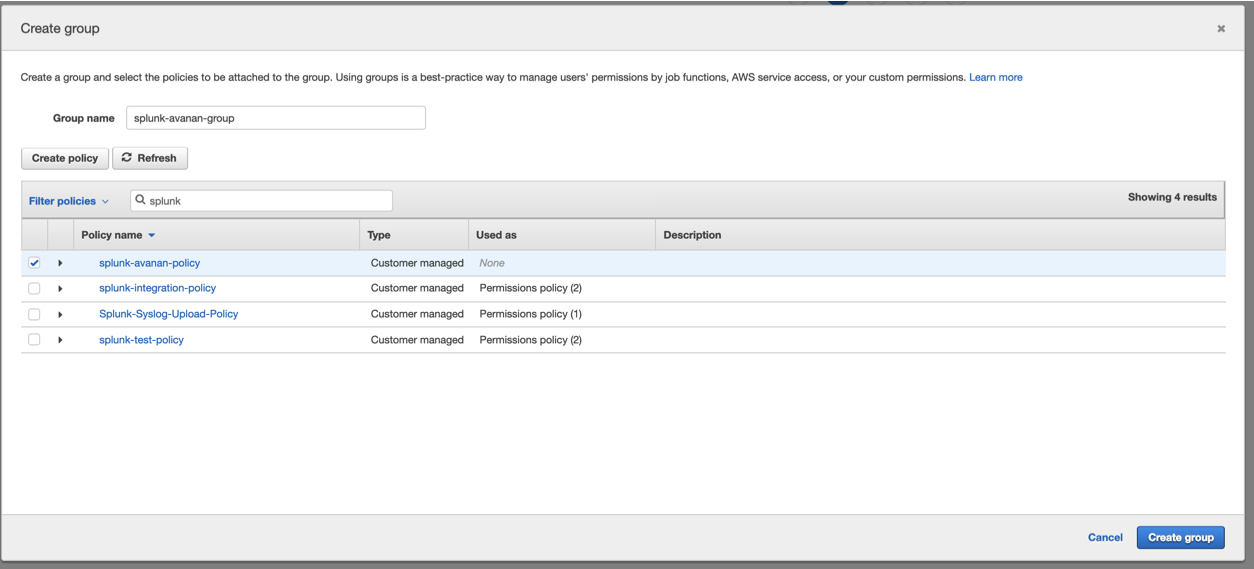
- Click on Review Policy
- Select the policy you just created, give the group a name and click on “Create group”
Step-8:
- After the policy is created, go back to the previous tab and click “Refresh”
- On the next screen, select a policy name and click on “Create Policy”.
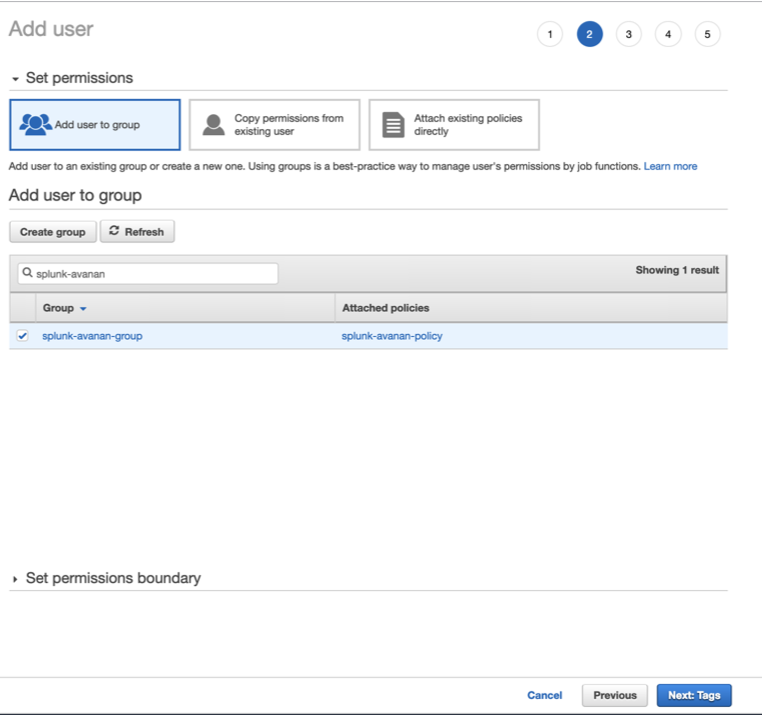
Step-9:
- Back to the “Add user” screen, confirm that the group you just created is selected and click on “Next: Tags”
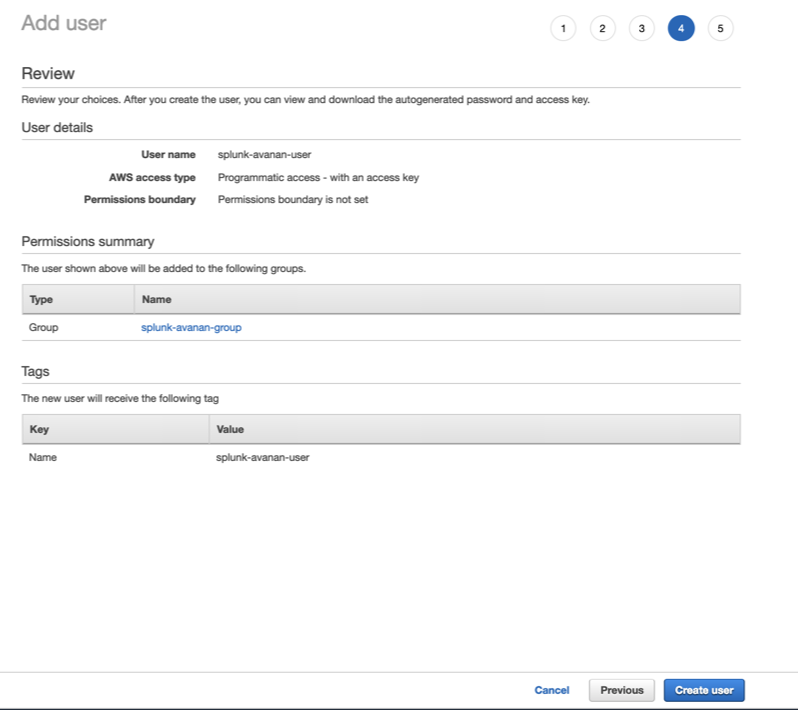
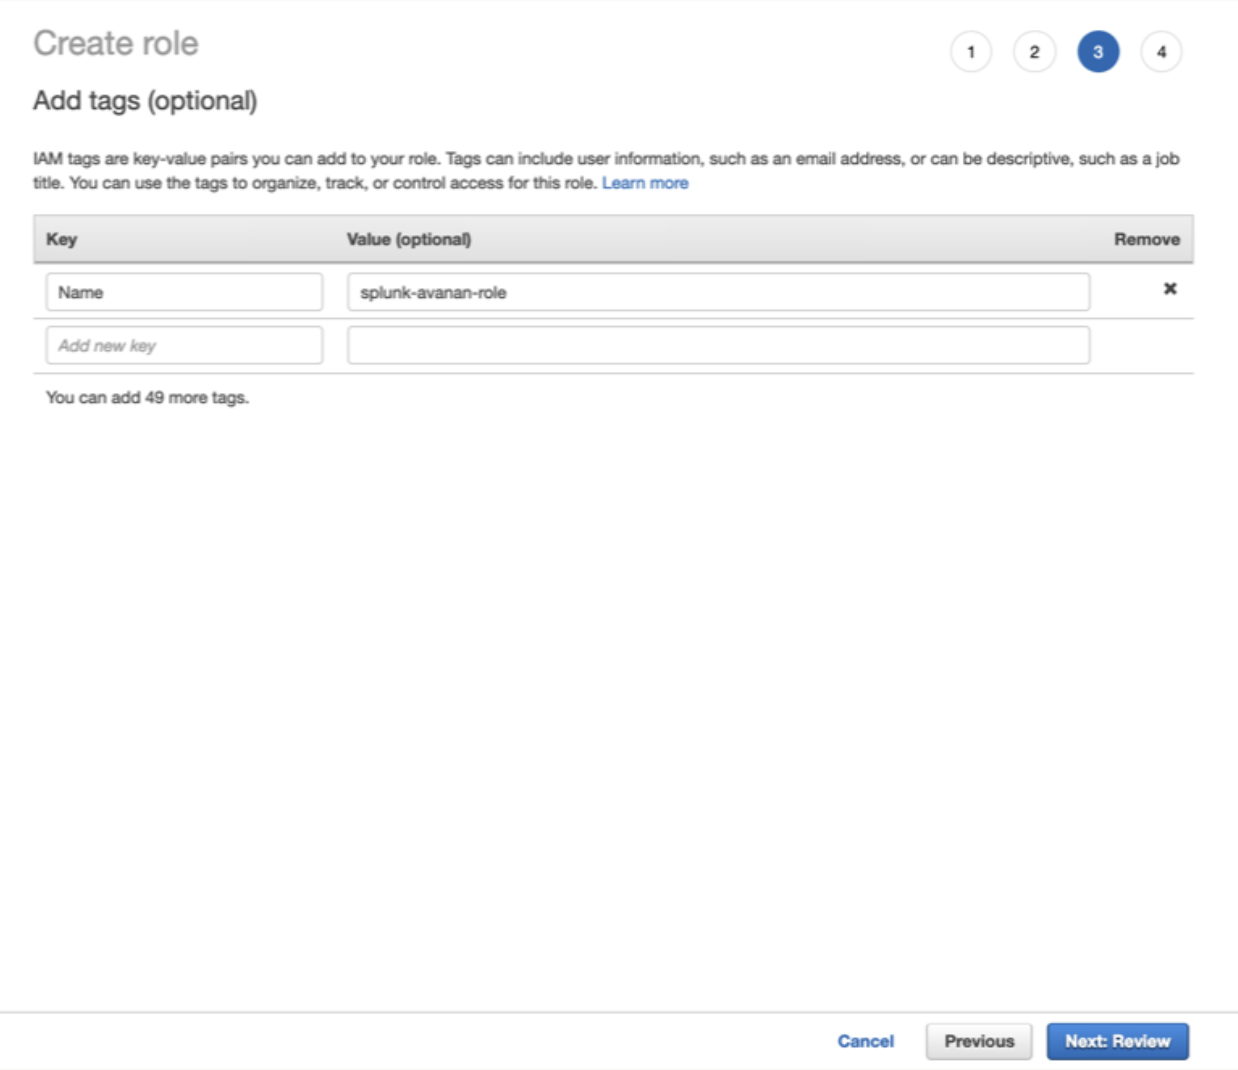
Step-10:
- Add the necessary Tags (in accordance with your environment directives) and click on “Next: Review”
- Confirm all the configurations and click on “Create user”
- Download the CSV or copy the Access Key and Secret access key somewhere safe. This information won’t be available again
- Click Close.
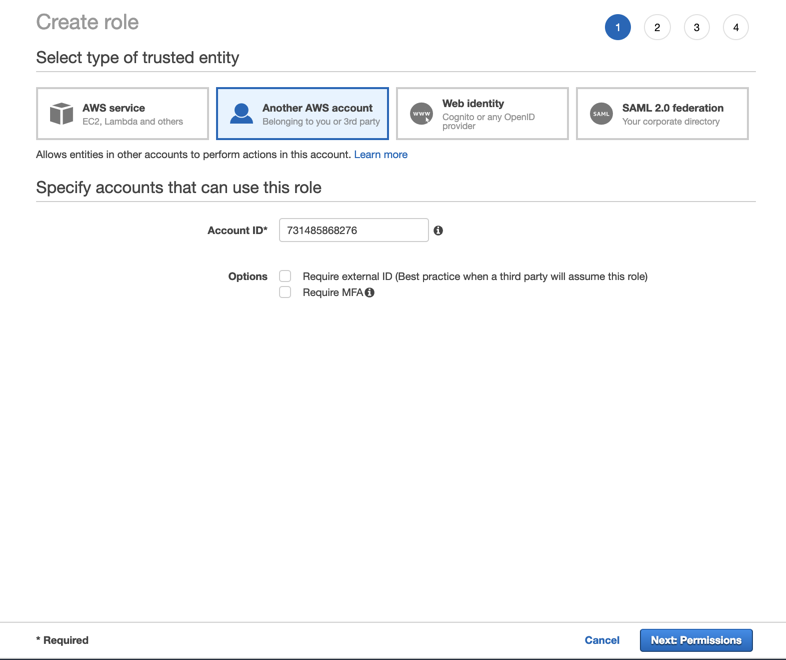
Step-11:
- Click on Roles and on “Create role”
- Select Another AWS Account
- Insert the 12 digit number of the user you just created click on “Next: Permissions”
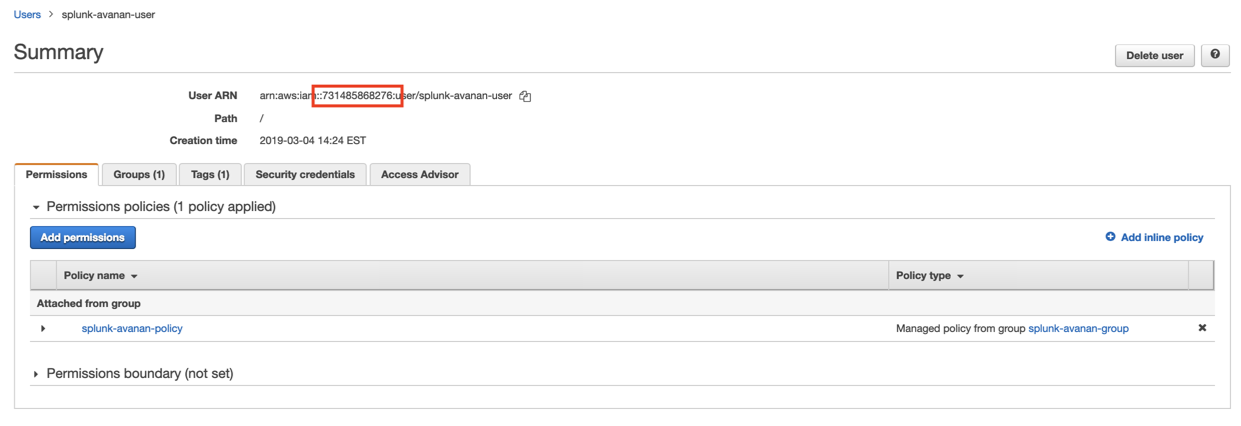
- Note: to find the 12 digit number, open the user on another screen:
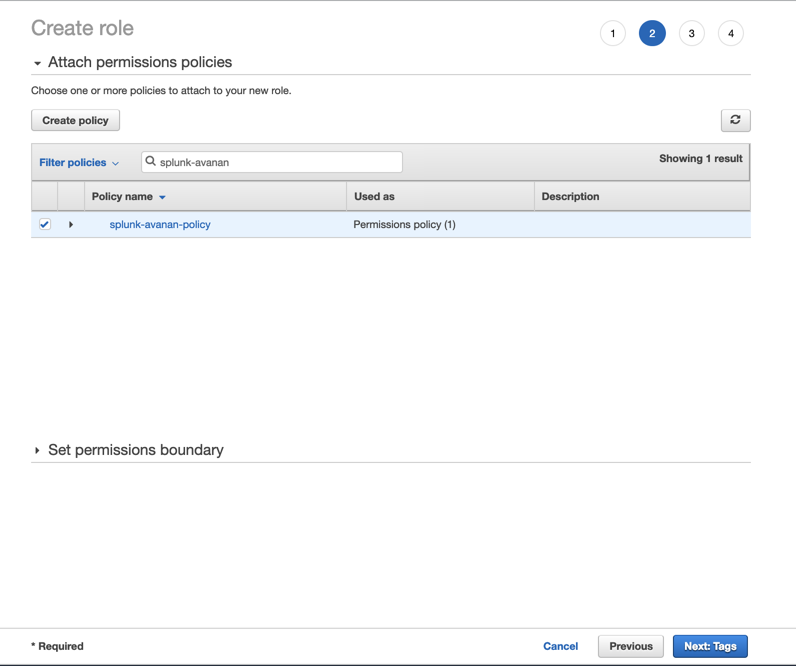
Step-12:
- Select the policy you created, click on Next: Tags.
Step-13:
- Add the necessary Tags (in accordance with your environment directives) and click on Next: Review.
Step-14:
- Select a role name and click on Create Role
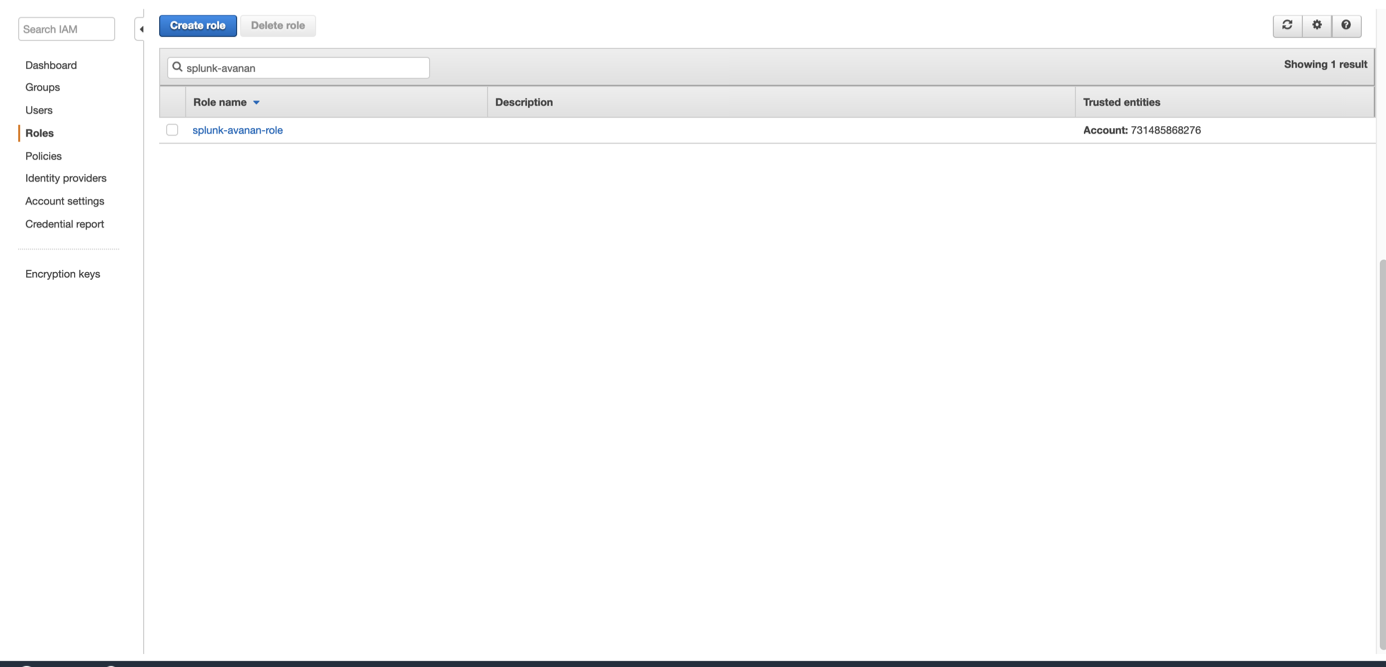
Step-15:
- Search for the role you just created, click on its name
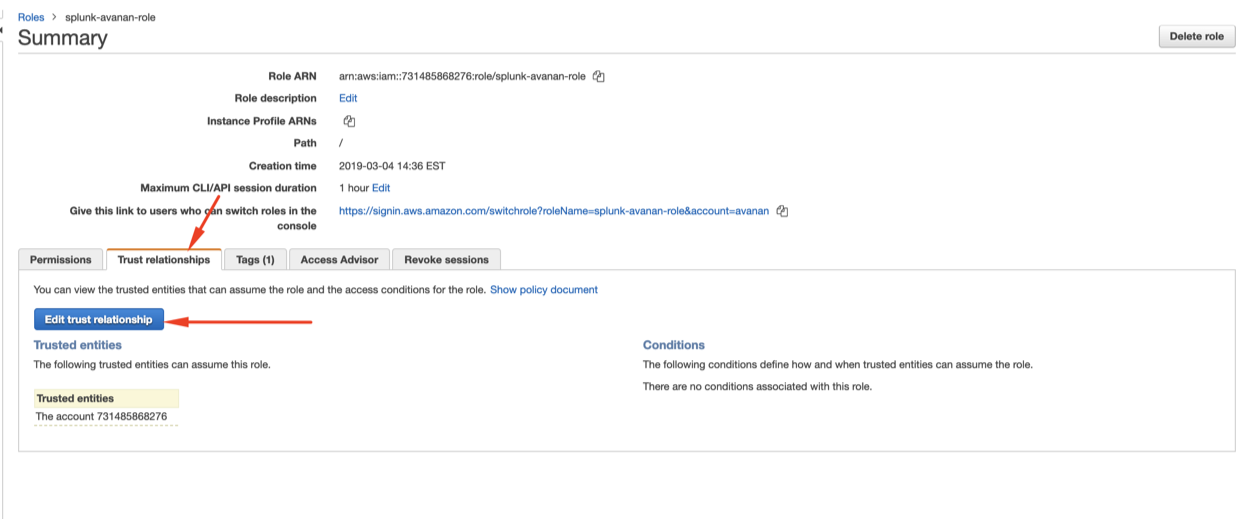
Step-16:
- Select “Trust relationships” and click on “Edit trust relationship”
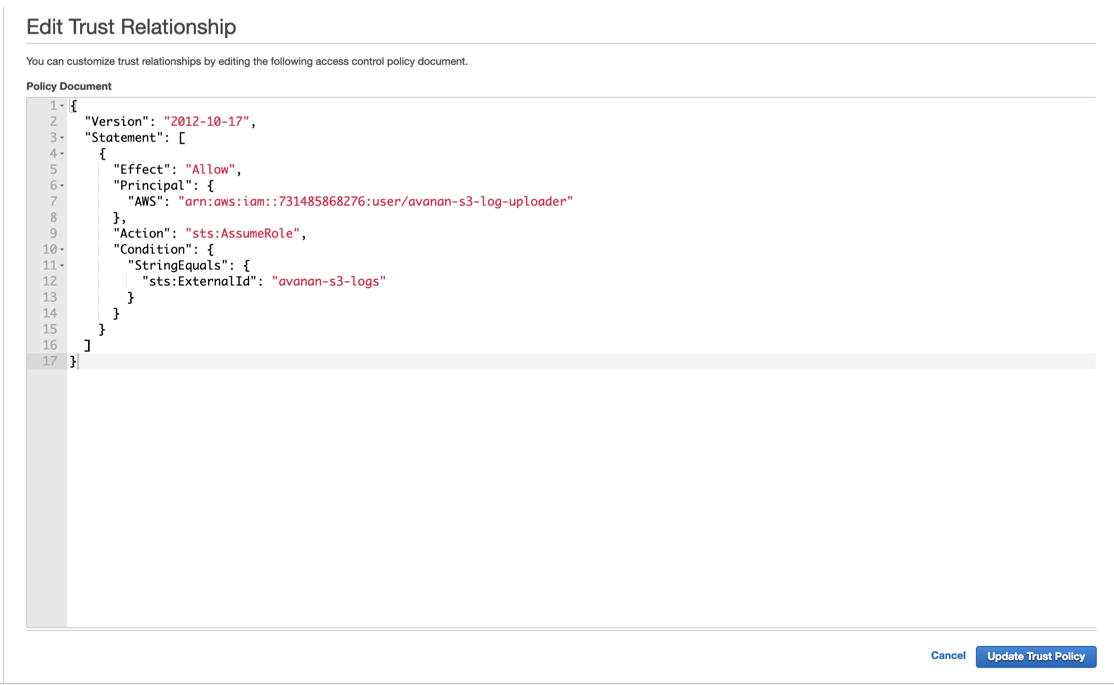
Step-17:
- Copy the following over and click on “Update Trust Policy”
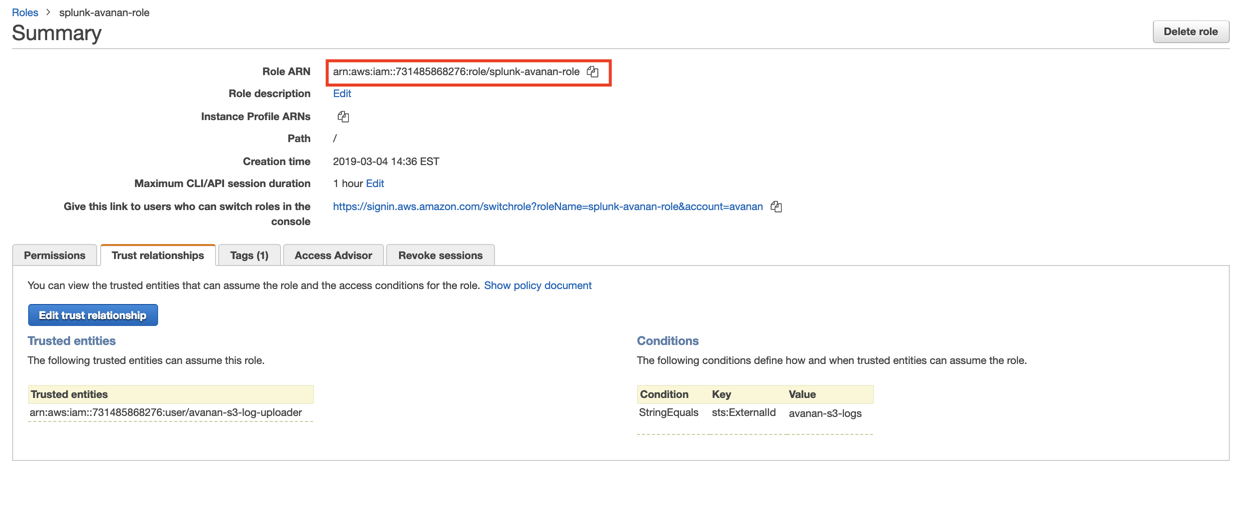
Step-18:
- Copy the Role ARN to use on the Avanan side.
Step-19:
- Log in to Avanan portal and complete the SIEM integration. For more details, see SIEM integration.
Note - After this integration, Avanan starts sending the logs to the AWS S3 bucket. You have to configure your SIEM platform to receive logs from the AWS S3 bucket.