When a user shares an email or file through the SaaS application, Avanan gets notified through API. The security engine then scans the data for threats and malicious content and determines if it is necessary to quarantine, clean, remove, and more.
To scan the data for threats, Avanan uses a full-blown security stack that includes zero-day threats protection and malware prevention, data leak prevention, and the ability to reveal shadow IT scenarios. Avanan is designed to protect from real SaaS threats.
Overview
Avanan offers the industry’s most complete cloud security solution with defense-in-depth capabilities to make your SaaS and IaaS safe and compliant. It protects your users and files in any cloud environment, from Office 365 to Gmail, Amazon Web Services to Azure.
Avanan offers three modes of protection for email outlined below:
- Monitor only
- Detect and Prevent
- Protect (Inline)
Monitor only mode provides visibility into the cloud-hosted email leveraging publicly available API and a journal entry from the SaaS email provider. Scan results are provided from 60+ best of breed security tools. In this mode manual and automated query based quarantines are available after delivery to the user mailbox.
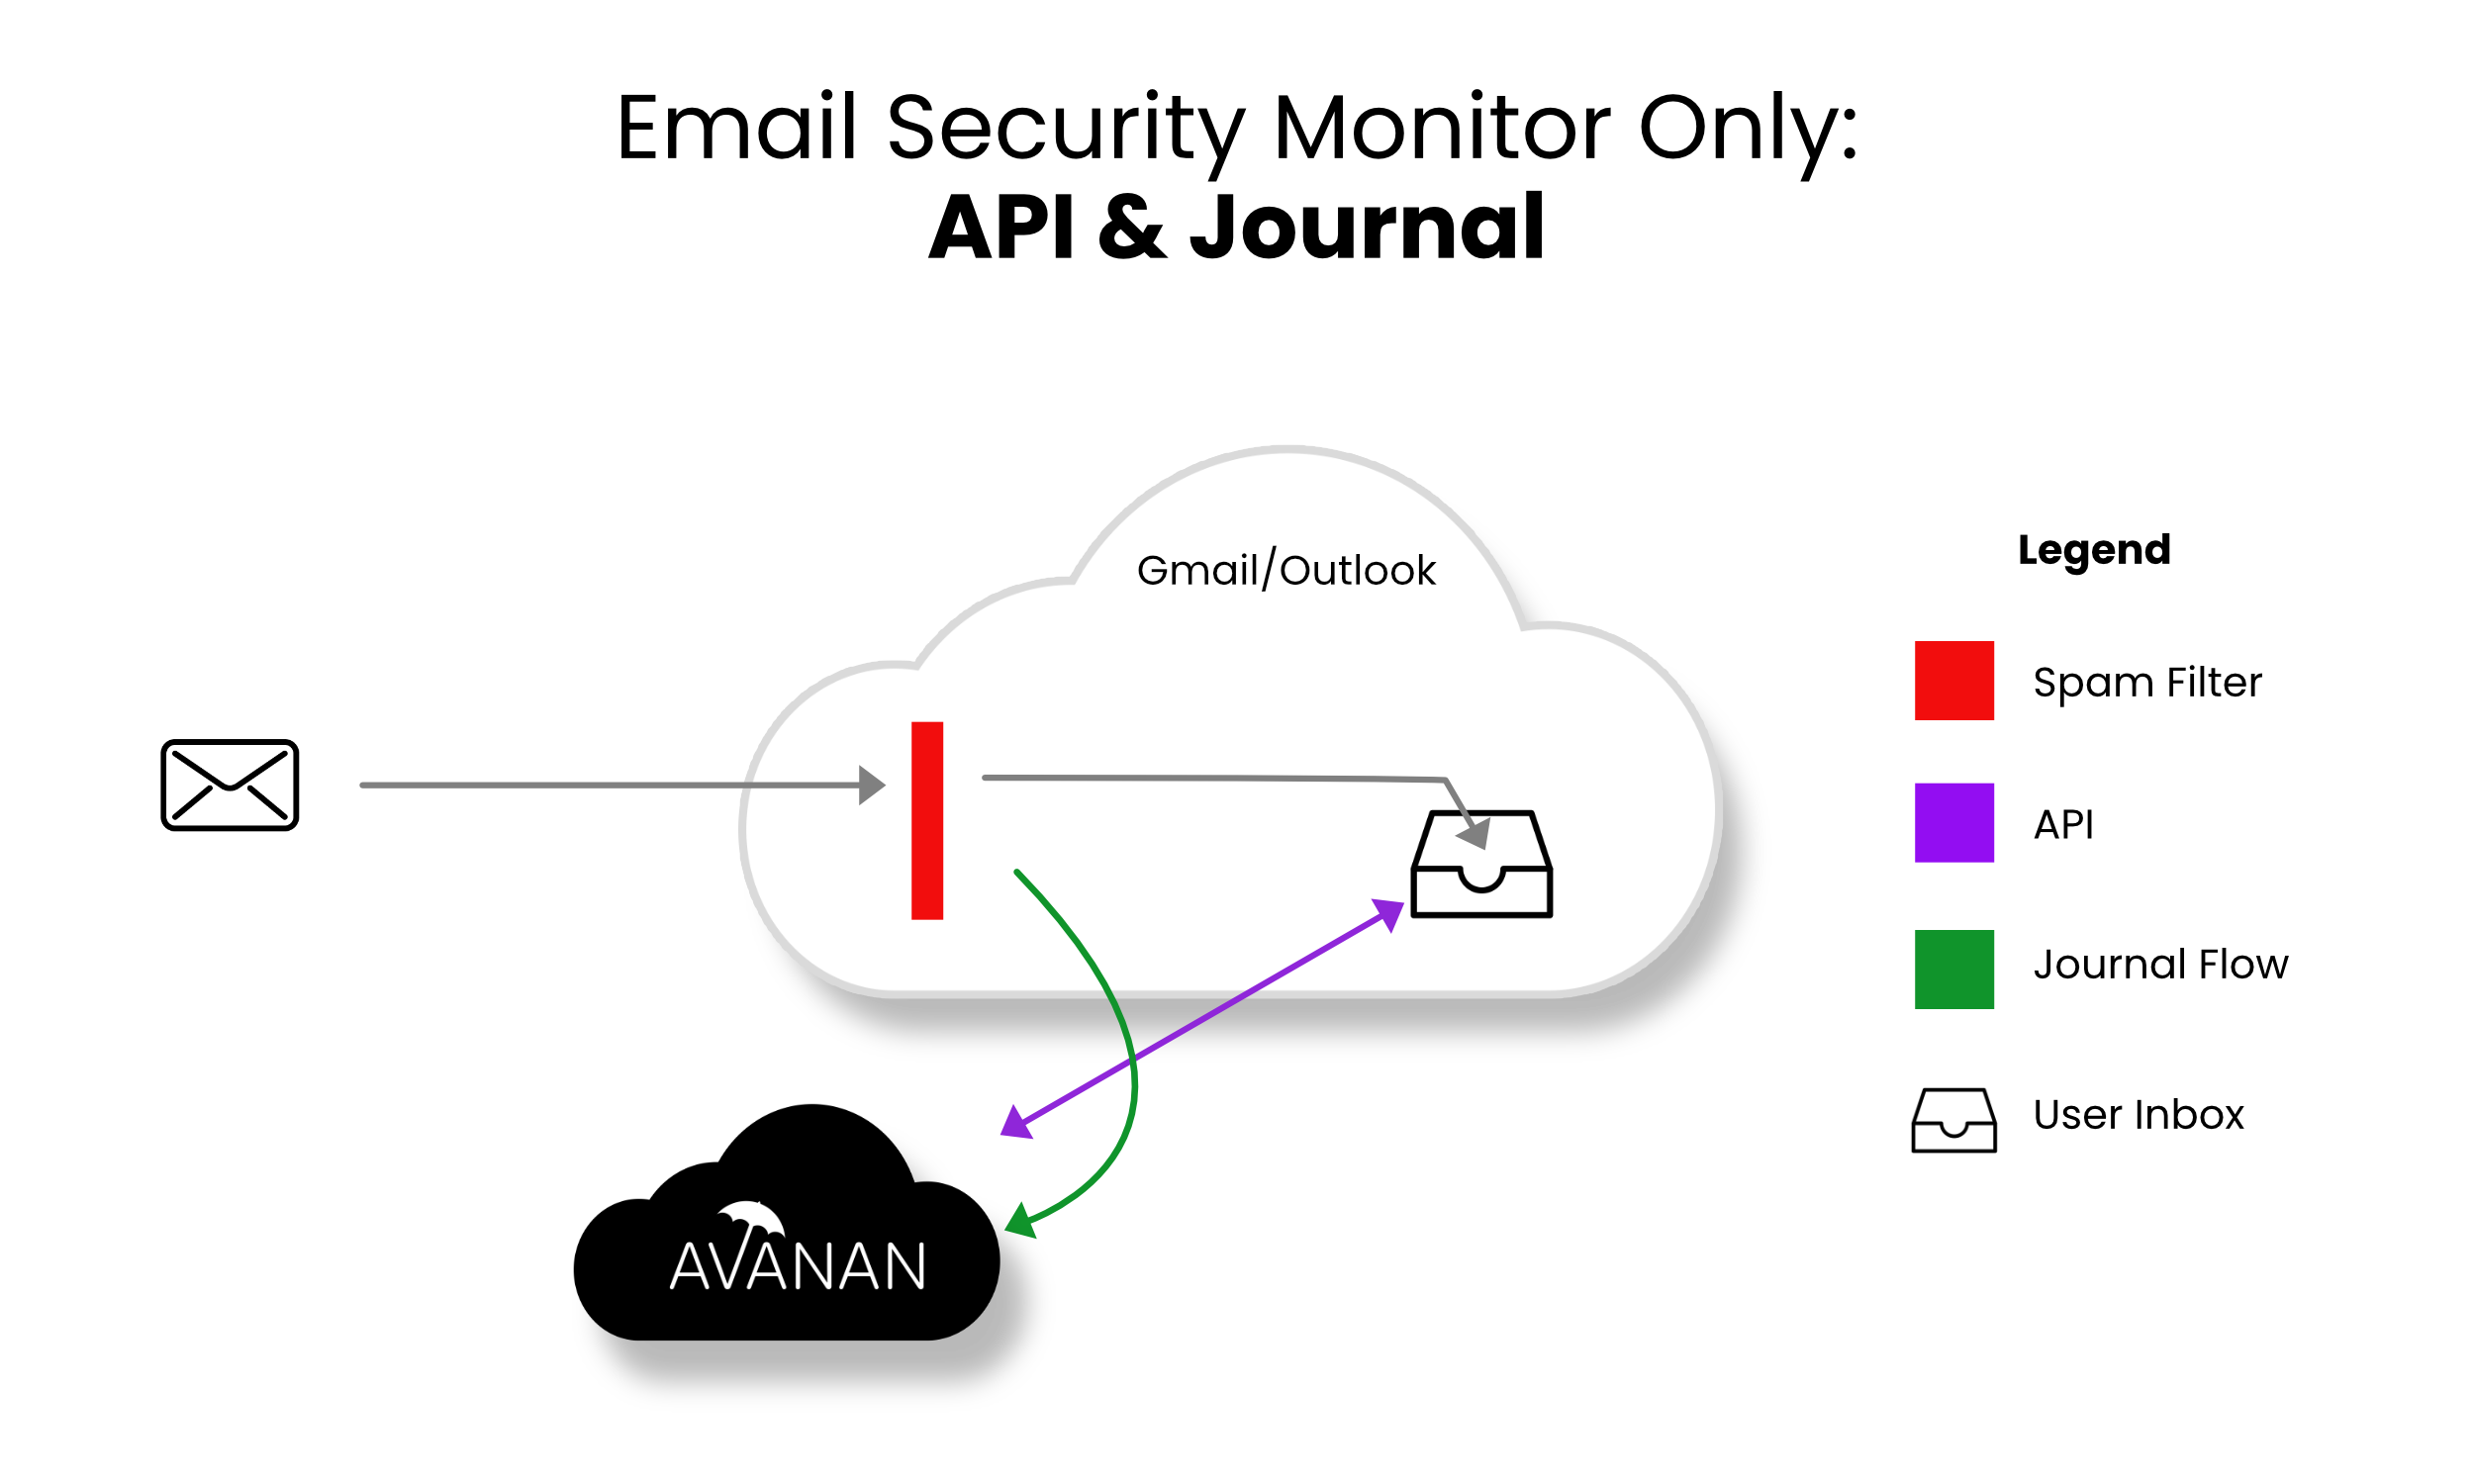
- Incoming email passes through the email provider’s spam filter. Emails are sorted accordingly,
- Rejected
- Accepted, Moved to Junk
- Accepted, Moved to Inbox
- Manual and automated query-based quarantines are available after delivery to the user mailbox.
Detect and Prevent mode provides an increased level of protection that scans email via journaling leveraging the same SaaS email provider API. This mode adds an automated policy action to quarantine malware, phishing attacks, etc. based on the results of the best of breed security stack. In this mode user notifications and release workflows are available.

- Incoming email arrives in respective mailbox folder.
- Avanan detects new email and scans (10 sec - 5 min).
- If malicious, Avanan takes automatic action, otherwise, leave the email alone.
- Optional user notifications and release workflows are available.
Protect (Inline) mode provides the highest level of protection and scans email prior to delivery to the end user’s inbox. Leveraging the same SaaS email provider API and implementing mail flow rules Avanan can scan email with a best-of-breed security stack to protect end-users from malware, data leaks, phishing attacks, and more. Scanning and quarantining take place before the email is delivered to the user’s inbox. This mode ensures that threats are detected and remediated before the user has access to the email.
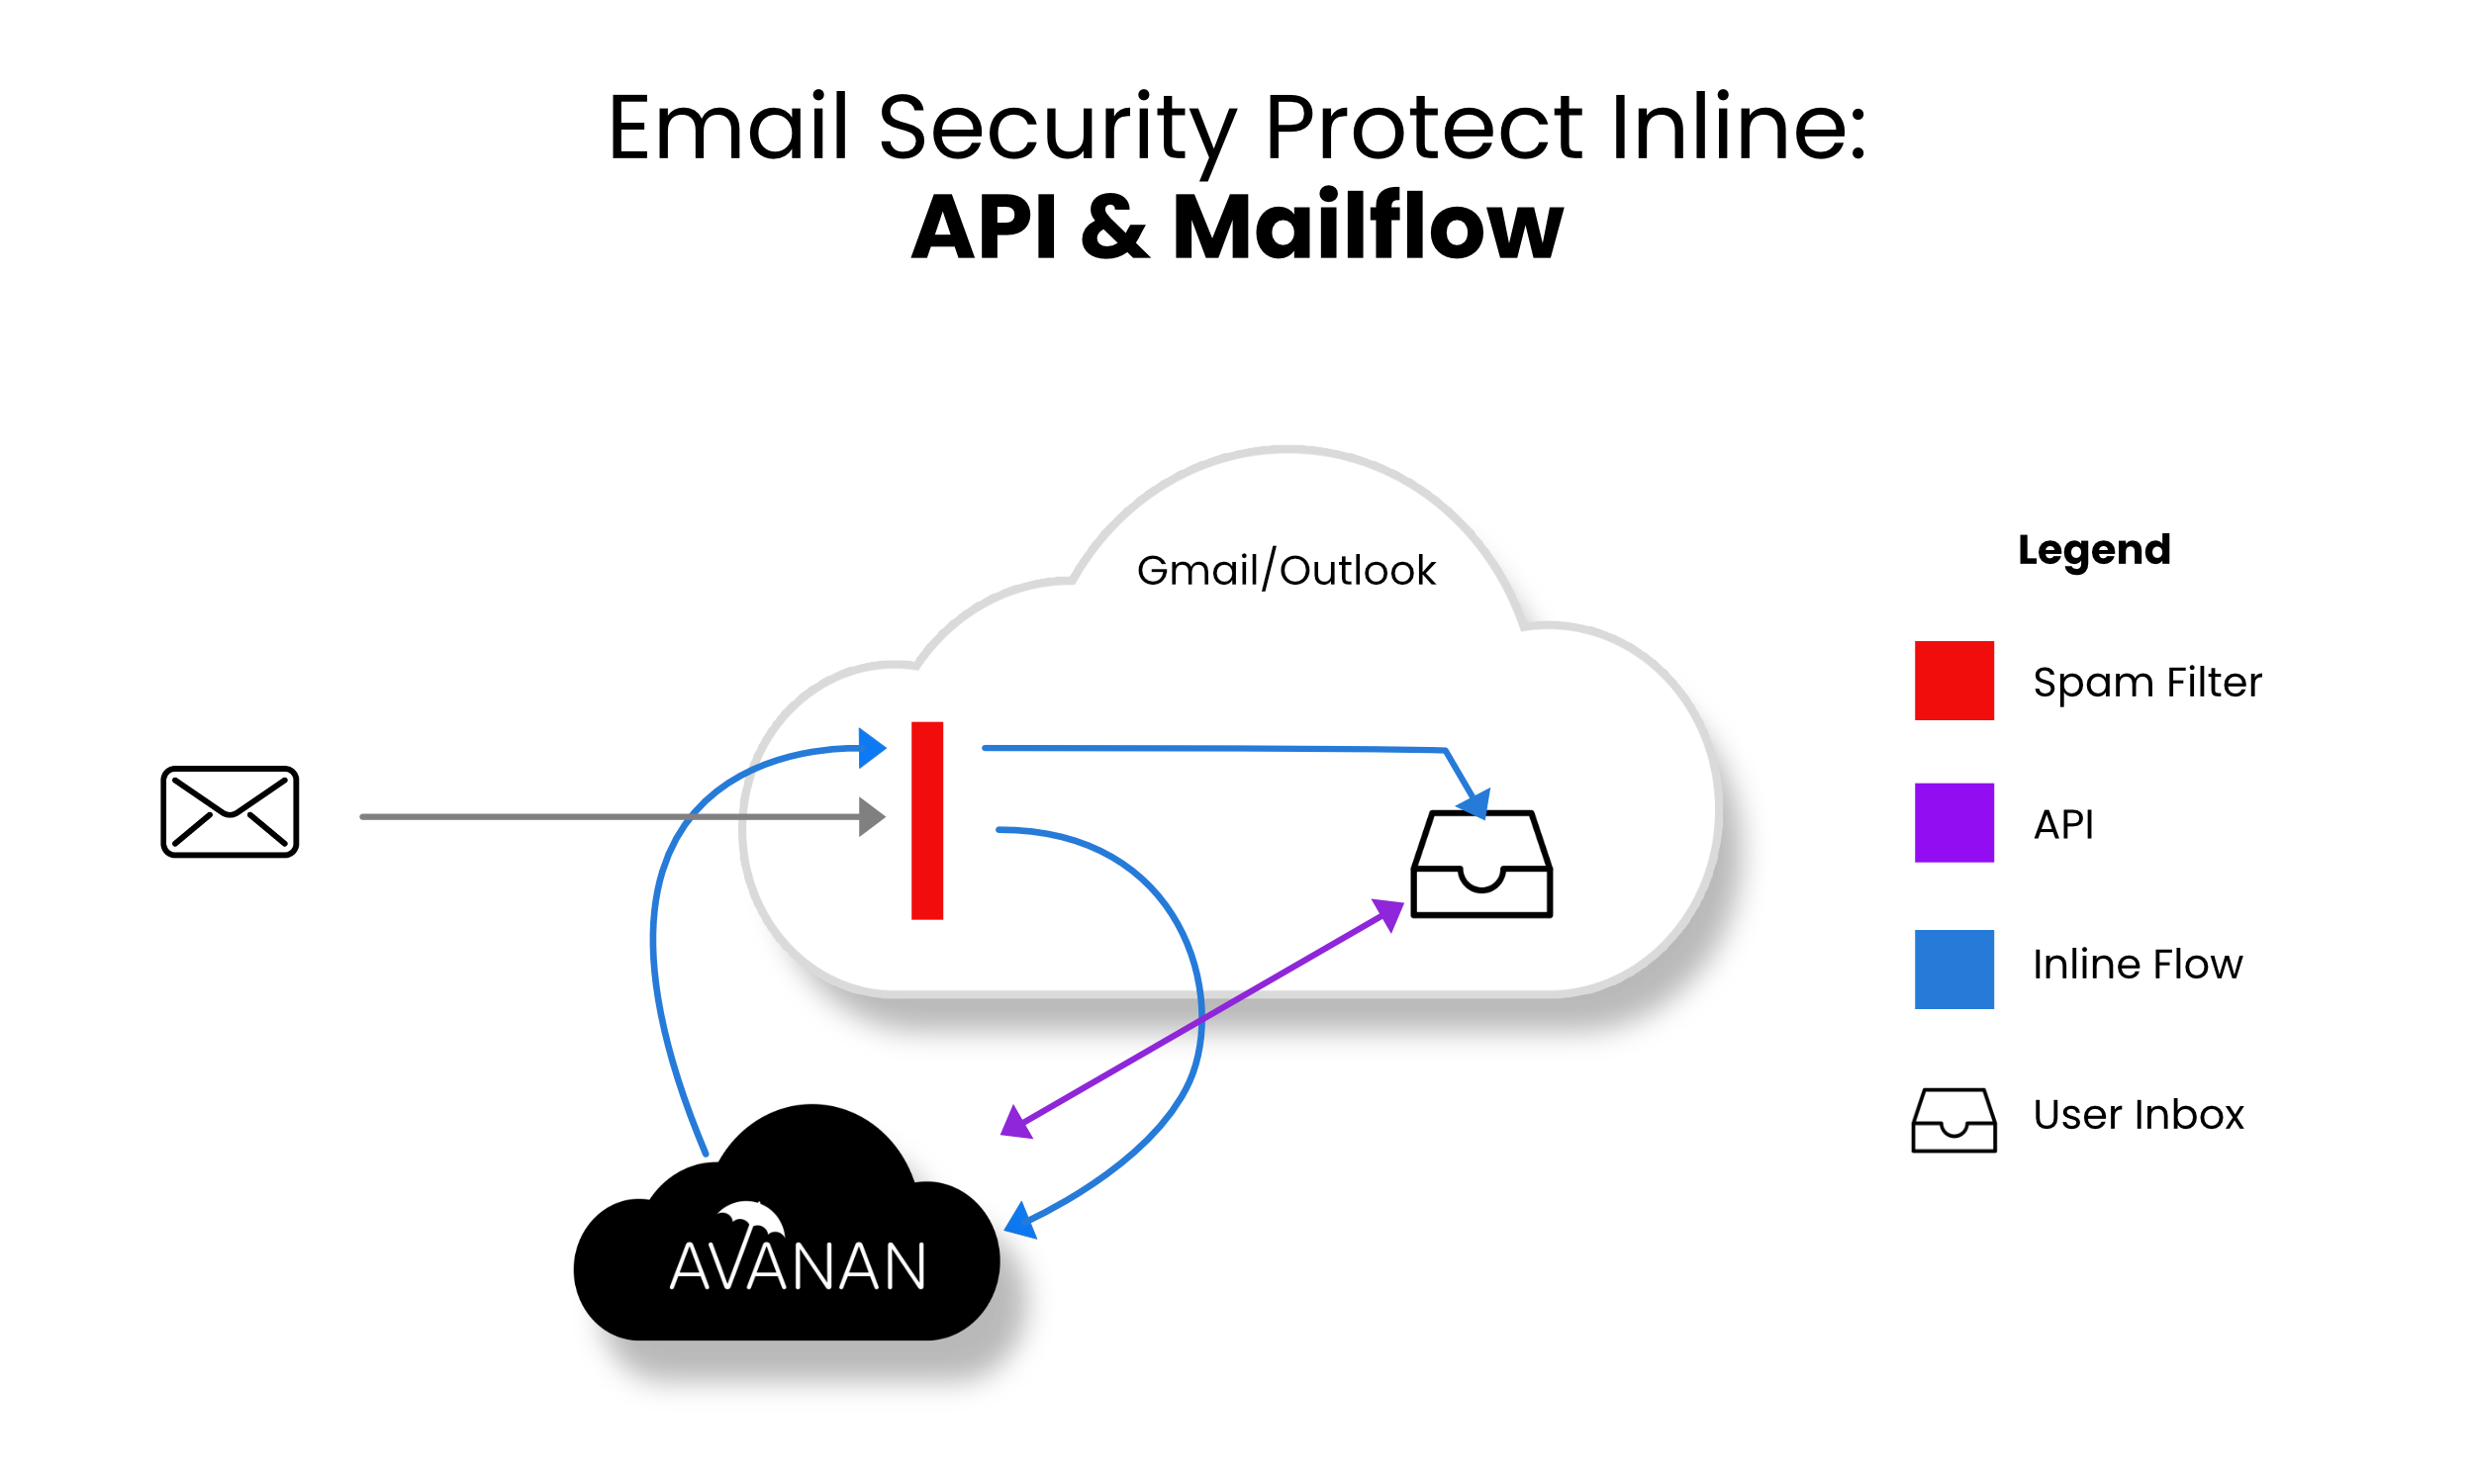
- Incoming email heads to the mail flow.
- Avanan redirects the mail to the Avanan platform for scanning (10 sec - 5 min).
- If malicious, Avanan takes action, otherwise, returns the email to the mail flow.
- User notifications and release workflows are defined in the policy.
Configuring Email Policy
Threat Detection Policy
Threat Detection policy rules are designed to prevent malicious emails (phishing, spam, malware etc.) from getting to your end-users mailbox or alternatively prevent them from being sent by your end-users to external parties.
Detect and Prevent mode and Protect (Inline) mode offers three separate workflows to manage malware and phishing attacks. In Detect and Prevent mode the workflow scans the emails after delivery of email to the user and in Protect (Inline) mode, the workflow scans the emails prior to delivery to the user.
Note - Changing the policy protection mode from Monitor only or Detect and Prevent mode to Protect (Inline) mode takes time to start protecting in Protect (Inline) mode. It could take up to two hours, depending on the number of protected users in the Avanan Portal account.
Sync Times with Microsoft
- If you change the policy protection mode from Monitor Only or Detect and Remediate mode to Prevent (Inline) mode, it takes time to start protecting in Prevent (Inline) mode. It could take up to an hour, depending on the number of protected users in the Avanan portal.
- When adding a user to the scope of a Prevent (inline) policy that is not set to All Users and Groups, it may take up to 1 hour for emails from this user to be inspected inline.
- When a new user is added to Microsoft 365, administrators can include them in the policy scope within 10 minutes or it might take up to 24 hours.
Threat Detection Policy for Incoming Emails
Configuring a Threat Detection Policy Rule
- Click Policy on the left panel of the Avanan Portal.
- Click Add a New Policy Rule.
- From the Choose SaaS drop-down list, select the SaaS platform you want to set policy for Office 365 Emails or Gmail.
- From the Choose Security drop-down list, select Threat Detection and click Next.
- Select the desired policy mode (Monitor only, Detect and Prevent or Protect (Inline)).
If required, you can change the Rule Name.
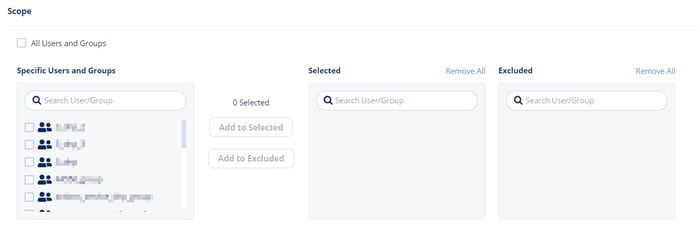
Note - Avanan protects Microsoft 365 Groups (a service that works with the Microsoft 365) only when the policy mode is set to Protect(Inline). - Select the users and groups to which the policy is applicable and click Add to Selected.
- To apply the policy to all users and groups in your organization, enable All Users and Groups.
- To exclude some of the users or groups from the policy, select the users/groups and click Add to Excluded.
- Select the workflows required for the policy.
Note - If you select Monitor only and Detect and Prevent mode, you may not see some of these additional configuration options that allows you to customize the end user email notifications.
For more information on workflows, see Phishing Protection and Malware Workflow. - Configure Alerts to send to the administrators, users, and specific email addresses.
- To send email alerts about phishing and malware, select Send email alert to admin(s) about phishing and Send email alert to admin(s) about malware.
- To send email alerts to specific emails, select Send Email alert to ... and enter the email address.
- To stop sending alerts to administrators for block-listed items, clear the Send email notifications to Admin on blocklisted items checkbox.
- To stop sending alerts to users for block-listed items, clear the Send email notifications to User on blocklisted items checkbox.
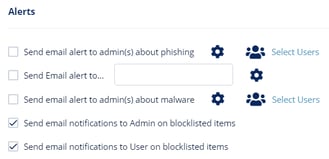
Note - To customize the email alert templates, click on the gear icon to the right of the alert.
- After the policy is configured, click Save and Apply.
Note - Policies are based on the order of precedence. Make sure your policies are applied in the proper order. You can adjust the policy order from the order column of Policy.
Phishing Protection
Phishing protection is comprised of the phishing workflows in the policy itself and from the general Anti-Phishing Engine settings.
For information about the Anti-Phishing engine settings, see Security Engines - SmartPhish - Spam Protection and Security Engines - SmartPhish.
Phishing Workflow
When phishing is detected in emails, the configurable workflows for Anti-Phishing are as follows:
| Workflow | Description |
| User receives the email with a warning |
Email to the user is scanned and when found to be suspicious, the subject is replaced with a Phishing warning notice and the original subject is provided in brackets. The body of the message includes a customizable message to the user along with a link to remove the warning if a false positive is suspected by the user. 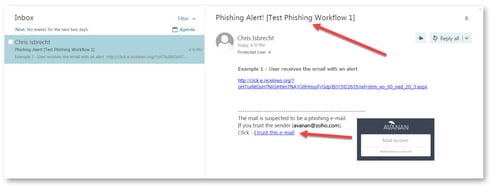 |
|
Quarantine. User is alerted and allowed to |
Email to the user is scanned and when found malicious, the subject is replaced with Quarantined notice and the original subject is provided in brackets. The body of the message is replaced with a customizable message to the user along with a link to release the email if a false positive is suspected. 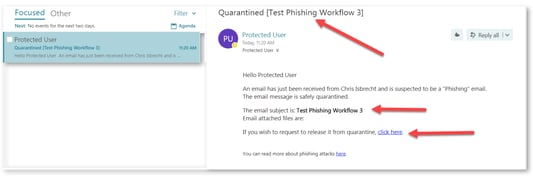 |
| Quarantine. User is alerted and allowed to restore the email |
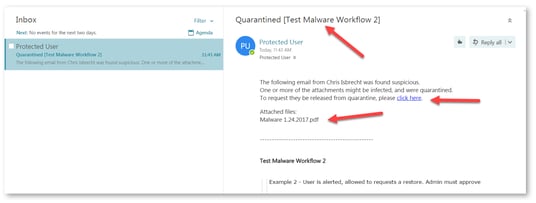
Email to the user is scanned and when found malicious, the subject is replaced with a quarantined notice and the original subject is provided in brackets. The body of the message is replaced with a customizable message to the user along with a link to release the file if a false positive is suspected. The attachment is also stripped and noted in the replaced body. In this workflow, the user has the option to release the quarantined attachment. Using the link in the email, the user can release the attachment. The original email and attachment will be immediately delivered back to the inbox. |
| Quarantine. User is not alerted (admin can restore) | In this mode, the email is automatically quarantined with no user notification. |
| Email is allowed. Deliver to Junk folder | The detected email is delivered to the recipient's Junk folder |
| Email is allowed. Header is added to the email | The detected email is delivered to the recipient with an additional header that can be configured in the policy. |
| Do nothing | The detected email is delivered to the recipients |
For more information on who receives the restored emails, see Who receives the Emails Restored from Quarantine.
Suspected Phishing Workflow
When suspected phishing is detected in emails, the configurable workflow for Anti-Phishing are as follows:
| Workflow | Description |
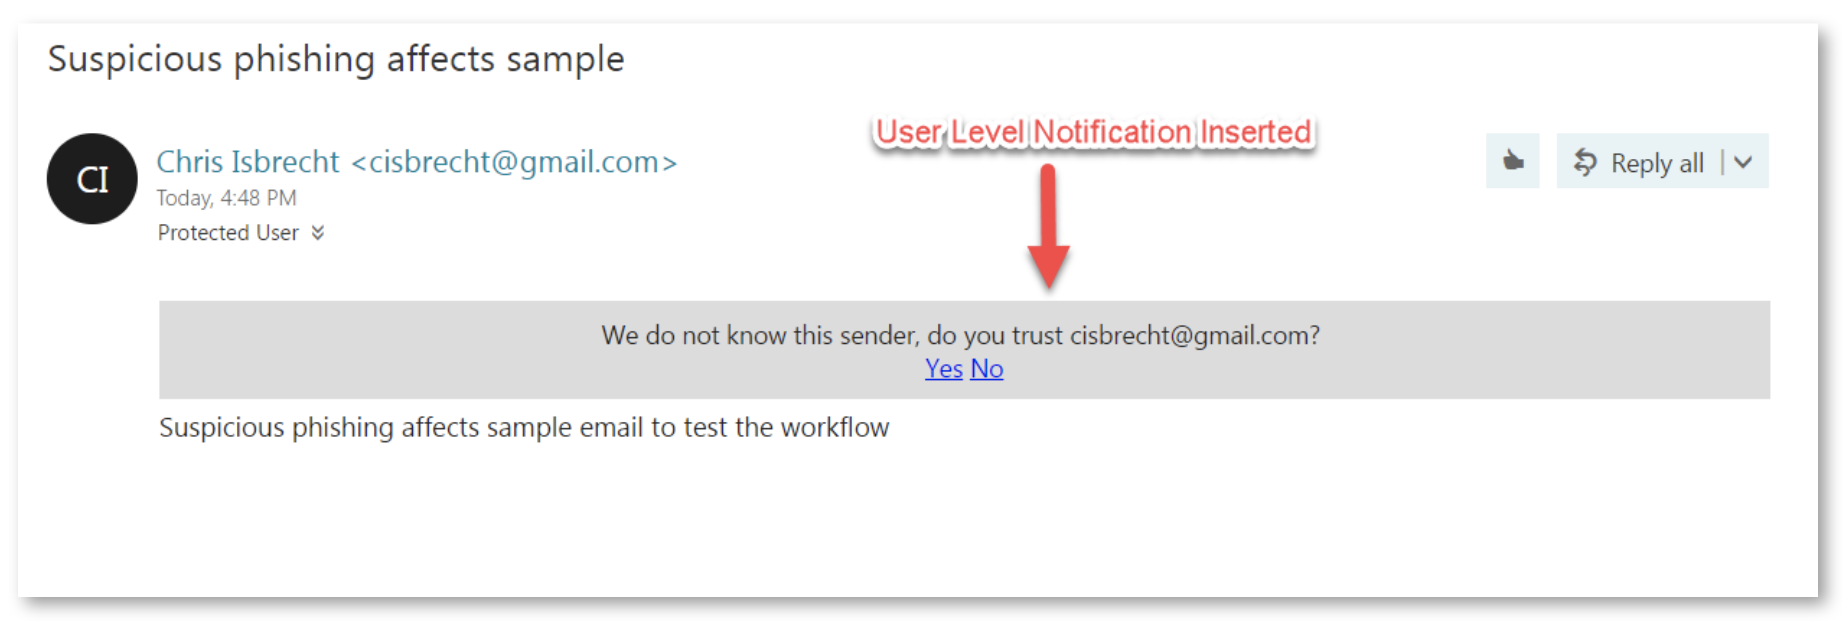
| User receives the email with a warning | The detected email is delivered to the user with a notification inserted in the body of the email. |
| Quarantine. User is not alerted (admin can restore) | The detected email is automatically quarantined with no user notification. |
| Quarantine. User is alerted and allowed to request a restore (admin must approve) | Email to the user is scanned and when found malicious the subject is replaced with Quarantined notice and the original subject is provided in brackets. The body of the message is replaced with a customizable message to the user along with a link to release the email if a false positive is suspected. |
| Quarantine. User is alerted and allowed to restore the email | Email to the user is scanned and when found malicious, the subject is replaced with a quarantined notice and the original subject is provided in brackets. The body of the message is replaced with a customizable message to the user along with a link to release the file if a false positive is suspected. The attachment is also stripped and noted in the replaced body. In this workflow, the user has the option to release the quarantined attachment. Using the link in the email, the user can release the attachment. The original email and attachment will be immediately delivered back to the inbox. |
| Email is allowed. Deliver to Junk folder | The detected email is delivered to the recipient's Junk folder. |
| Email is allowed. Header is added to the email | The detected email is delivered to the recipient with an additional header that can be configured in the policy. |
| Do nothing | The detected email is delivered to the recipients. |
Malware Workflow
When malware is detected in emails, the configurable workflow for Anti-Malware are as follows:
| Workflow | Description |
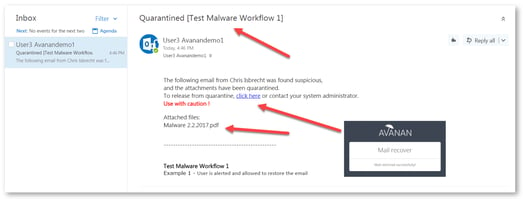
| Quarantine. User is alerted and allowed to restore the email | Email to the user is scanned and when found Malicious, the subject is replaced with a quarantined notice and the original subject is provided in brackets. The body of the message is replaced with a customizable message to the user along with a link to release the file if a false positive is suspected. The attachment is also stripped and noted in the replaced body. In this workflow, the user has the option to release the quarantined attachment. Using the link in the email, the user can release the attachment. The original email and attachment will be immediately delivered back to the inbox. |
| Quarantine. User is alerted, allowed to request a restore. Admin must approve |
Email to the user is scanned and when found malicious, the subject is replaced with a Quarantined notice and the original subject is provided in brackets. The body of the message is replaced with a customizable message to the user along with a link to release the file if a false positive is suspected. The attachment is also stripped and noted in the replaced body. In this workflow, using the link in the email, the end-user can request to release the attachment. The administrator is notified via email to the configured Restore requests approver email address. The email contains a direct link to the email profile in the Avanan Portal. The administrator can do a full security review of the Malware from the Avanan Portal and can restore the email or decline the release request. If the request is approved, the original email and attachment will be immediately delivered to the end-user mailbox. |
| Quarantine. User is not alerted (admin can restore) | In this mode, the email is automatically quarantined with no user notification. |
| Email is allowed. Deliver to Junk folder | The detected email is delivered to the recipient's Junk folder. |
| Email is allowed. Header is added to the email | The detected email is delivered to the recipient with an additional header that can be configured in the policy. |
| Do nothing | The detected email is delivered to the recipients. |
Notes:
- To create Allow-List and Block-List for Anti-Malware, see Anti-Malware Exceptions.
- To view who receives the restored emails, see Who receives the Emails Restored from Quarantine.
Suspected Malware Workflow
| Workflow | Description |
| User receives the email with a warning | The detected email is delivered to the user with a notification inserted in the body of the email. |
| Email is allowed. Deliver to Junk folder | The detected email is delivered to the recipient's Junk folder. |
| Quarantine. User is alerted and allowed to request a restore (admin must approve) | Email to the user is scanned and when found malicious, the subject is replaced with a Quarantined notice and the original subject is provided in brackets. The body of the message is replaced with a customizable message to the user along with a link to release the file if a false positive is suspected. The attachment is also stripped and noted in the replaced body. In this workflow, using the link in the email, the end-user can request to release the attachment. The administrator is notified via email to the configured Restore requests approver email address. The email contains a direct link to the email profile in the Infinity Portal. The administrator can do a full security review of the Malware from the Avanan Portal and can restore the email or decline the release request. If the request is approved, the original email and attachment will be immediately delivered to the end-user mailbox. |
| Quarantine. User is alerted and allowed to restore the email | Email to the user is scanned and when found malicious, the subject is replaced with a quarantined notice and the original subject is provided in brackets. The body of the message is replaced with a customizable message to the user along with a link to release the file if a false positive is suspected. The attachment is also stripped and noted in the replaced body. In this workflow, the user has the option to release the quarantined attachment. Using the link in the email, the user can release the attachment. The original email and attachment will be immediately delivered back to the inbox. |
| Quarantine. User is not alerted (admin can restore) | In this mode, the email is automatically quarantined with no user notification. |
| Email is allowed. Header is added to the email | The detected email is delivered to the recipient with an additional header that can be configured in the policy. |
| Do nothing | The detected email is delivered to the recipients. |
Password Protected Attachments Workflow
When password-protected attachments are detected, Avanan attempts to extract the password using various techniques such as searching for the password in the email body. If the password is found, Avanan uses the password to decrypt the file and inspect it for malware.
If the password is not found, the administrator can select any one of these workflows:
Note - These workflows apply only for the incoming and internal emails.
| Workflow | Description |
| User receives the email with a warning |
The detected email is delivered to the user with a notification inserted in the body of the email. |
| Require the end-user to enter a password |
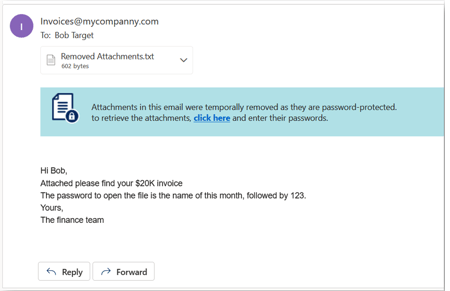
The attachment is removed temporarily and a warning banner is added to the email along with a link to enter the password.
Notes:
|
| Quarantine. User is alerted and allowed to restore the email | The email is automatically quarantined and the user is notified about the quarantine. Using the link in the email, the user can release the attachment. The original email and attachment will be immediately delivered back to the inbox. |
| Quarantine. User is not alerted (admin can restore) | The email is automatically quarantined with no user notification. The administrator can restore the email. |
| Trigger suspected malware workflow | The email follows the workflow configured for Suspected Malware. |
| Do Nothing |
The attachment will be considered as clean. Note - This workflow flags only the attachment as clean (not malicious). The email can still be found to be malicious for various reasons. |
For more information on who receives the restored emails, see Who receives the Emails Restored from Quarantine.
Supported File Types
Avanan can detect these file types as password-protected:
| File Type | File Extensions |
| Archives | AR, ARJ, BZ2, CAB, CHM, CRAMFS, CPIO, GZ, IMG, ISO, IZH, QCOW2, RAR, RPM, TAR, TAR.BZ2, TAR.GZ, TAR.XZ, TB2, TBZ, TBZ2, TGZ, TXZ, UDF, WIM, XZ, ZIP, and 7Z. |
| Adobe PDF (all versions) | |
| Microsoft Excel 2007 and later | XLSX, XLSB, XLSM, XLTX, XLTM, XLAM |
| Microsoft Excel 2007 Binary | XLSB |
| Microsoft Excel 97 - 2003 | XLS |
| Microsoft PowerPoint 2007 and later | PPTX, PPTM, POTX, POTM, PPAM, PPSX, PPSM |
| Microsoft PowerPoint 97 - 2003 | PPT, PPS, POT, PPA |
| Microsoft Word 2007 and later | DOCX, DOCM, DOTX, DOTM |
| Microsoft Word 97 - 2003 | DOC, DOT |
Requesting Passwords from End Users - End-User Experience
End-User Experience for Require end-user to enter a password workflow
For password protected attachments, if Require end-user to enter a password workflow is defined in the policy, the attachment is removed temporarily and a warning banner is added to the email with a link to enter the password.
To restore the password protected attachment with Require end-user to enter a password workflow:
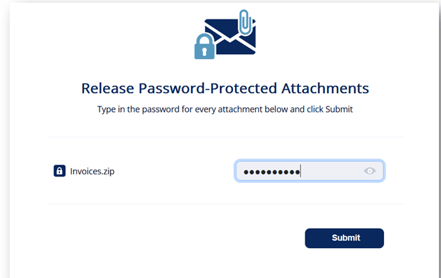
- Click the link in the warning banner of the email.

- Enter the password for the attachment and click Submit.
After you submit, the Anti-Malware engine scans the attachment for malicious content.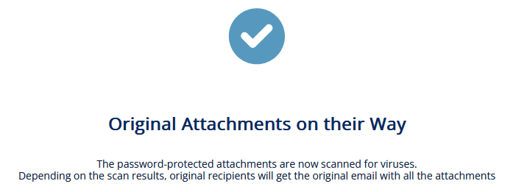
If the Anti-Malware engine finds the attachment as clean, the original email with password-protected attachment gets delivered to the original recipients of the email.
If the email was already released, this message appears: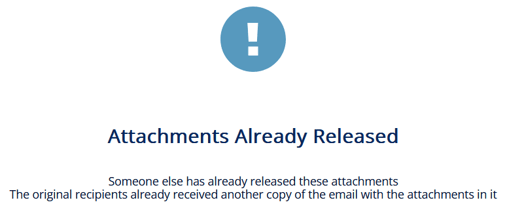
End-User Experience for Quarantine. User is alerted and allowed to restore the email workflow
For password protected attachments, if Quarantine. User is alerted and allowed to restore the email workflow is defined for the policy, the email body and its attachments are removed. The user is notified about the email and its attachments with a link to request to release the email.
To restore the email and its attachments:
- Click the link provided in the email.
- If prompted, enter the reason for restoring the attachment, and click Submit.
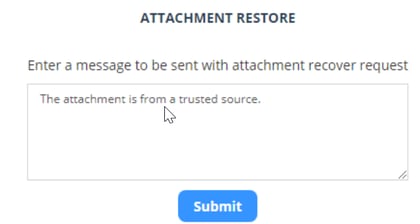
After you submit, the admin receives the request.
After the admin approves, the user receives the original email.
Password Protected Attachments - Administrator Experience
For password protected attachments, if Quarantine. User is alerted and allowed to restore the email workflow is defined for the policy, and if the end-user requests to release the email, the administrator is notified about the request.
To review the request:
- Open the security event of the email for which the user requested to release.
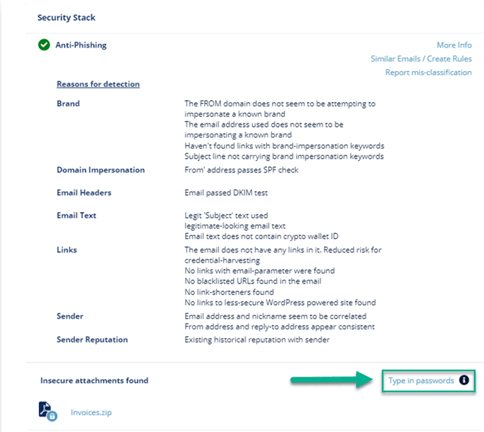
Under Security Stack, the password-protected attachments which are not scanned by Anti-Malware will be marked as Insecure attachments found. - To inspect the password-protected attachments before restoring the email:
- Click Type in passwords to enter the password for the attachment.
- Enter the password for the attachment and click Submit.

The Anti-Malware engine scans the attachment and gives a verdict. - To restore the email and its attachments, click Restore Email.
- Click Type in passwords to enter the password for the attachment.
- To release the original email without inspecting the password-protected attachments, click Restore Email.
Restored Emails - End-User Experience
After the administrator approves an end-user request to restore an email from quarantine, Avanan performs these actions:
- Removes the quarantine/clean email notifications received for the quarantined email from the end user mailbox.
- Adds the original email to the end-user mailbox, where the email received time is the restore time of the email from quarantine, but not the original email sent time.
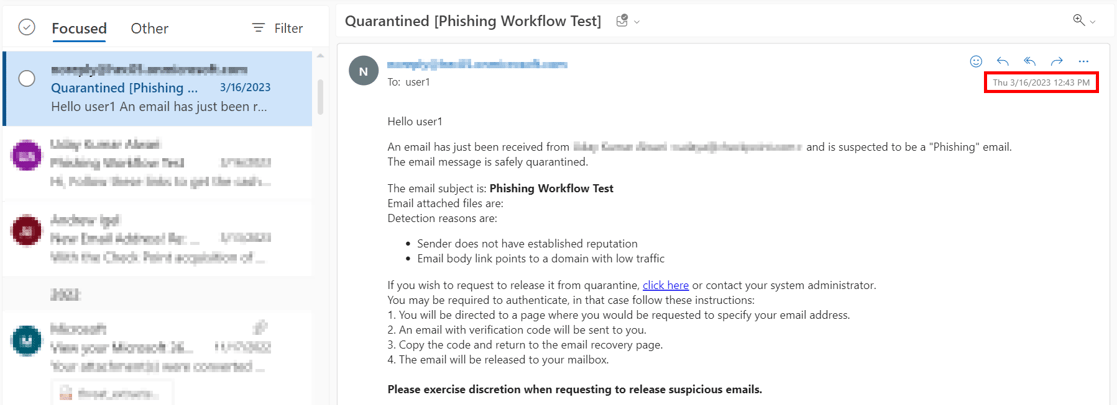
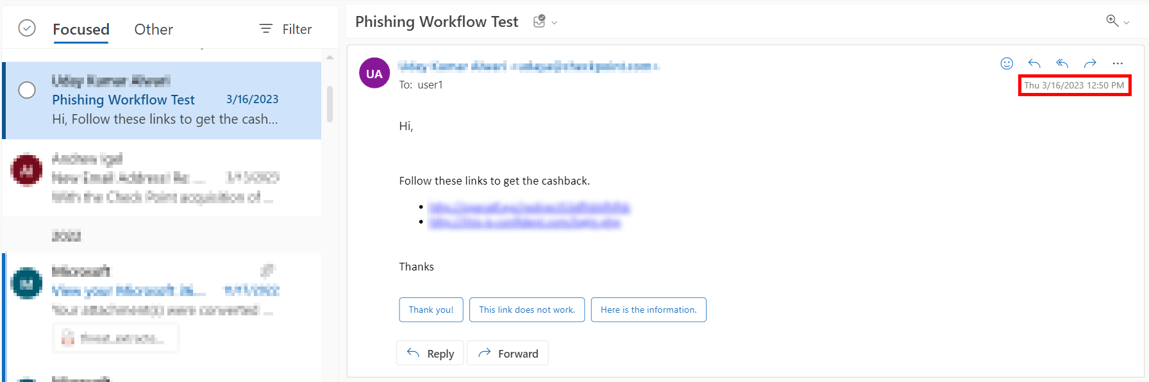
This example shows the initial email received by the end-user.
This example shows the same email received by the end-user after the administrator approved the restore request.
Note - The initial email received by the end-user is removed and the restored email gets delivered as a new email to the end-user mailbox. The email received time is the restore time of the email by the administrator, but not the original email sent time.
Spam Workflow
The administrators can select any of these workflows when spam is detected in emails.
Note - Spam protection workflow is configurable only for Office 365 email and Gmail
| Workflow | Description |
| Email is allowed. Deliver to Junk folder (only for Office 365) |
The Anti-Phishing engine marks the email as Spam by updating the Spam Confidence Level (SCL) to 9 (by setting value of header X-CLOUD-SEC-AV-SCL to True). The email will be moved to the Spam folder by Office 365 (with the proper Mail Flow rules), based on the configured action for SCL=9 (by default set to deliver the message to the recipients' Junk Email folder). For more information on SCL levels, see SCL. |
| Email is allowed. Move to Spam (only for Gmail) |
Deliver the email to the user's Spam folder. |
| Add [Spam] to subject | The email is delivered to the inbox and the subject is modified to start with '[Spam]' (for example, the email subject 'Are you interested' will be delivered with new subject: '[Spam] Are you interested'). |
| Quarantine. User is alerted and allowed to restore the email | The email is quarantined and the user is allowed to restore the email. |
| Quarantine. User is not alerted (admin can restore) | The email is quarantined and the admin can restore the email. |
| Email is allowed. Header is added to the email | The detected email is delivered to the recipient with an additional header that can be configured in the policy |
| Do Nothing | Email is delivered to the inbox. |
Note - Depending on the configured workflow, the email is restored only to the requesting user or to all original recipients.
- If the user is allowed to restore the email on their own, the email gets restored only to the requested user.
- If the administrator restores the email, the email gets restored to all the original recipients.
Notification Settings
For information, see Notifications and Banners.
Warning Banners
For more details about warning banners and their configuration, see Warning Banners.
For more information about the supported placeholders, see Notification and Banner Templates - Placeholders
Threat Detection Policy for Outgoing Emails
Administrators can enable threat detection to prevent malware, phishing, and spam emails from being sent by their organization’s users to external parties.
Note – This feature is supported only for Office 365 Mail.
To enable threat detection for outgoing emails:
- Navigate to Policy on the left panel of the Avanan Portal.
- Click on an Office 365 Mail Threat Detection policy rule.
If you do not have an Office 365 Mail Threat Detection policy rule, create a new policy. See Creating Threat Detection policy. - Set the policy mode as Protect (Inline).
- Scroll down and expand Advanced Configuration.
- Enable Protect (Inline) Outgoing Traffic check-box.
- Click Save and Apply.
Supported Workflow Actions
As the protected emails are sent from inside the organization to external parties, the threat detection for outgoing emails do not support all the workflows as specified for the incoming emails. For more information about the workflows, see Phishing Protection.
It does not support these workflows:
- Delivering the email to the recipient's Junk folder (Email is allowed. Deliver to Junk folder)
- Delivering the email with a warning banner (User receives the email with a warning)
- Delivering the email with a prefix added to the subject (Add [Spam] to subject)
All the workflow actions that are not supported for outgoing emails are marked with a warning symbol.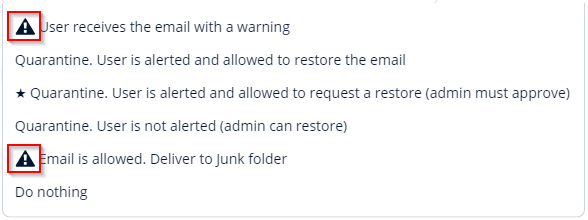
Note - If the policy rule contains any of the unsupported workflows, the email will be delivered to the external recipient unchanged.
Prerequisites to Avoid Failing SPF Checks
For Office 365 Mail, if you enable Protect (Inline) Outgoing Traffic in the DLP or Threat Detection policy, Avanan gets added to the email delivery chain before reaching external recipients (Internal email sender > Microsoft 365 > Avanan > Microsoft 365 > External recipient).
The recipient's email security solution sees the Avanan IP address as part of the delivery chain. If the recipient's email security solution fails to recognize the original IP address, it may consider the Avanan IP address as the IP address from which the email was sent.
If you do not configure the SPF record in your DNS to allow Avanan IP addresses to send emails on behalf of your domain, your emails might fail SPF checks and may be rejected. Avanan recommends you add the Avanan IP addresses to your SPF record before you enable Protect (Inline) Outgoing Traffic for outgoing emails.
To prevent outgoing emails from failing SPF checks and being quarantined, you must add include:spfa.cpmails.com to your SPF record.
Note - The above statement includes several IP addresses and networks, some outside your Avanan portal's data region. This is done for uniformity and consistency in all Avanan SPF records regardless of your data region. Avanan sends the emails only from one of the IP addresses in your region.