This document is a step-by-step guide to setting up an Azure app as your IDP (identity provider) to allow SAML authentication.
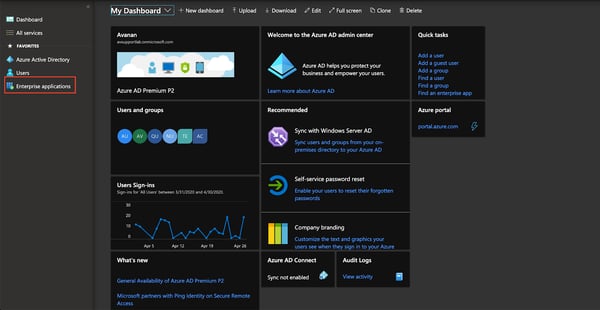
- Navigate to https://aad.portal.azure.com and click Enterprise applications from the left navigation pane.
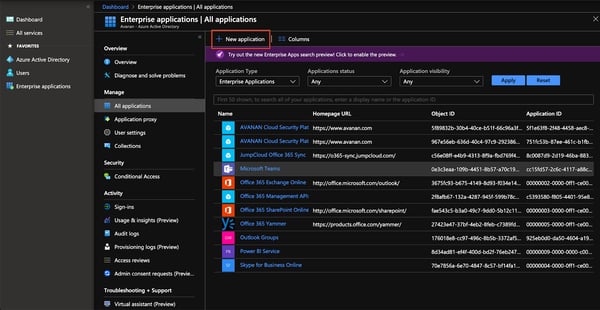
- Click new application.
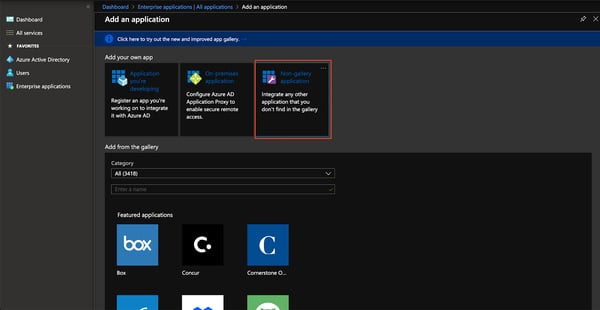
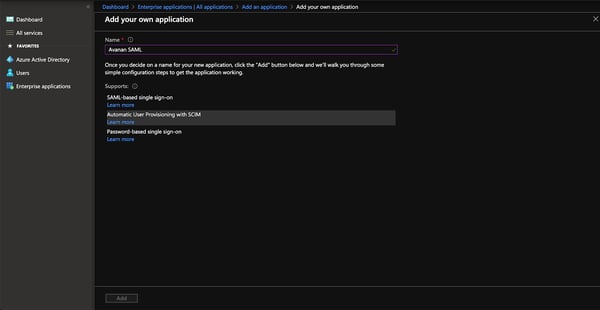
- Select Non-gallery application.
- Enter a name for the application and click Add.
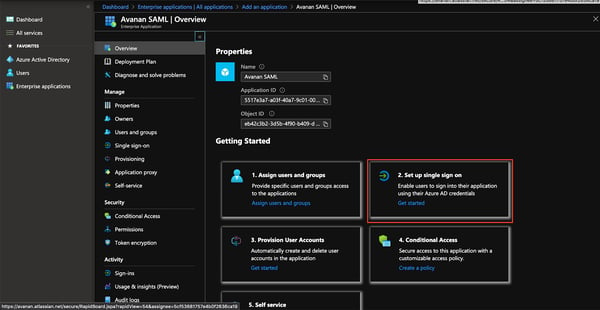
- Select Set up single sign on.
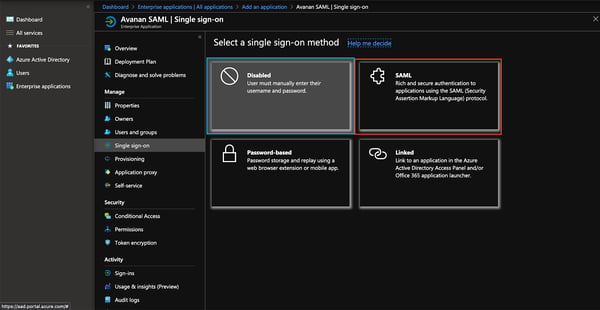
- Select SAML.
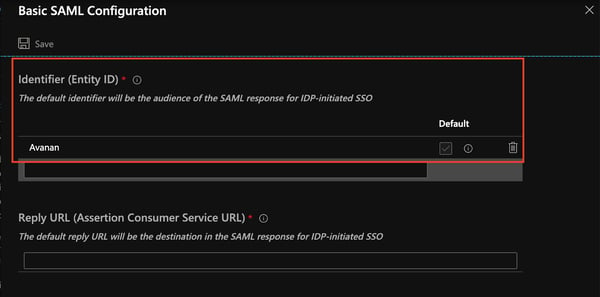
- For the Identifier, enter a unique string. You need this string later.
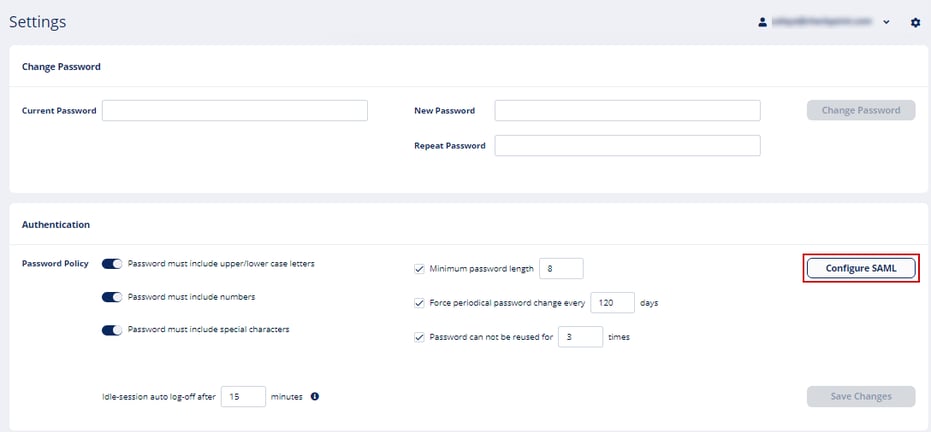
You need to perform the next two steps from the Avanan portal. - In the Avanan portal, click Security Settings > Settings from the left navigation pane, and then click Configure SAML.
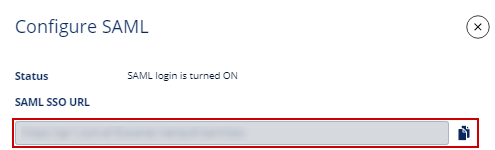
- In the Configure SAML window copy the SSO URL.
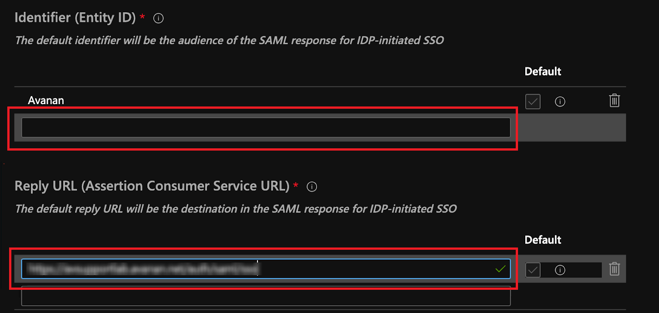
- Paste the URL you copied in the previous step into the Identifier (Entity ID) and Reply URL (Assertion Consumer Service URL) fields.
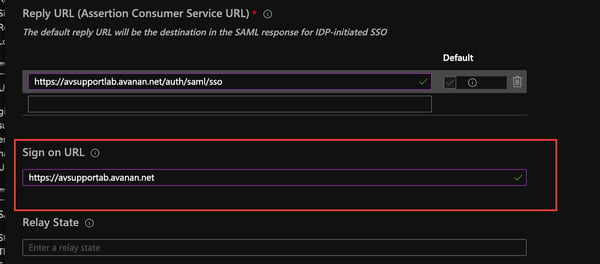
- Place the URL for your Avanan portal in the Sign on URL field and then click save in the top left corner of the window.
- Click the edit button in the User Attributes & Claims box.
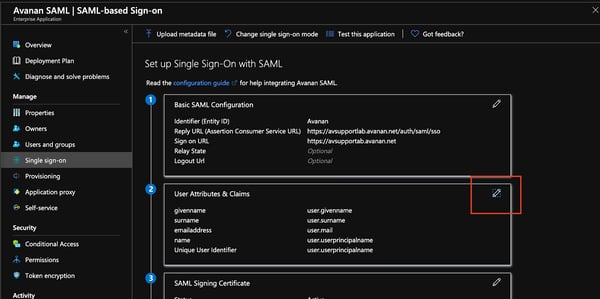
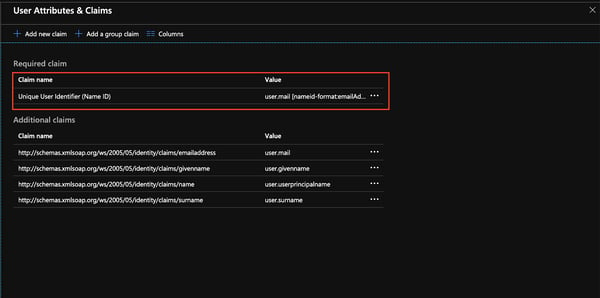
- Set the unique user identifier to user.mail or user.userprinciplename.
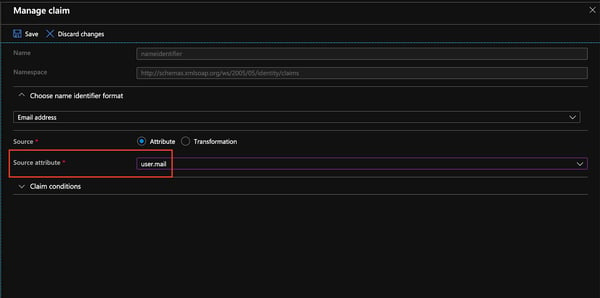
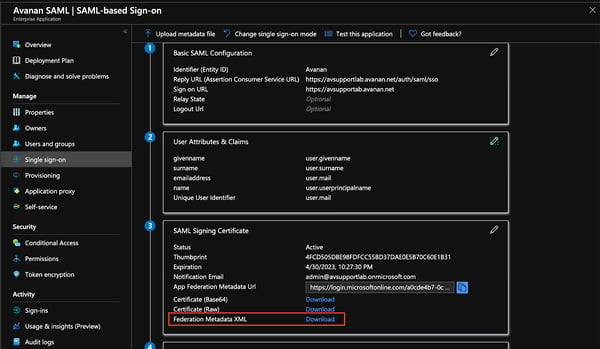
Note: When choosing user.mail make sure the field is populated for all relevant users, otherwise it will be impossible to authenticate users. - Download the Federation Metadata XML File.
- In the Avanan portal, Configure SAML window, and upload the metadata file.
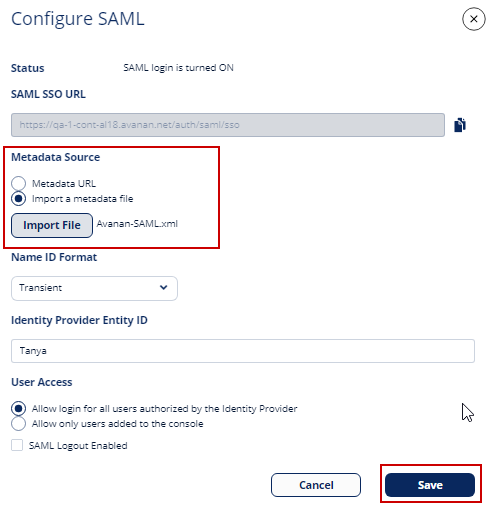
- Check off the Are you running Azure AD checkbox.
- Under the Azure AD entity ID, enter the Identifier you entered in Azure from step 7, then click Save.
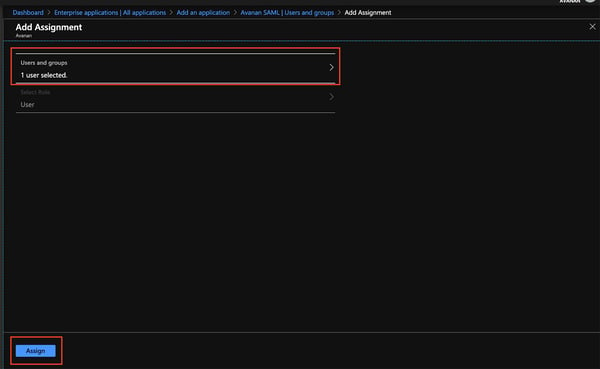
- In the Azure portal, click Users and Groups from the menu and then click Add Users.
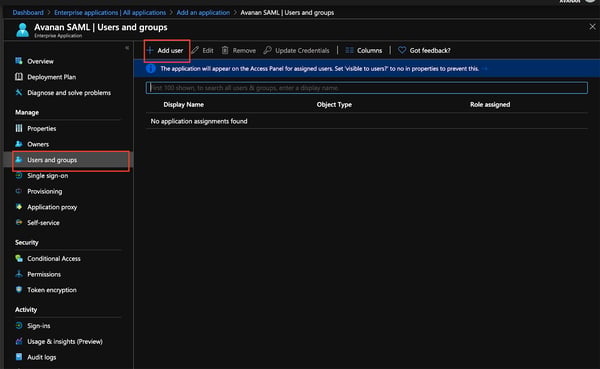
- Select the User or Group you want to grant access and click Assign.
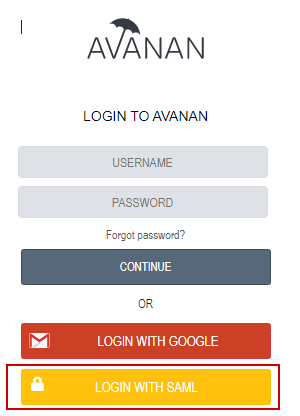
- You should now be able to login to the Avanan portal using the Login with SAML button.