Most of the frequently asked questions are covered in:
https://support.jumpcloud.com/customer/en/portal/articles/2551066-single-sign-on-sso-with-generic-saml-2-0-connector and https://support.jumpcloud.com/customer/portal/articles/2775691
Step-By-Step Guide:
- From the JumpCloud admin console, navigate to Applications and click the + button.
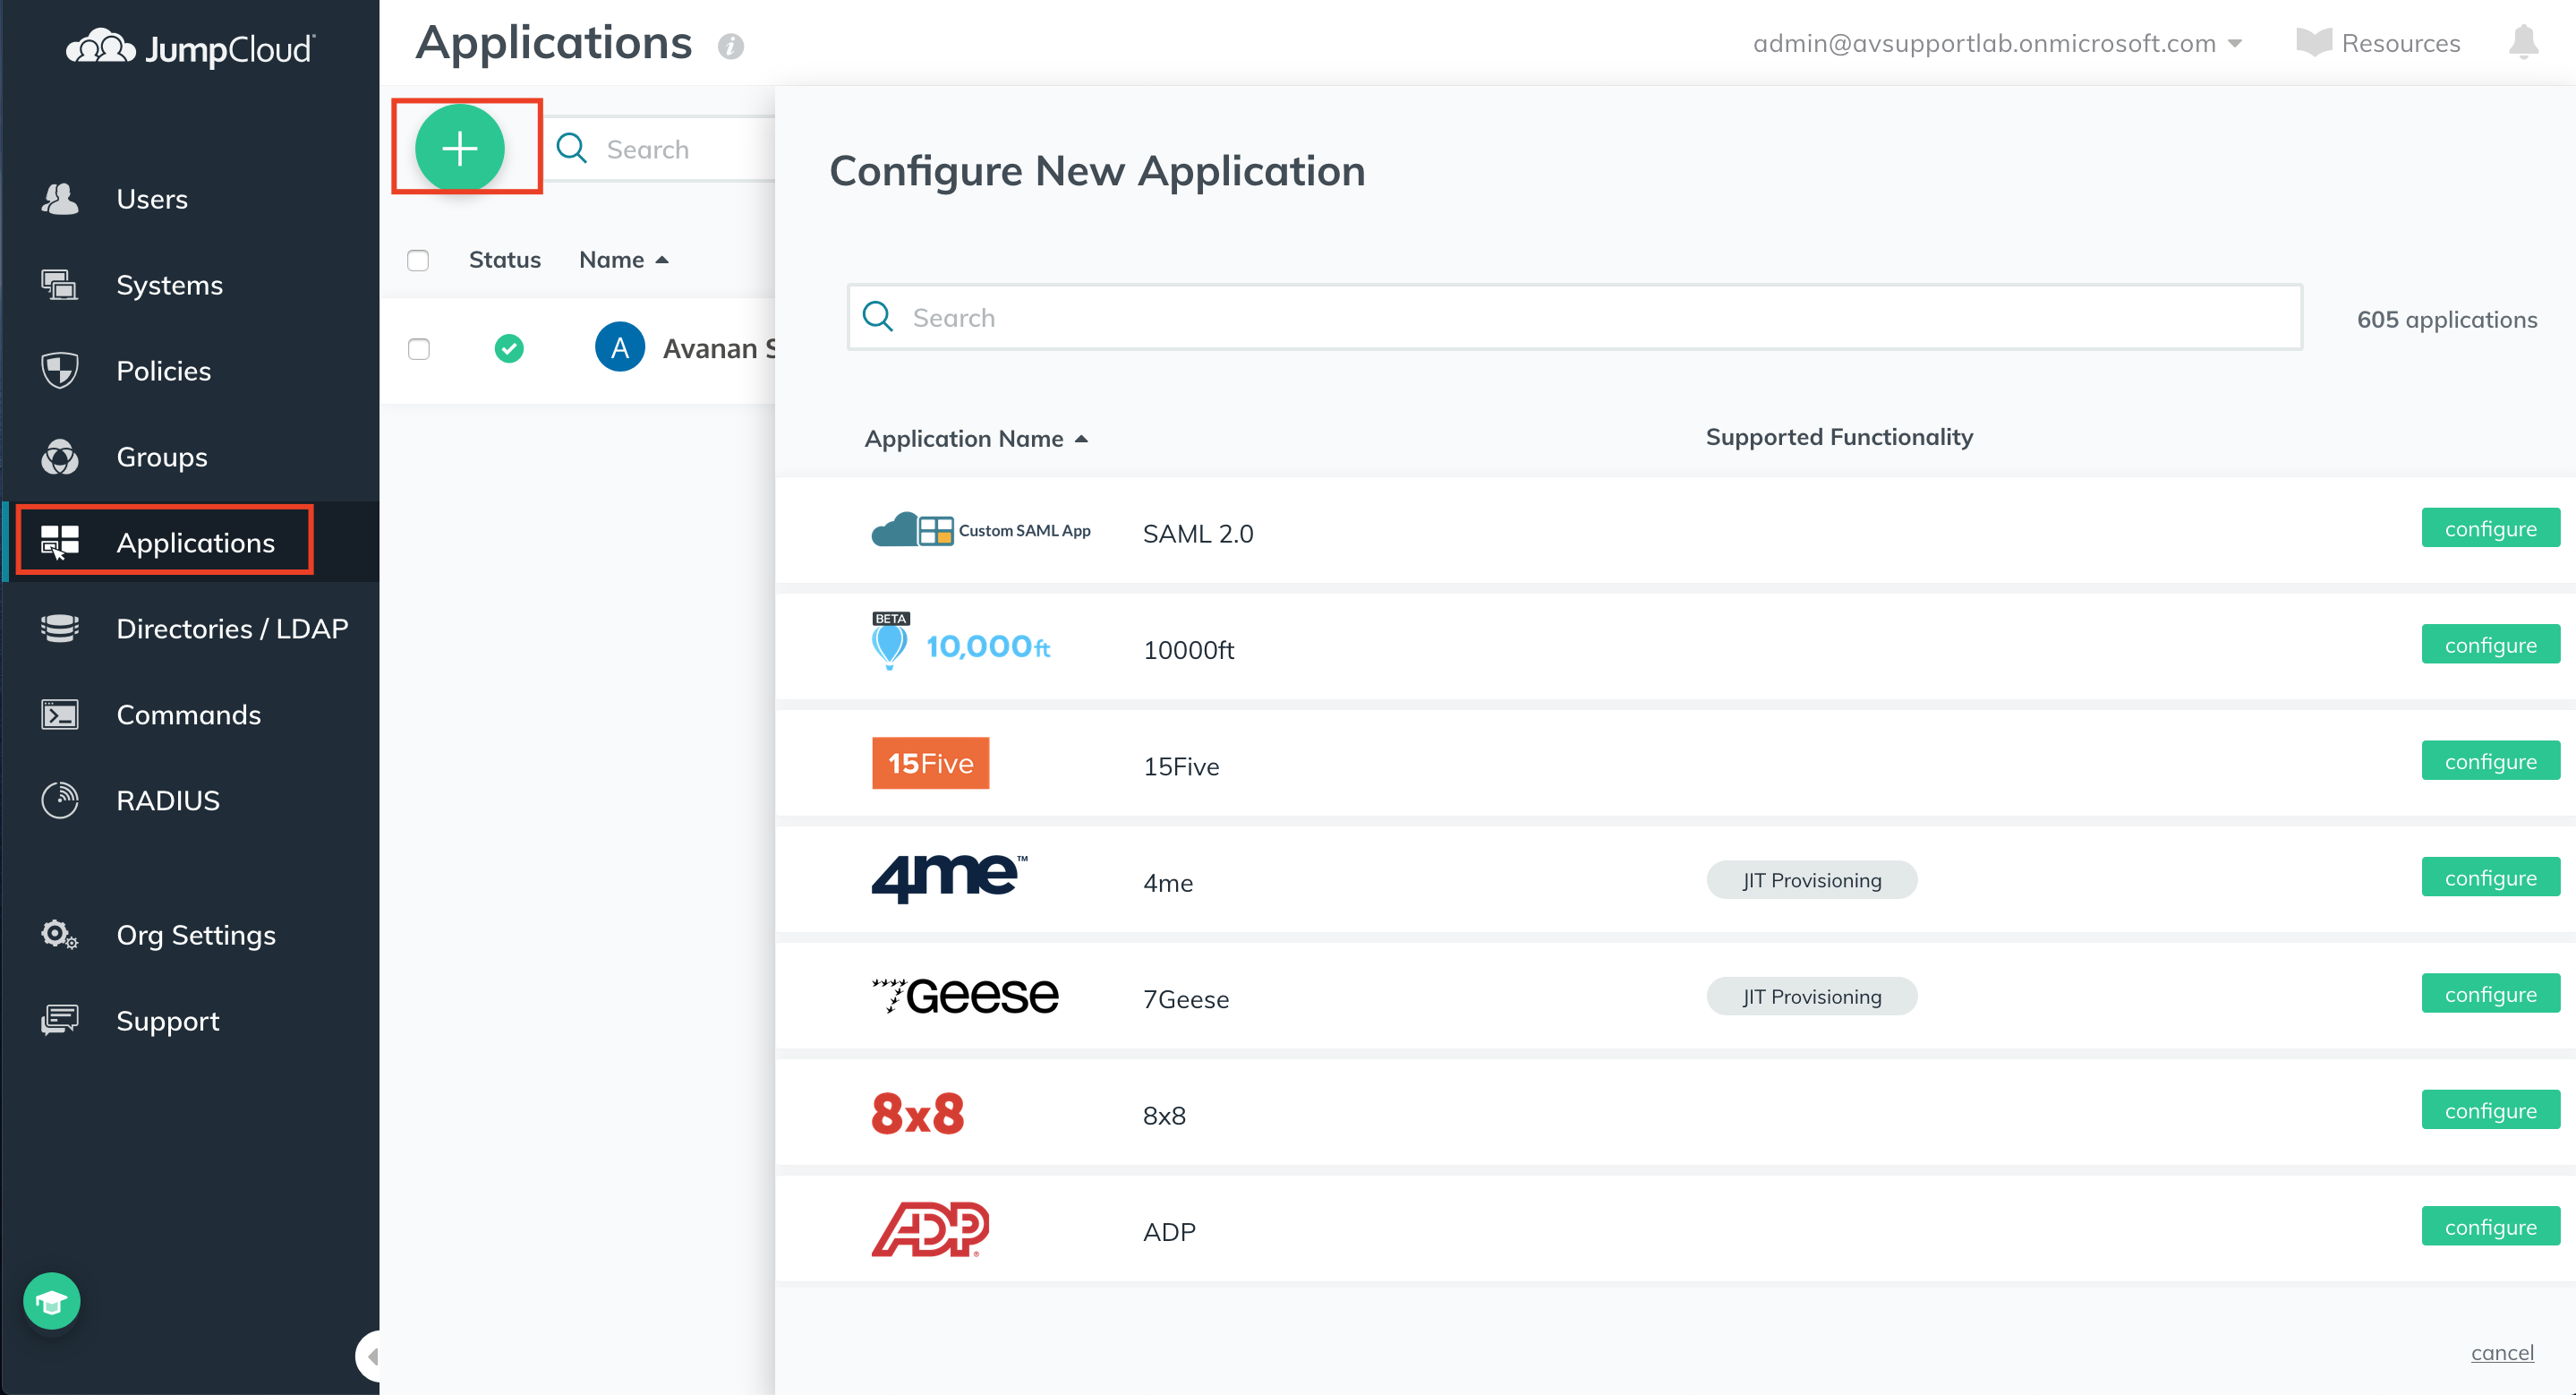
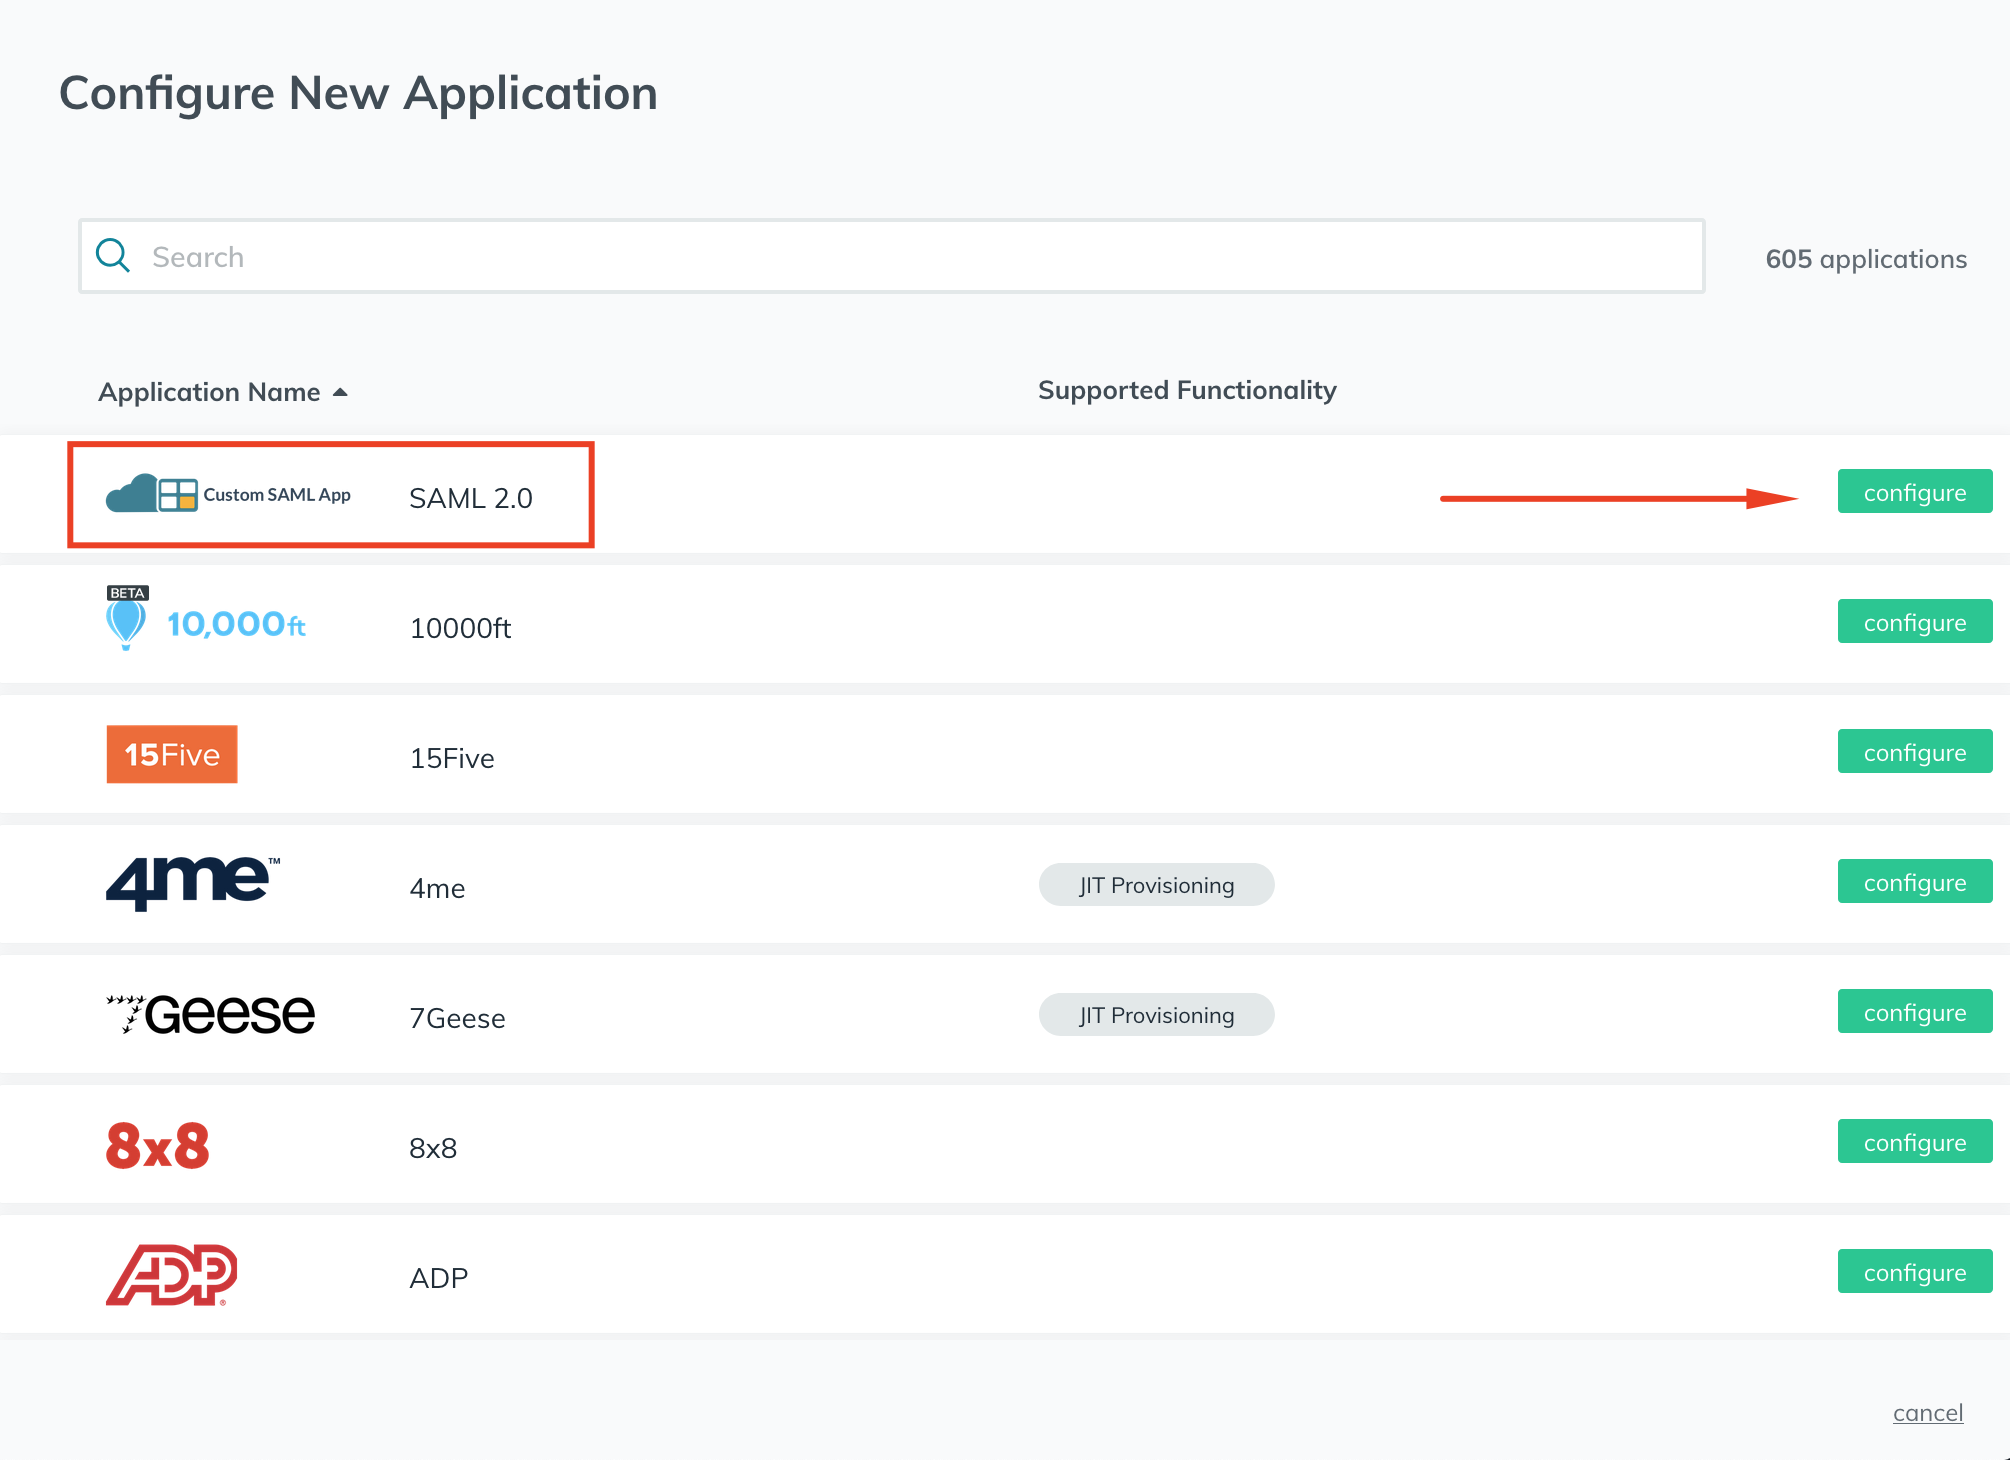
- Under Application Name, click configure next to the SAML 2.0 Application.
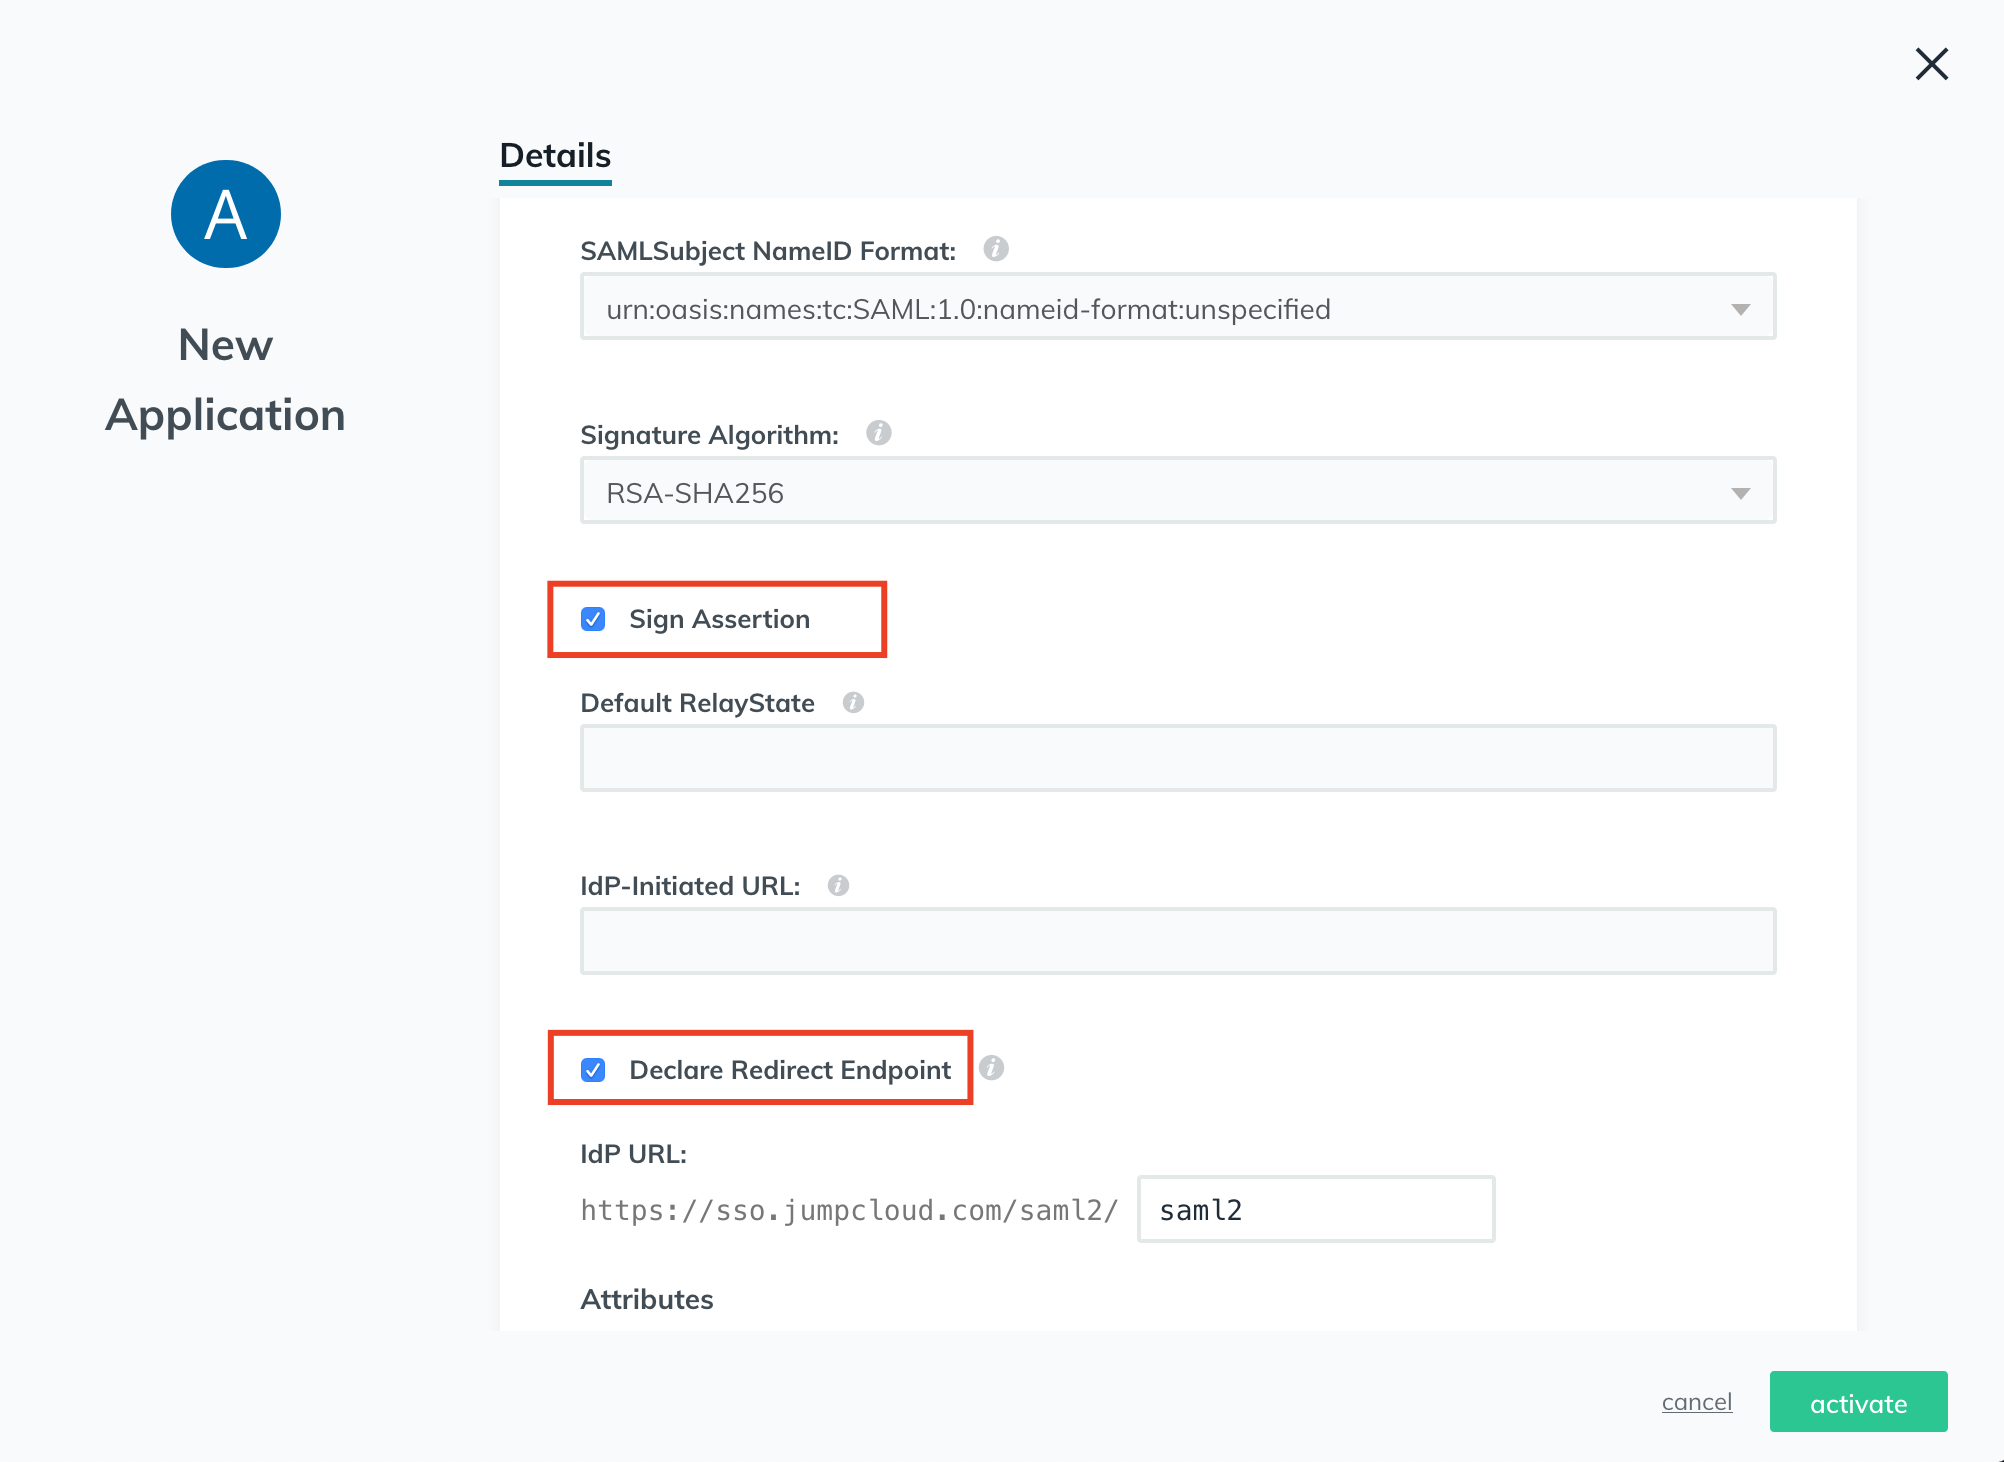
- Enter a display label, Idp Entity ID, and SP Entity ID in the relevant fields.
Note - The SP Entity ID must correlate to the ACS (assertion consumer service) URL.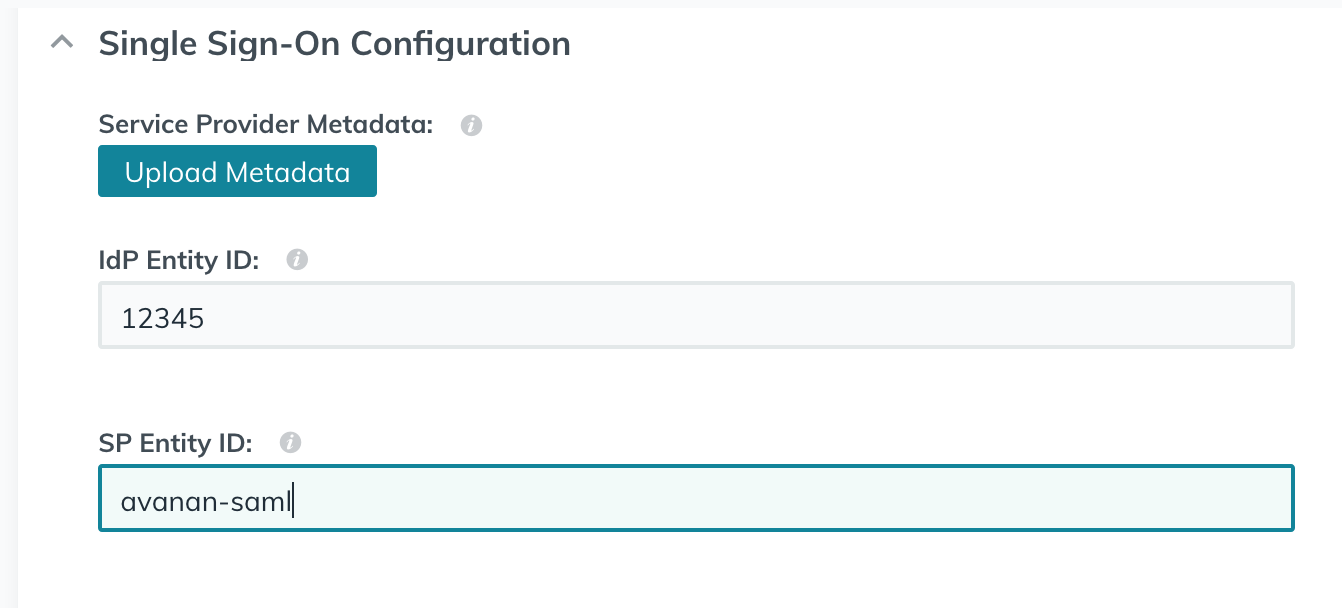
- Copy the ACS URL from your Avanan portal.
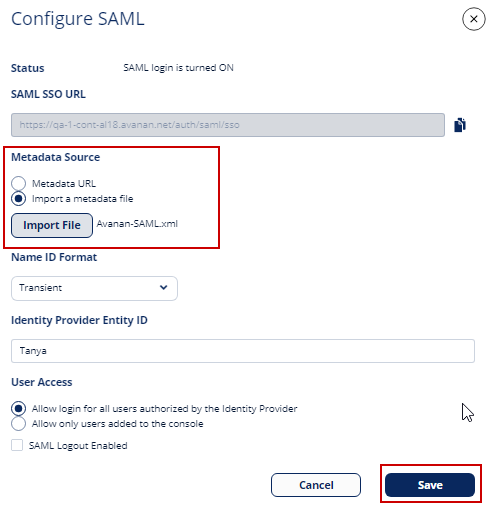
To do that, from the Avanan portal, go to Security Settings > Settings and click Configure SAML.
In the Configure SAML page, copy the ACS URL (SAML SSO URL) and paste it into the JumpCloud field.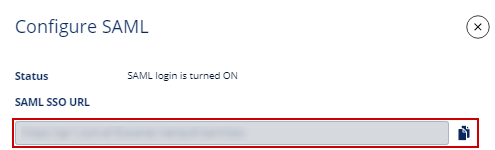
- In the JumpCloud console, select the Sign Assertion and Declare Redirect Endpoint check-box.
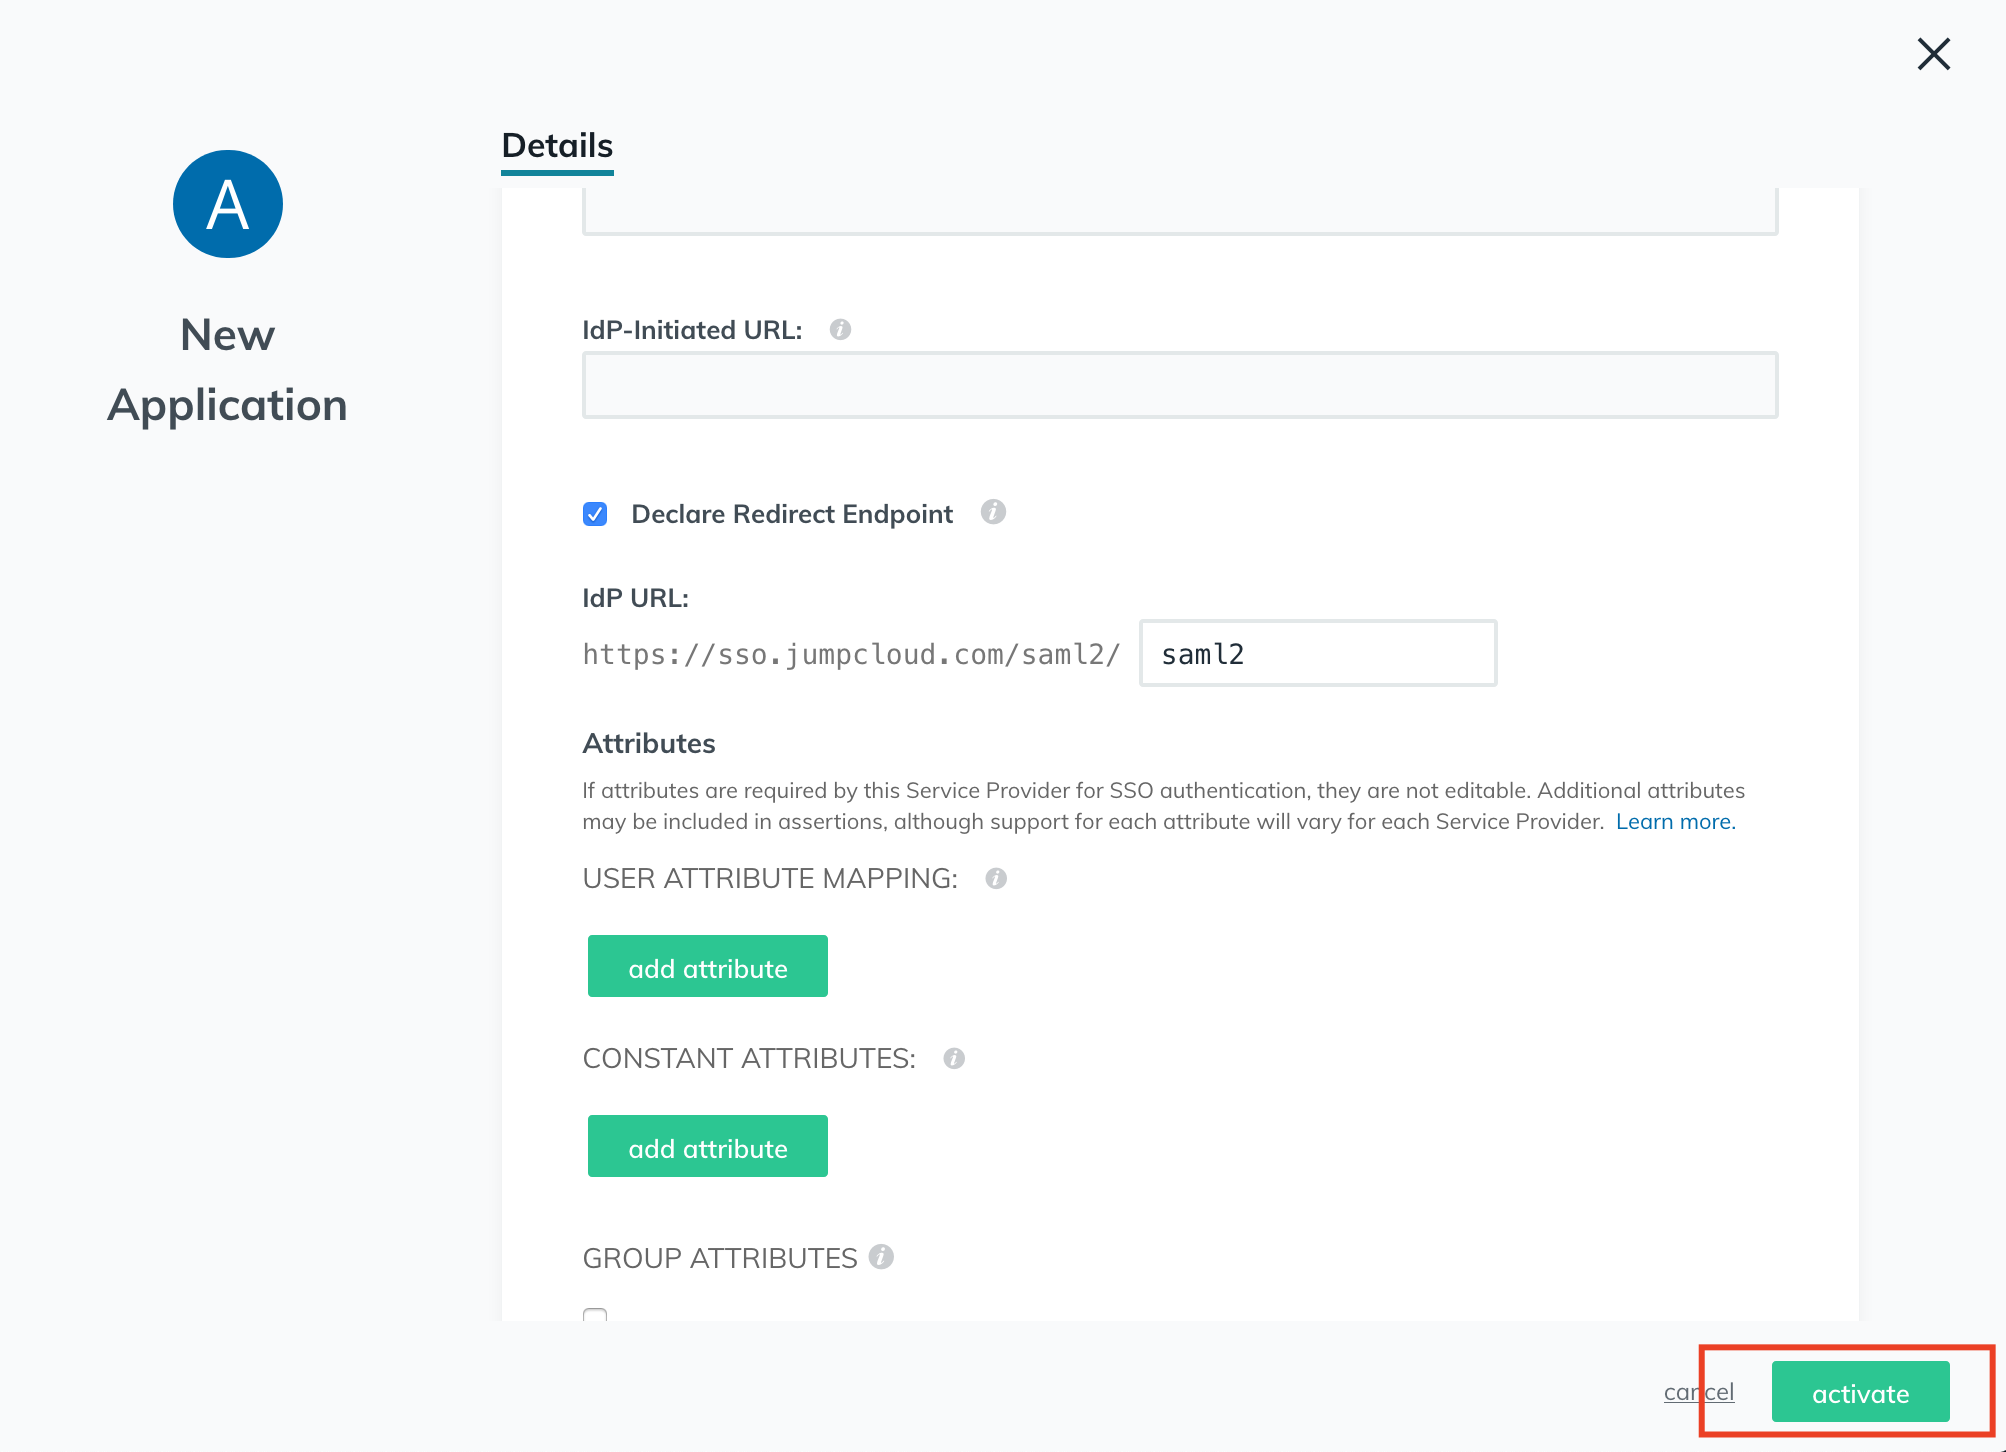
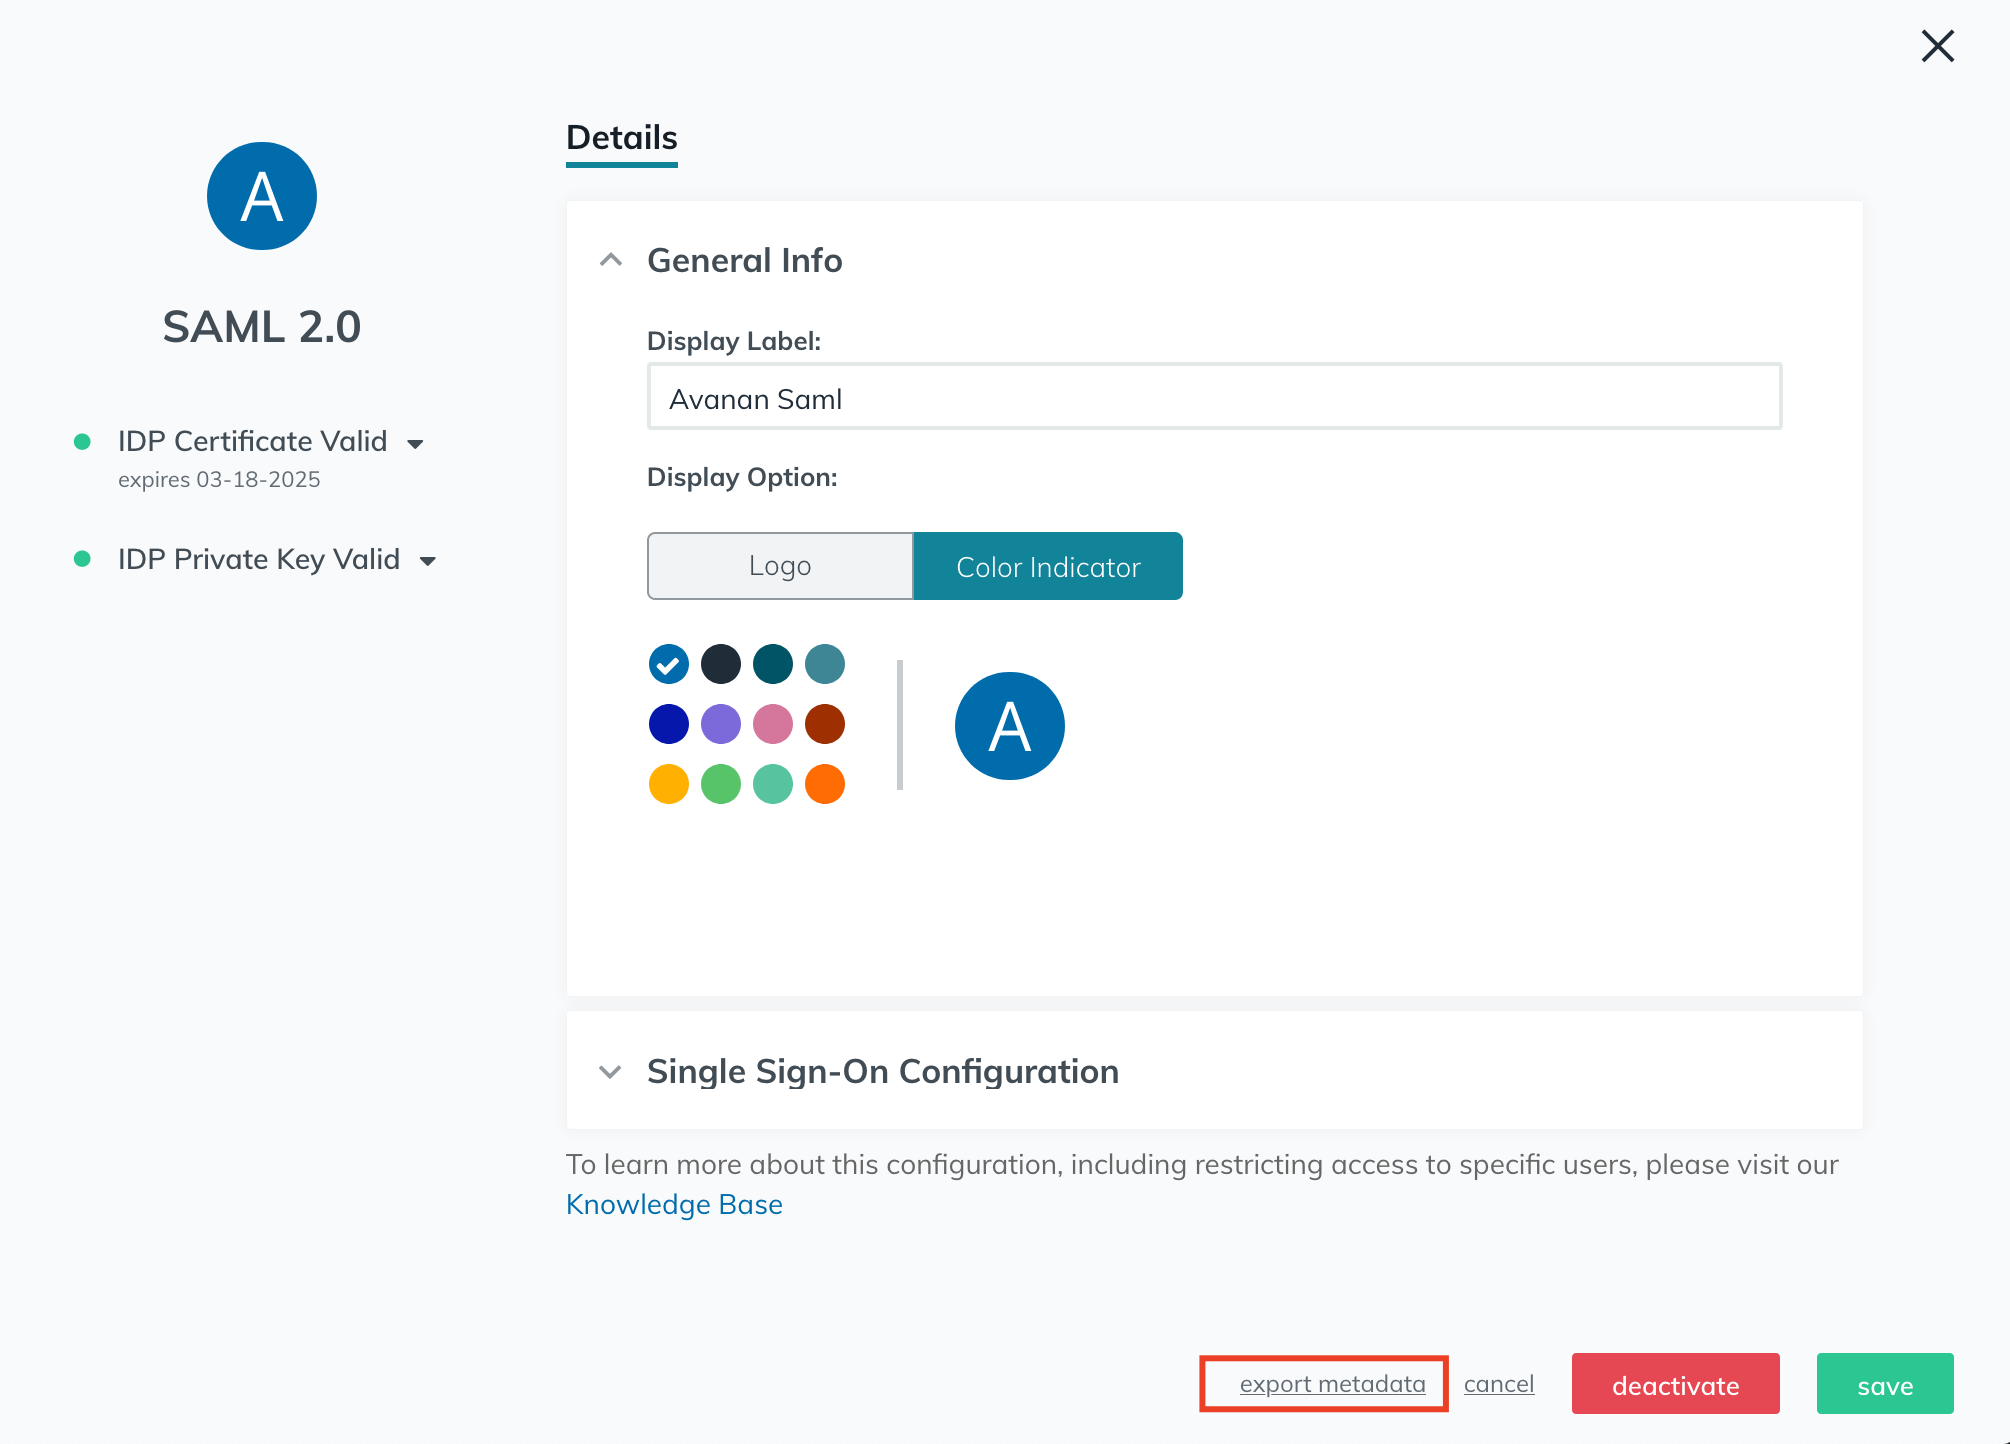
- Click active in the bottom right and then export the generated metadata file.
- Upload the exported metadata to your Avanan portal, and clear the Are you running Azure AD check-box.
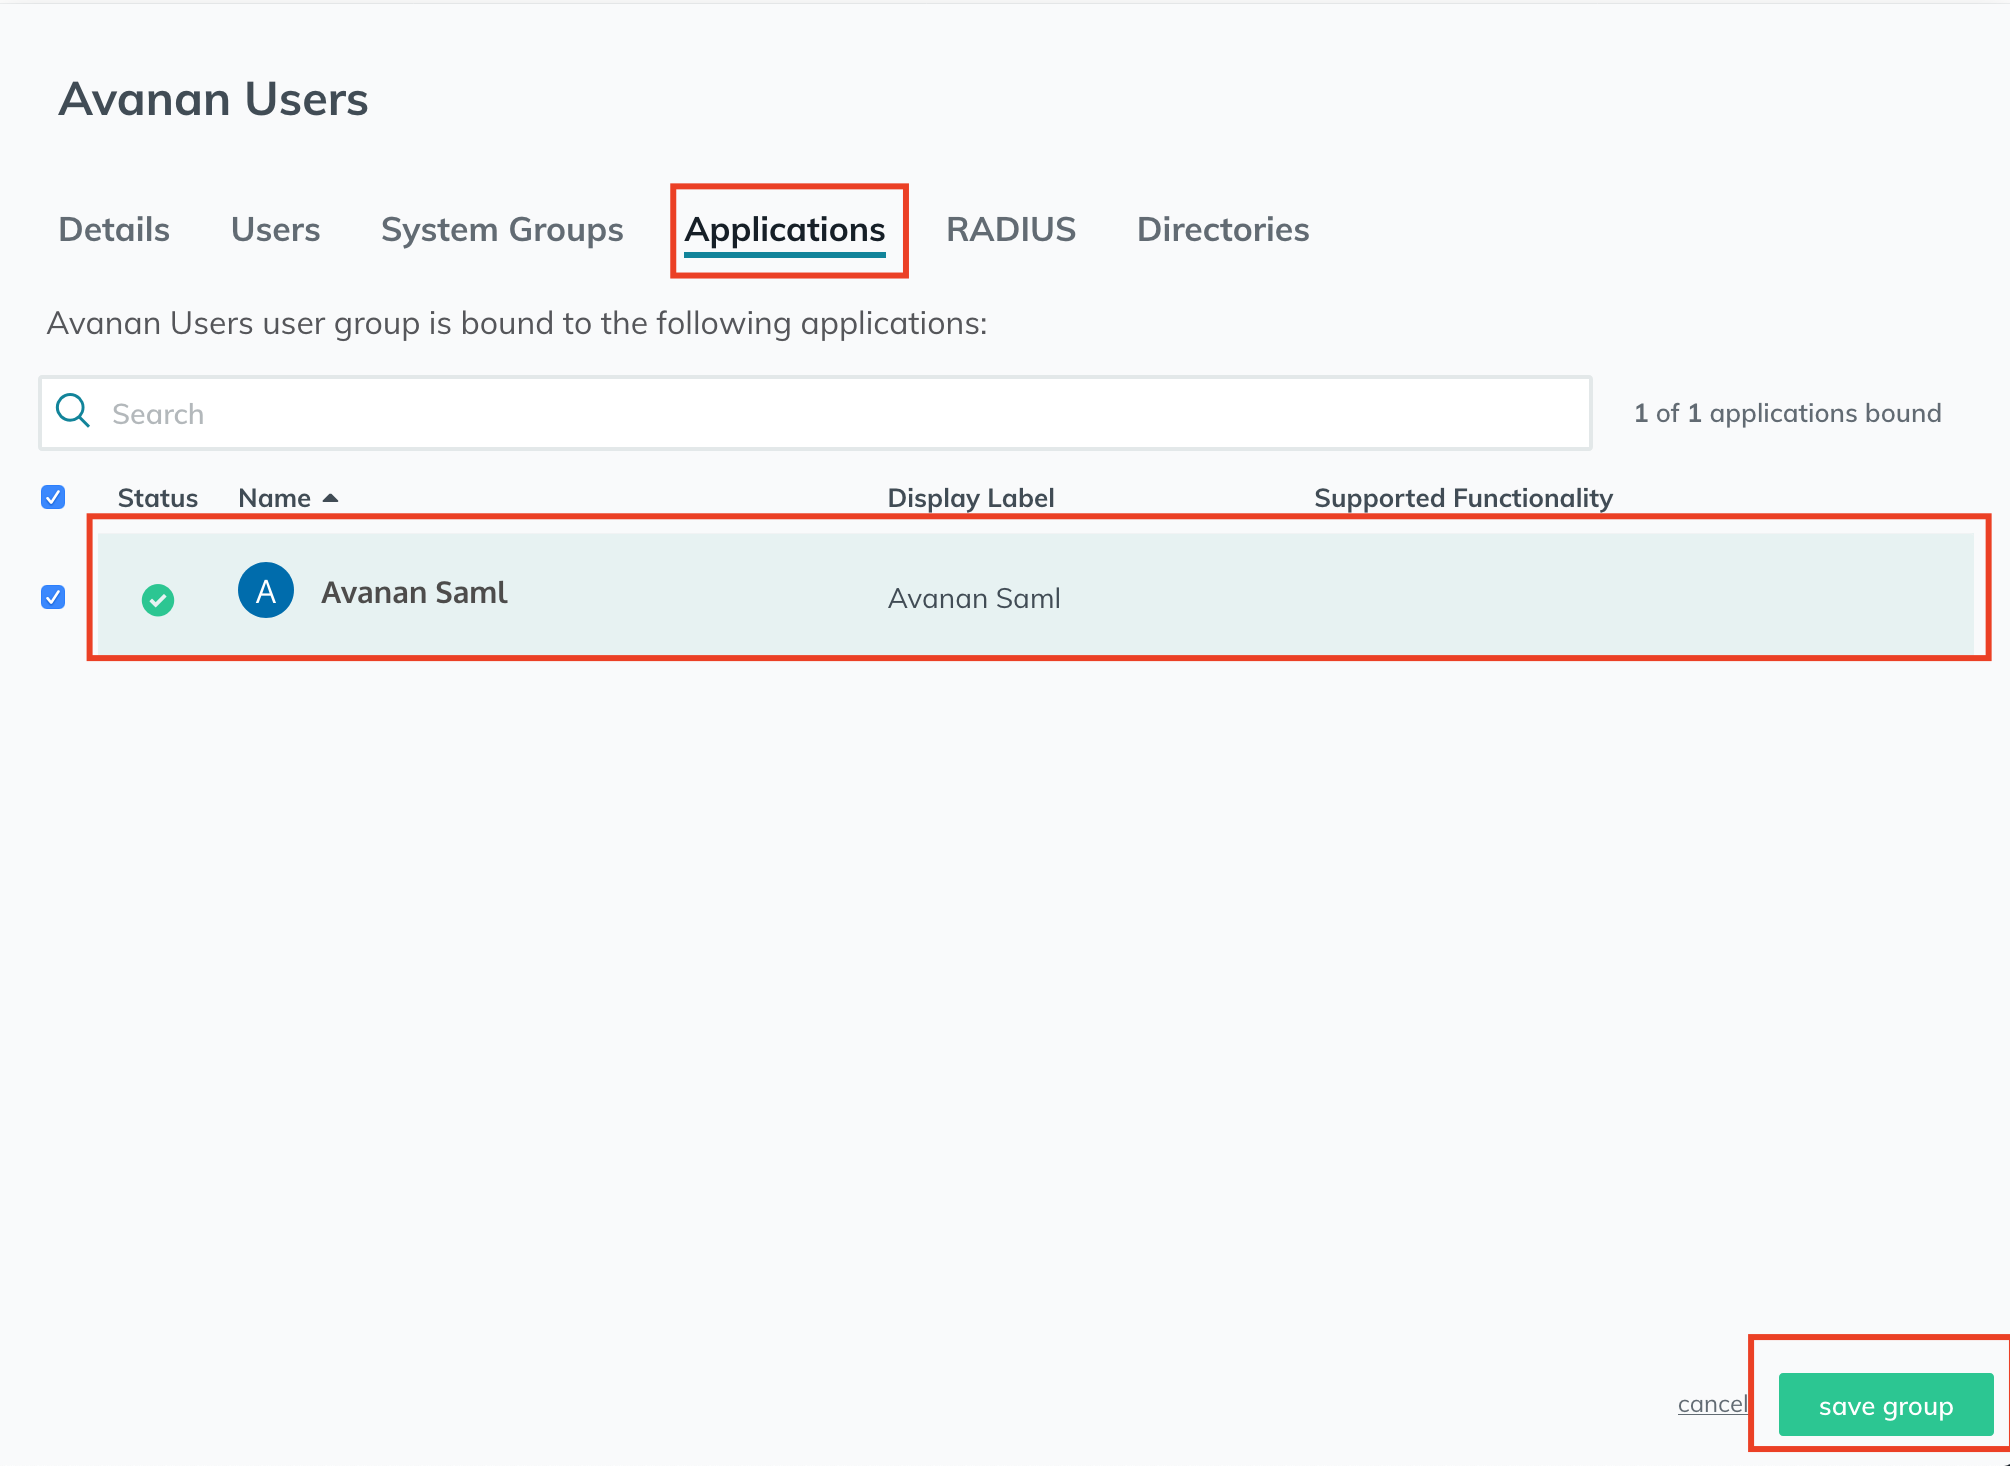
- From the JumpCloud console, assign users to the newly created JumpCloud application.
- Navigate to groups and select a user group.
- From the edit group window, click Applications and select the newly created App.
- Click save group.
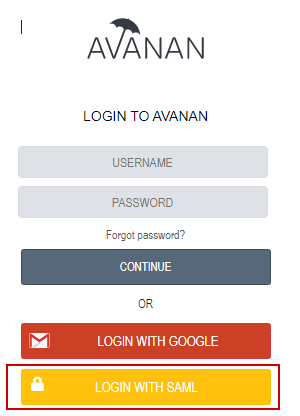
- Now, you can log in to the Avanan portal using SAML.