


When you first deploy Avanan, you can conveniently identify and quarantine malicious content that was lurking in any mailbox at your organization. When an Office 365 account is compromised, it is vital to immediately minimize the damage by removing all the emails sent out out of their compromised account from your Office 365 landscape. In under three minutes, you can do this essential damange control.
Creating a custom query also comes in handy when you need to do forensics, or want detailed insights into specific conversations. You can click on any "Sender" or "Recipient" to see their user profile, showing their top collaborators, whether they are internal or external to your organization, and if their account is enabled. Clicking on "Subject" shows you an email profile, where you can access email headers, attachment details, all the links in the body and attachment, and the option to individually quarantine.
Watch the video or read the walkthrough below to learn how to quarantine emails in all mailboxes sent from a compromised account in Office 365.
Walkthrough
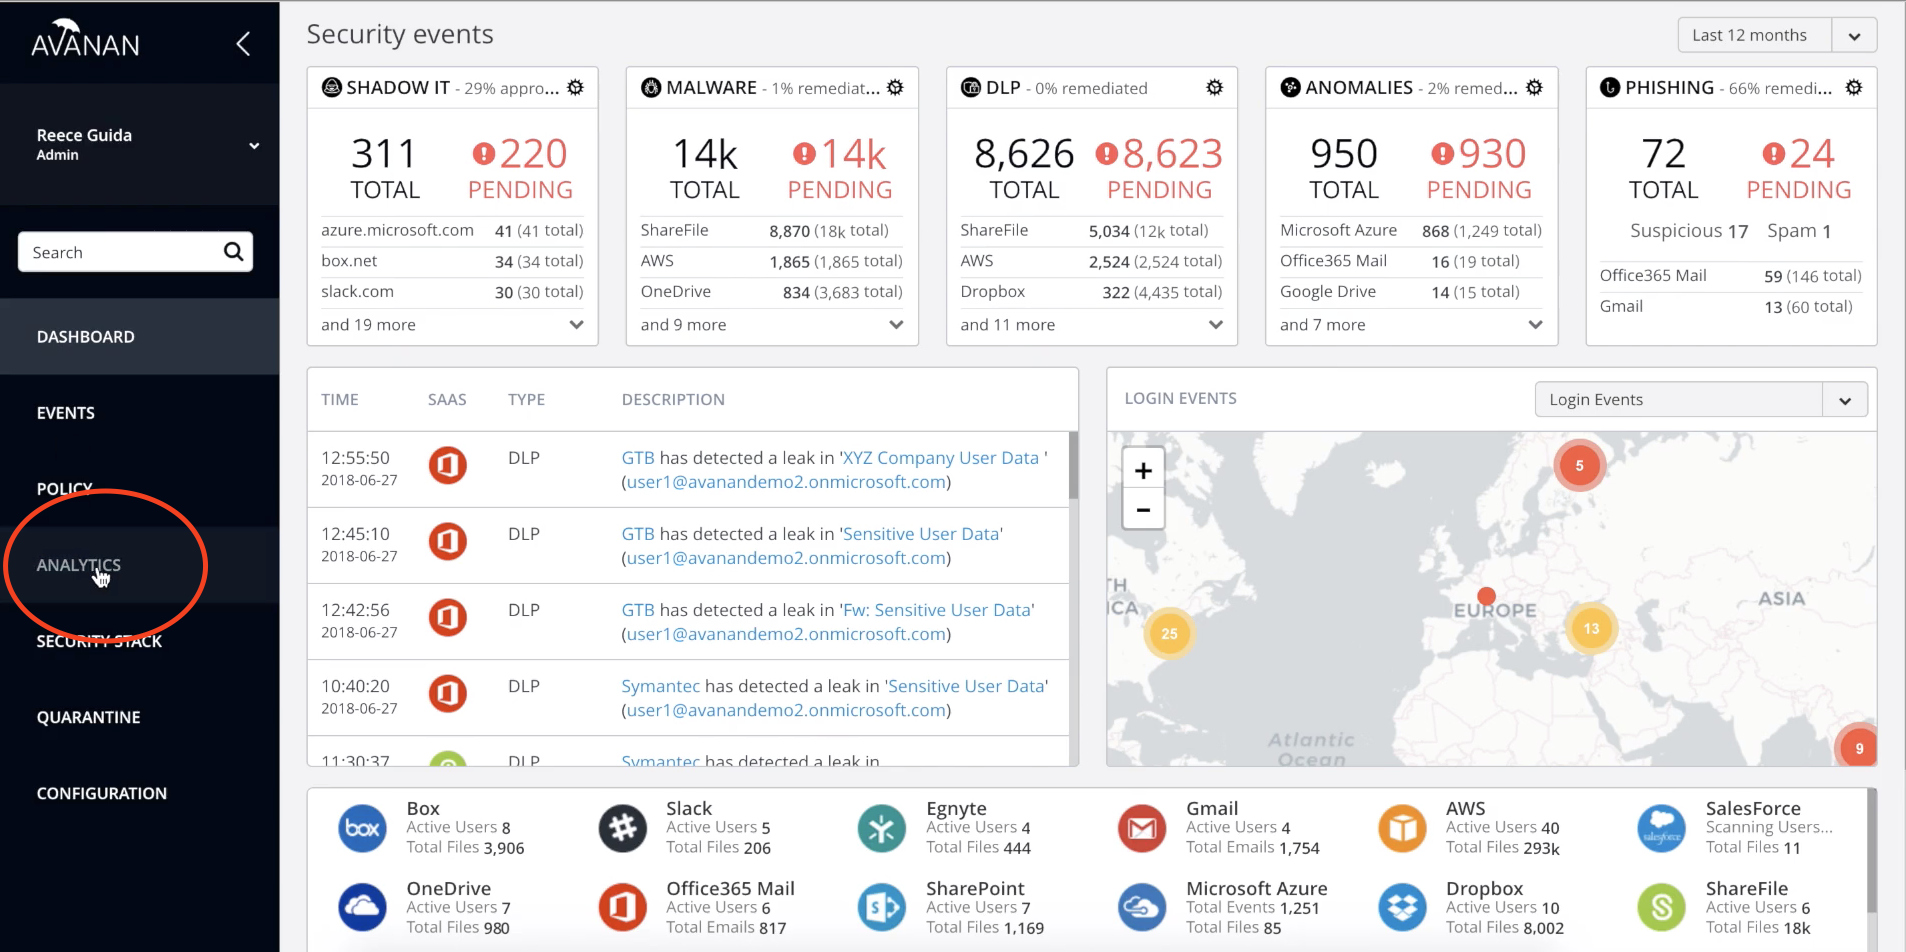
1. Click "ANALYTICS" from the navigation on the left side of the platform's home page. Scroll down, and hit "Custom Queries."
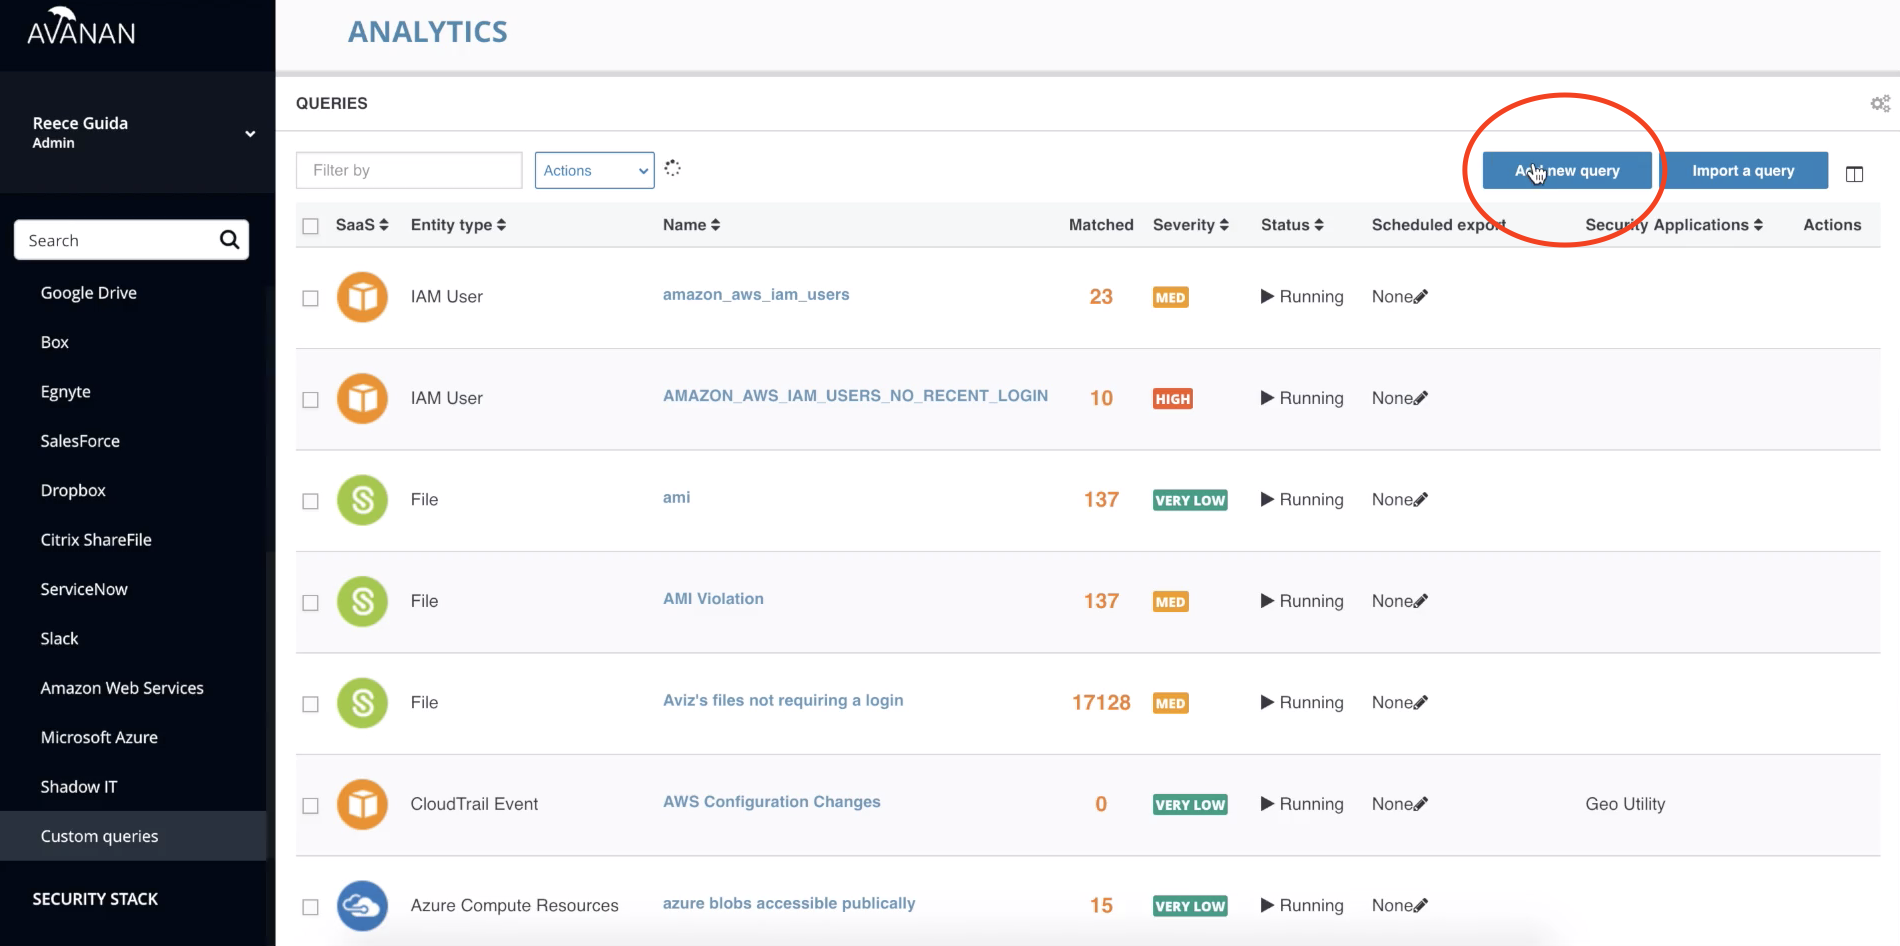
2. Click "Add new query" at the top right of the screen to begin creating your custom query.
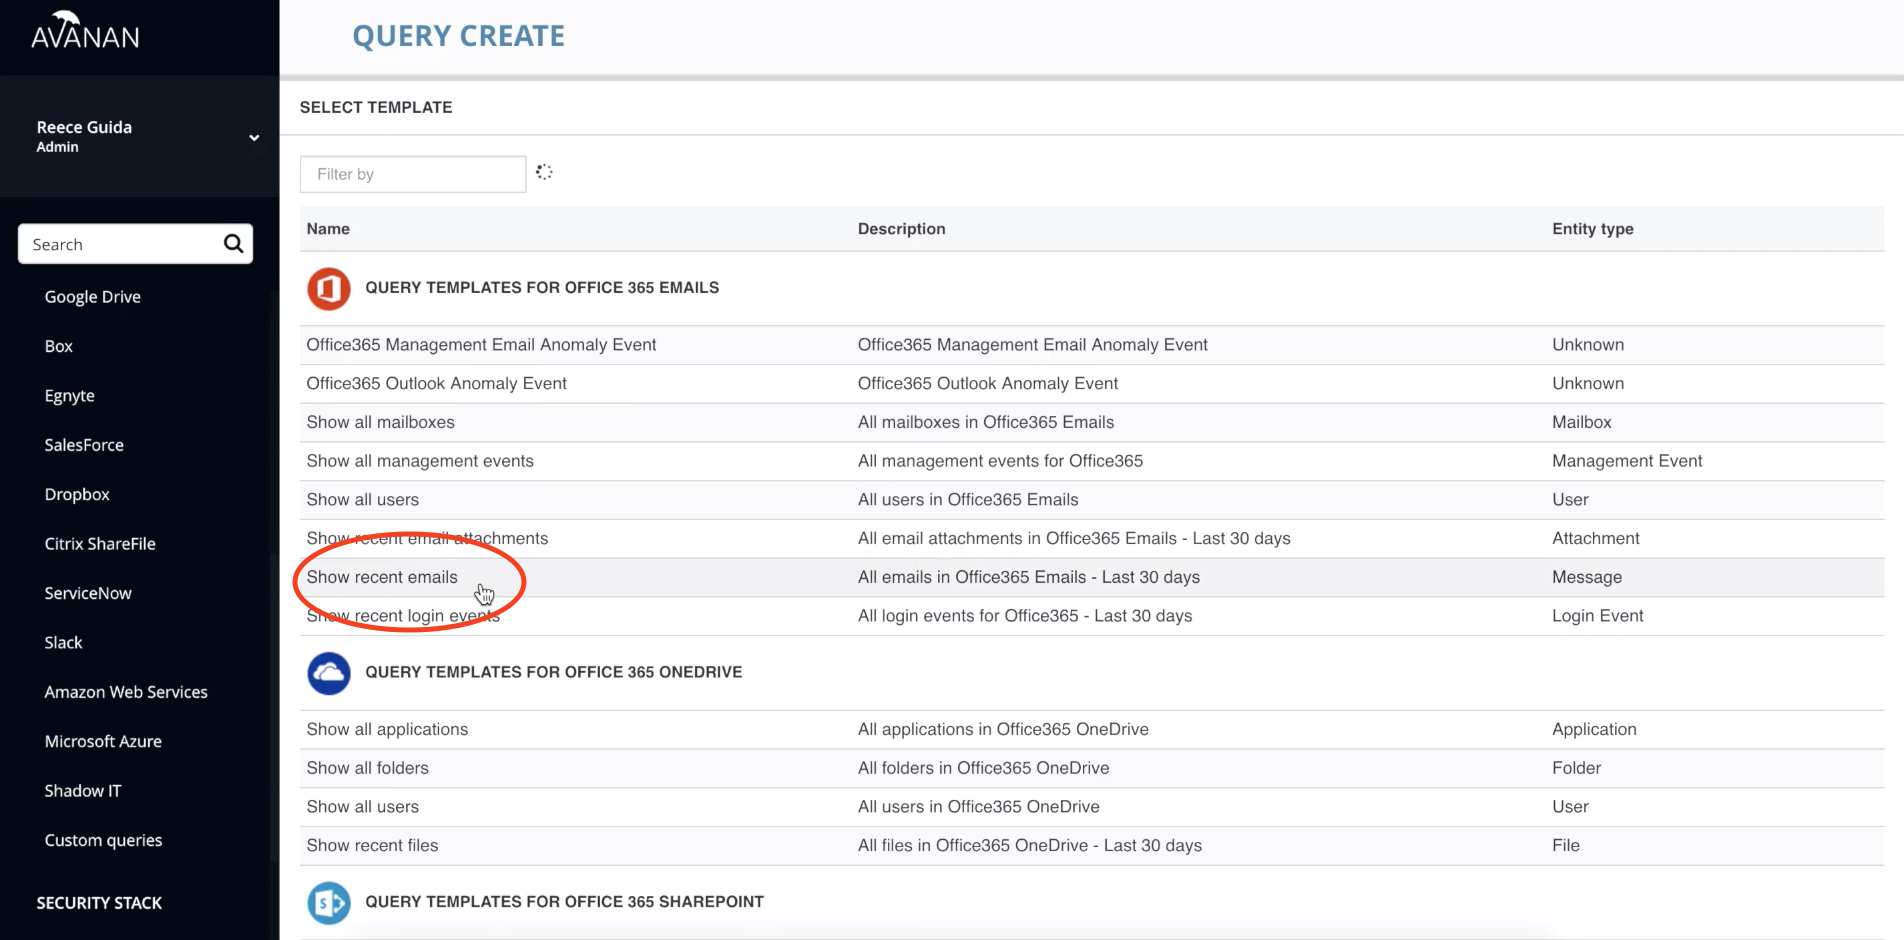
3. After being taken to a new page, look at "QUERY TEMPLATES FOR OFFICE 365 EMAILS" and choose the penultimate option, "Show recent emails."
4. The screen shows all the emails that would be from your entire organization for the past 15 days. Filter results based on which employee has been compromised by hovering over their name and hitting the funnel icon.
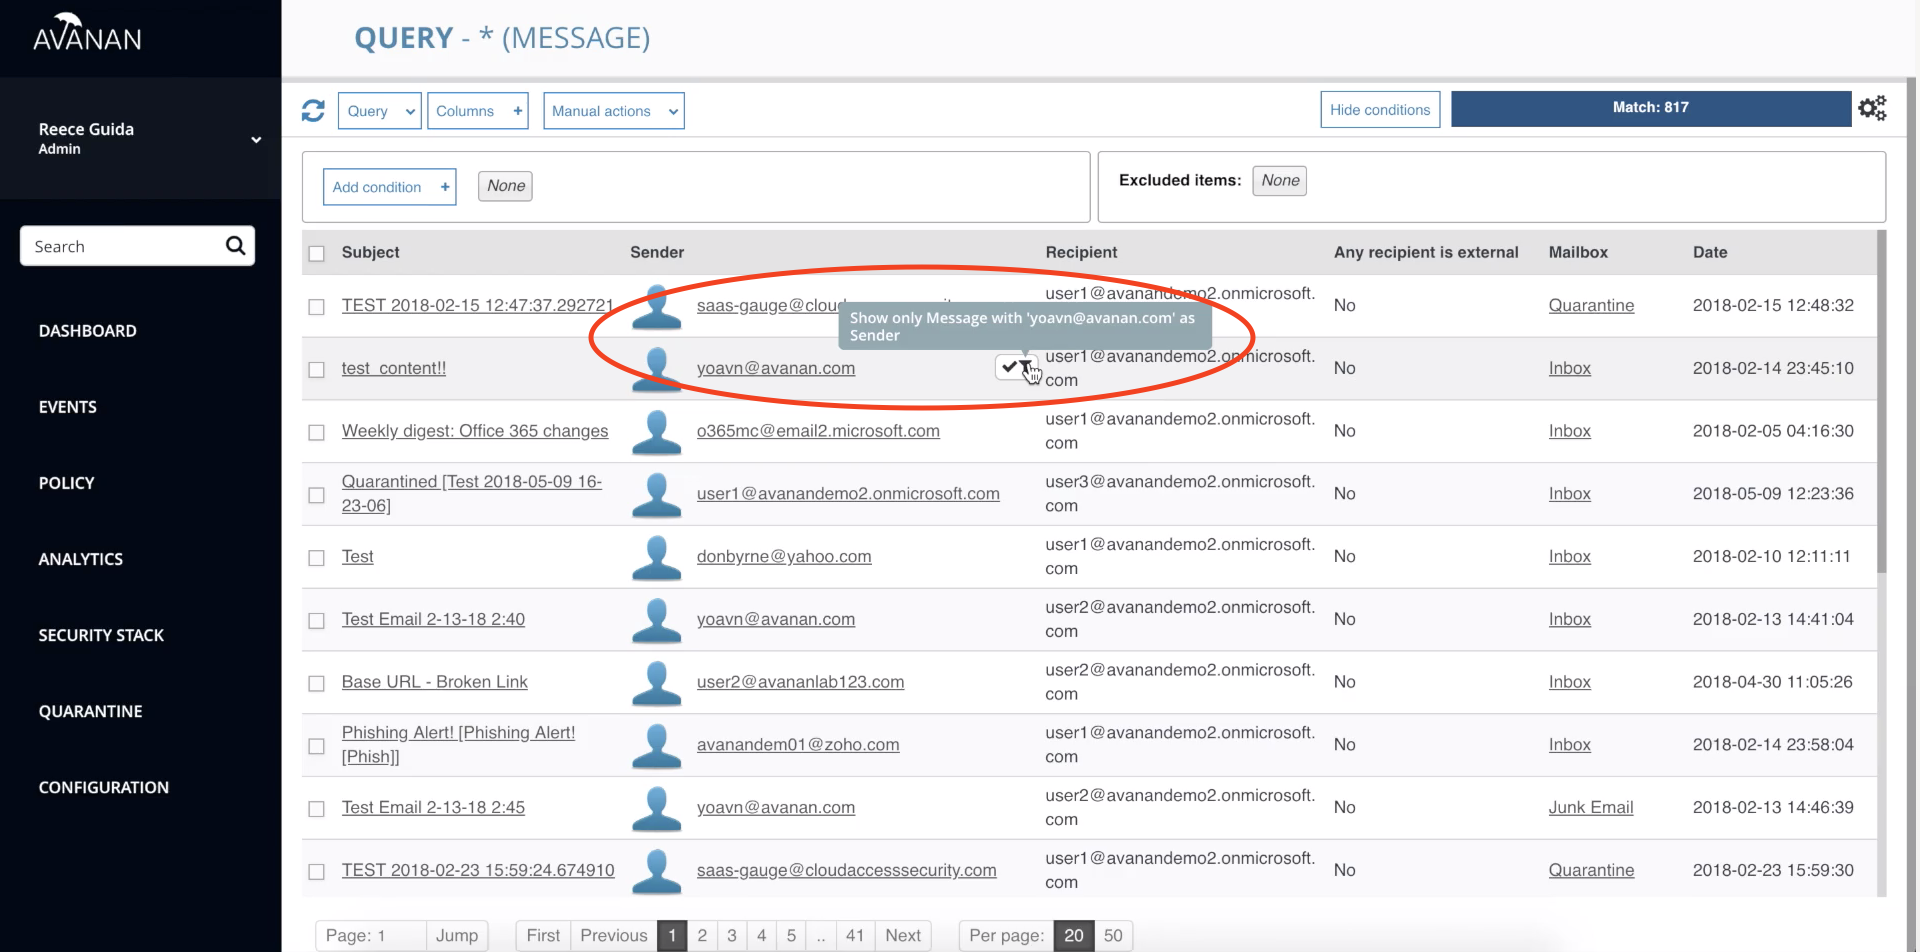
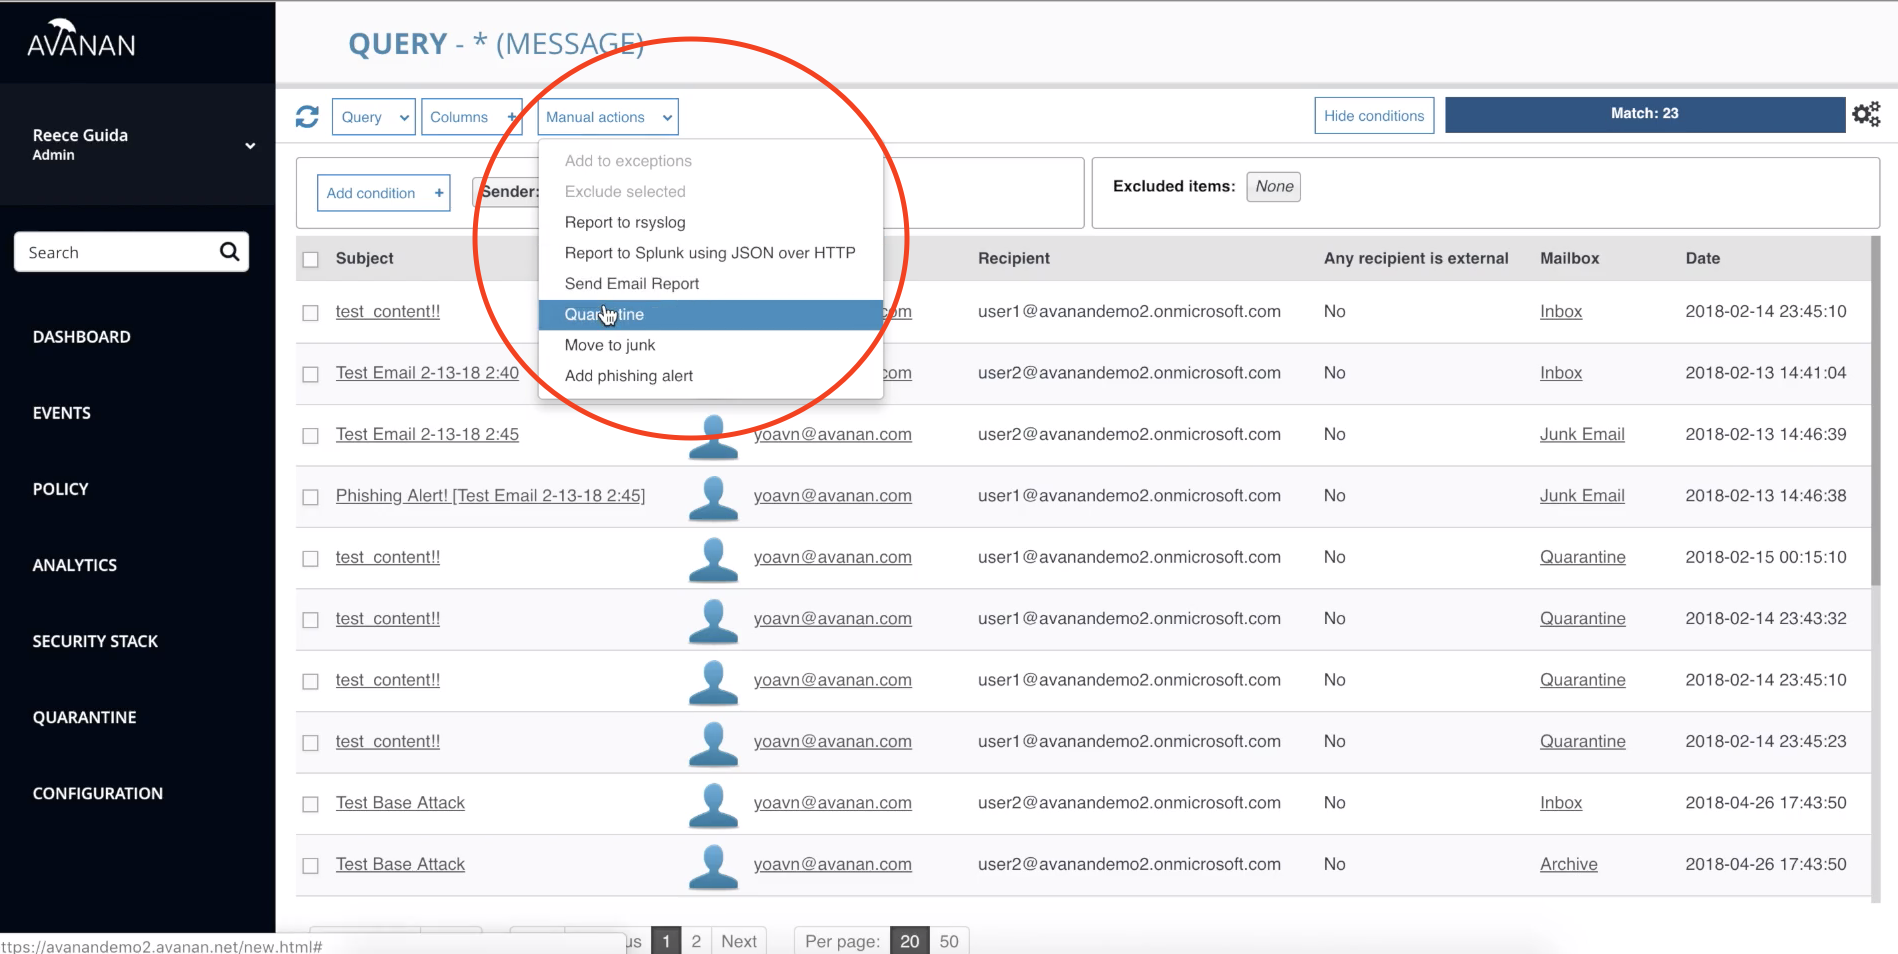
5. Now that your results identify all emails from that compromised account, which you want to quarantine all emails from, hit "Manual Actions" and "Quarantine" for it to take effect.
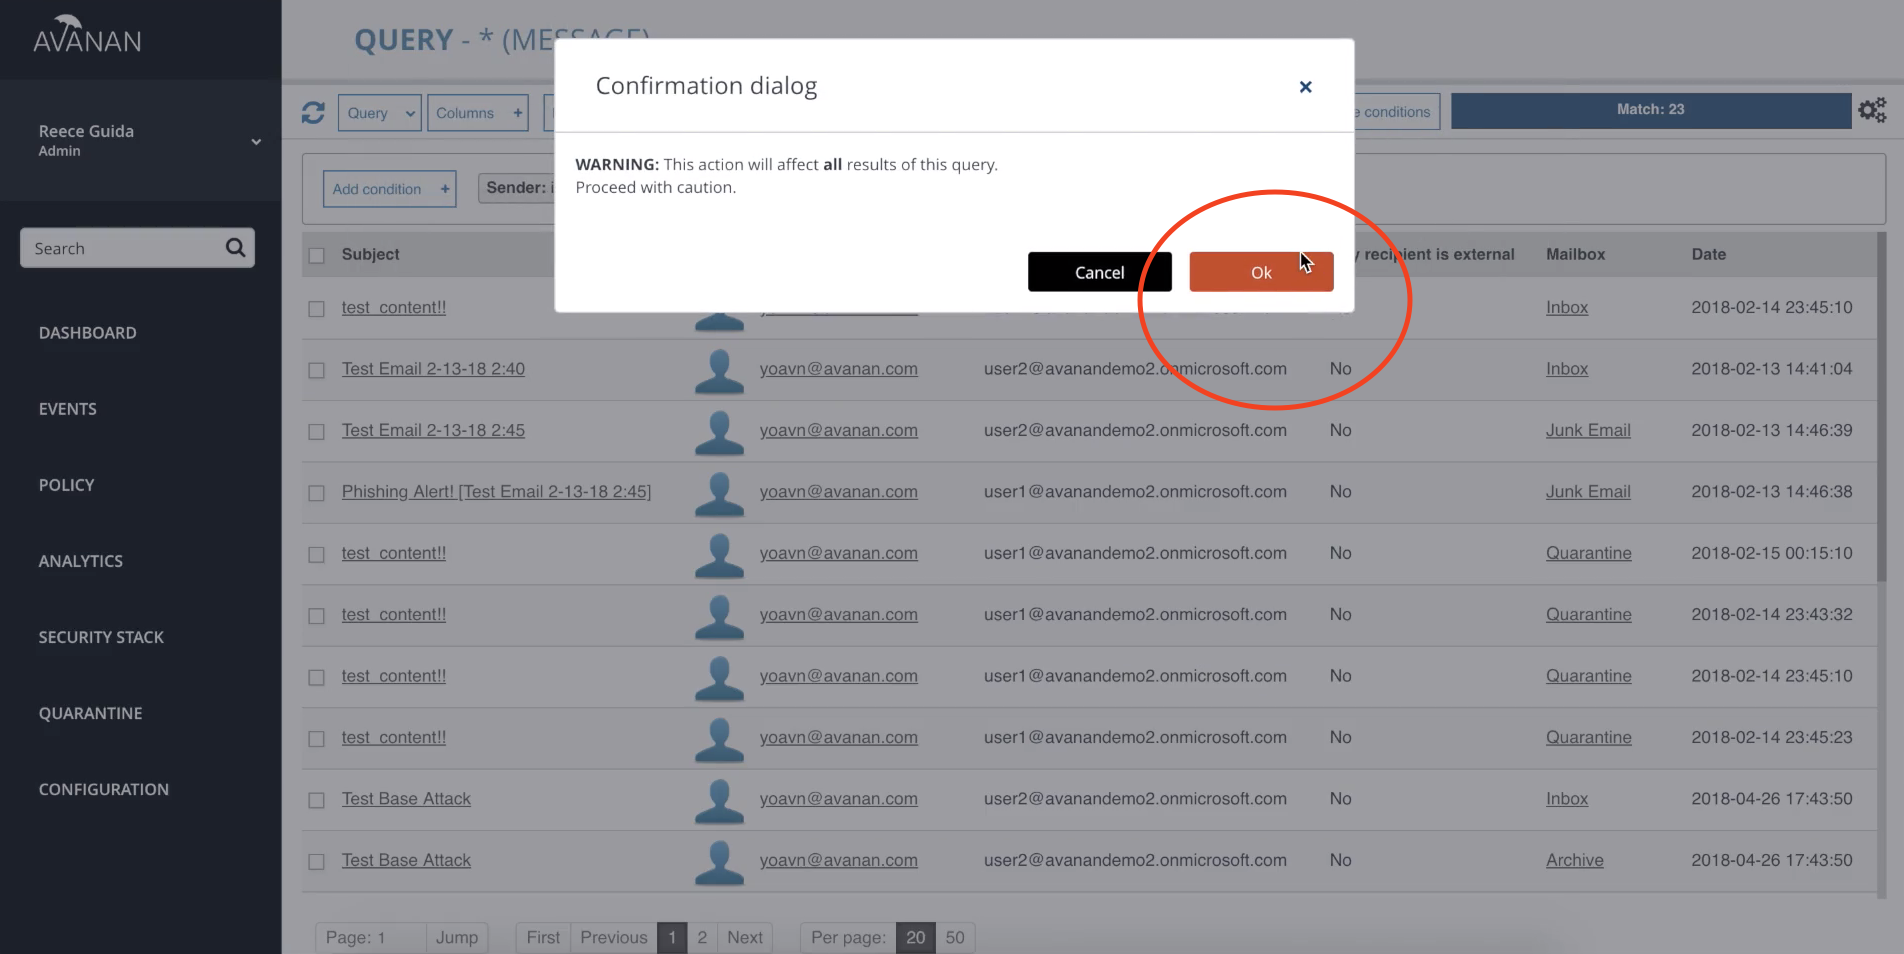
6. Because this action affects all mailboxes, confirm that you wish to continue.
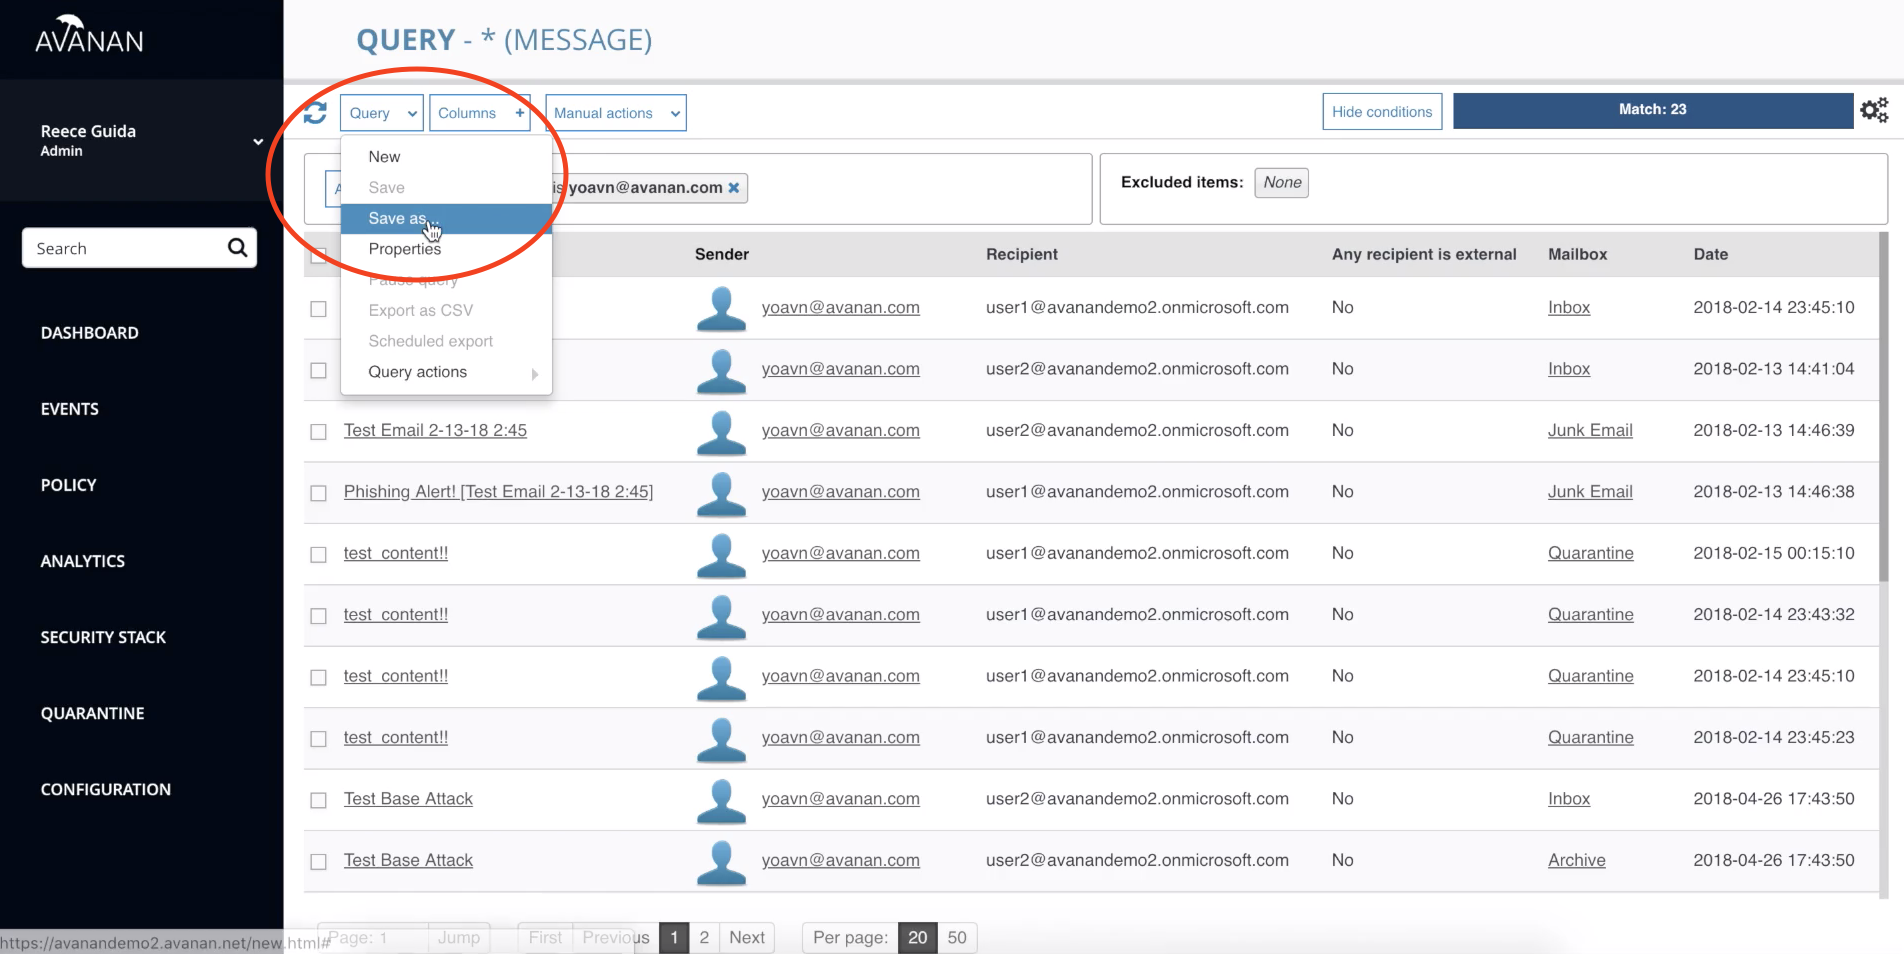
7. Now that the quarantine is running, save the query so it will always run.
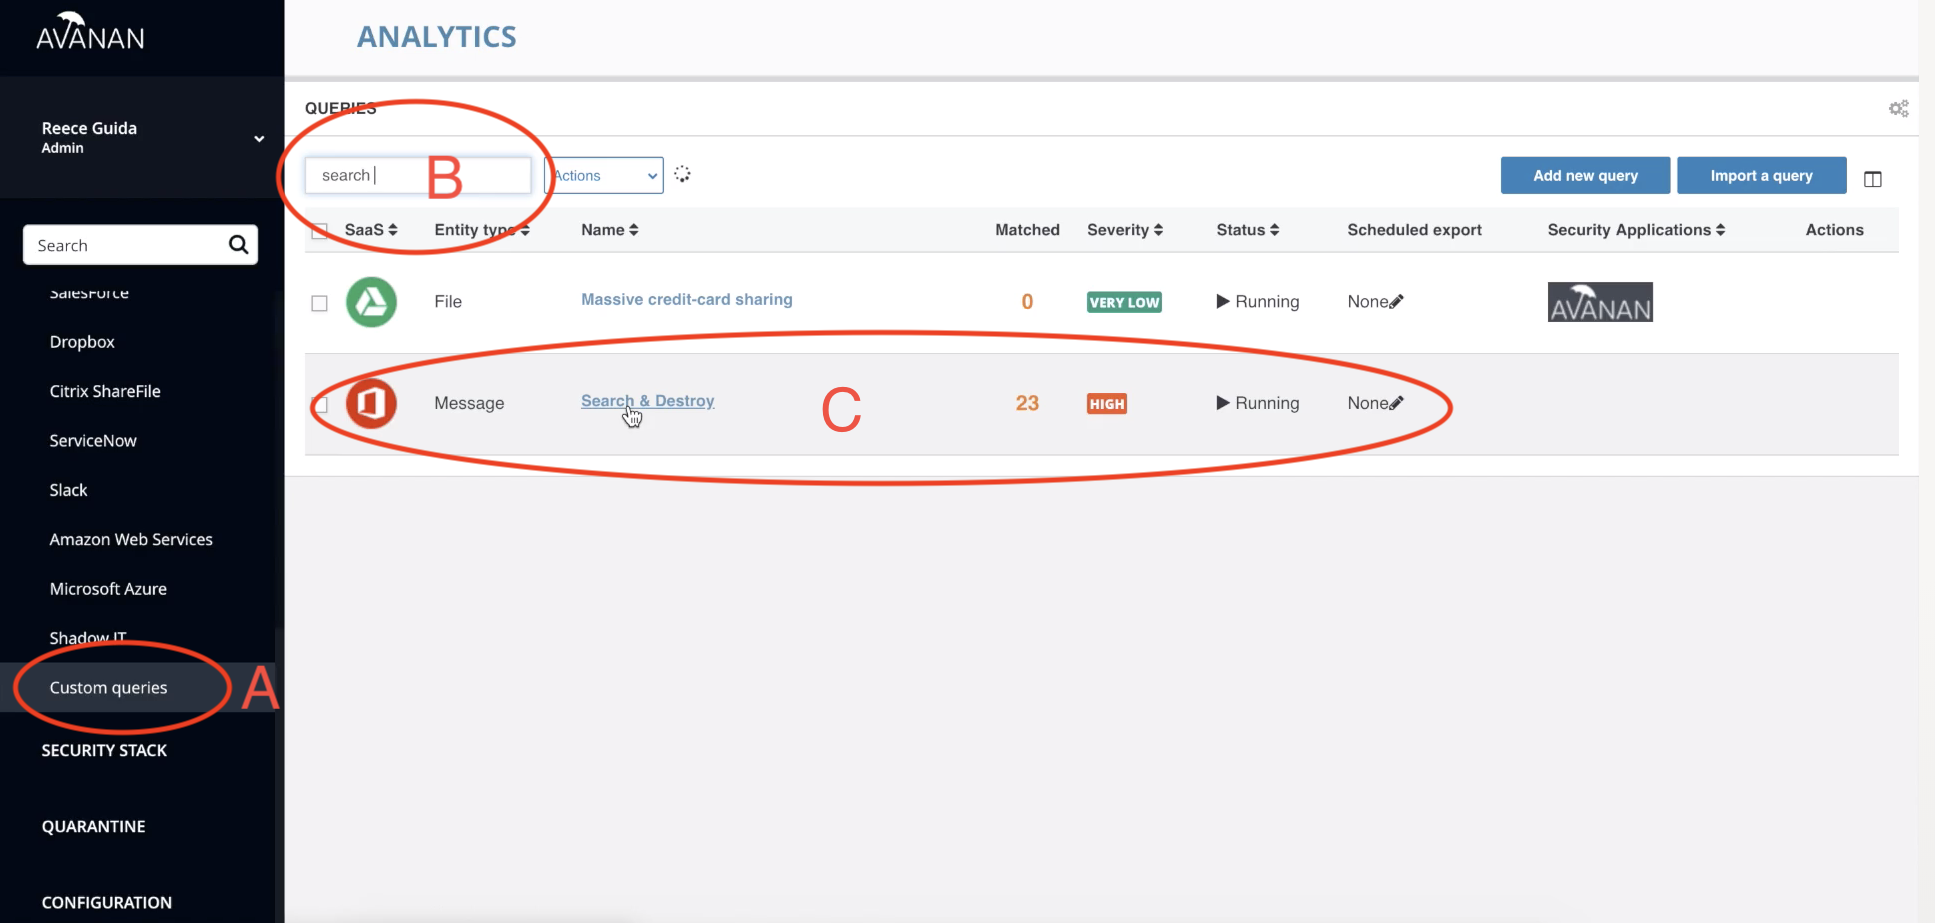
8. To view the custom query going forward, hit "ANALYTICS" on the left navigation again, select
- "Custom queries," and
- search for your query in the search box on the top left.
- After hitting enter, you will see a summary report of the query you just created.
You can also watch this video and more on our YouTube channel.