This article explains how to configure Azure as SAML Provider for the Avanan MSP Portal.
- Sign in to the Azure portal.
- Navigate to Enterprise Applications > New Application > Select Non-Gallery Application.

- Name the new application and click add.
From the next screen, click Single Sign on in the menu and select SAML.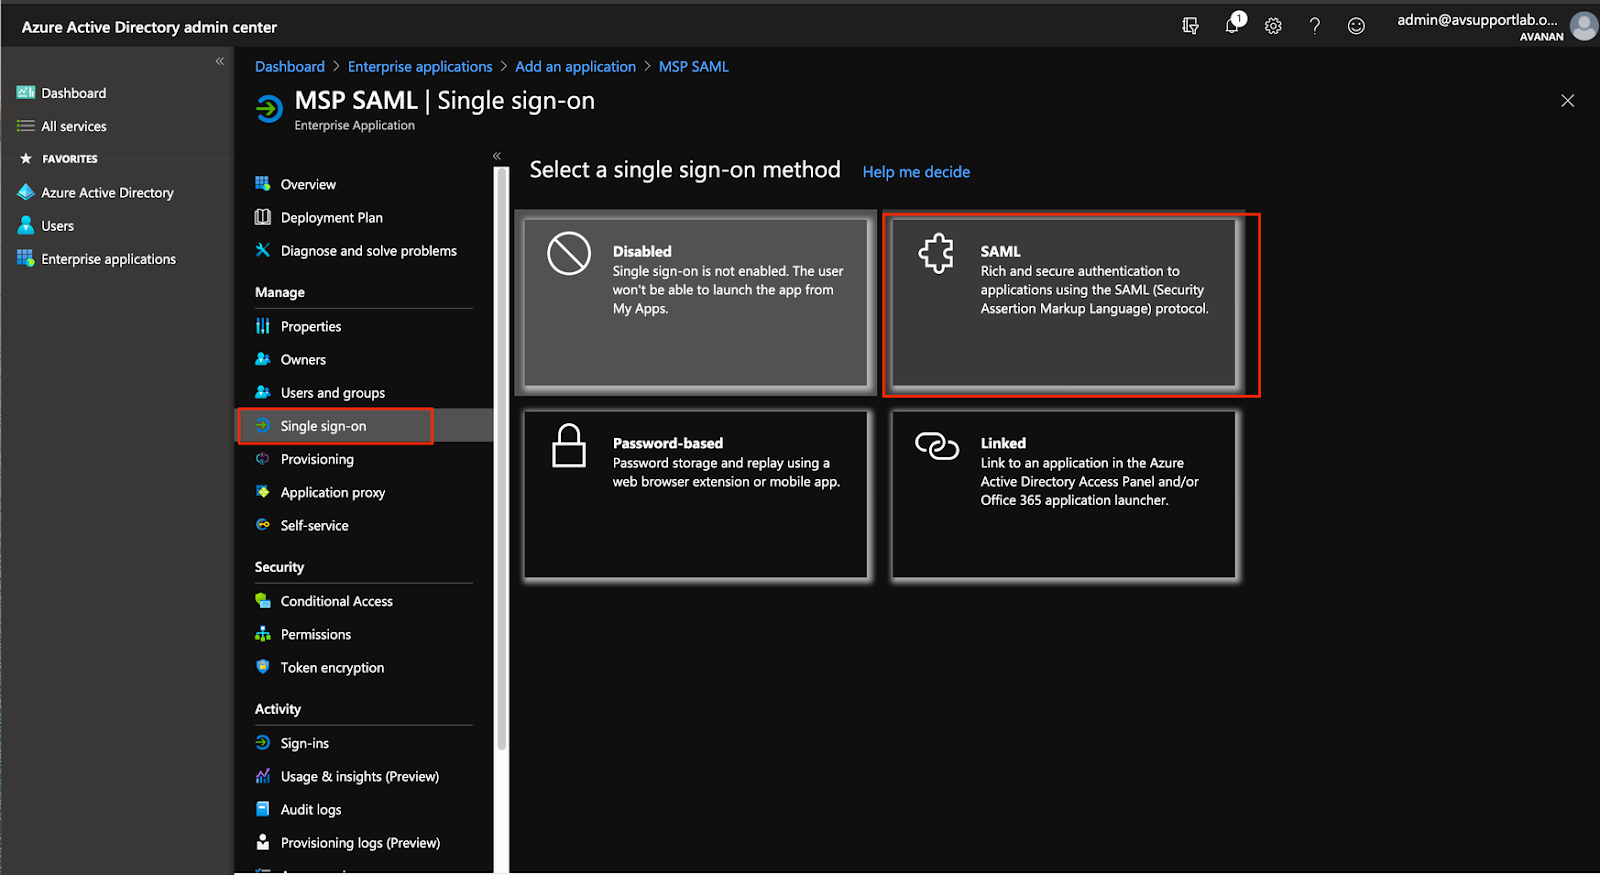
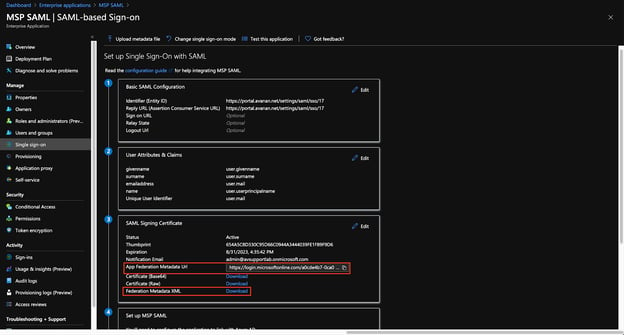
- Click the edit icon next to Basic SAML configuration.
You will need the ACS URL value which you can copy from the MSP portal under Settings > Configure SAML modal.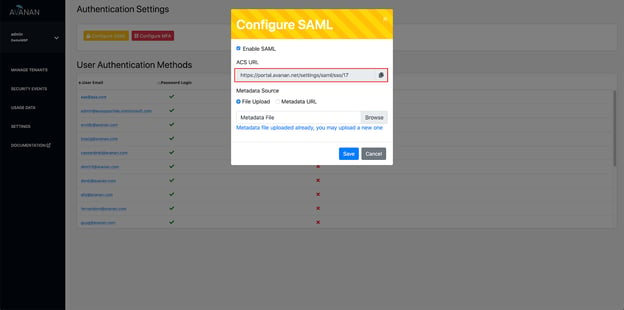
- Copy the two fields Identifier and Reply URL from the ACS URL value on the MSP portal to to the Basic SAML Configuration dialog in the Azure portal.
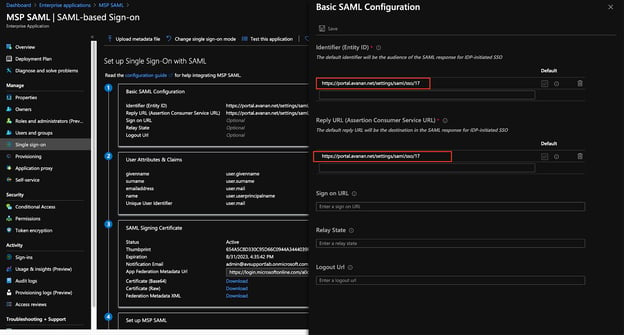
- Click Save.
- Click the edit pencil in the User Attributes & Claims section. Click the Value field under required claim, and select user.mail as the Source attribute.

- Click Save.
- Your configuration should now look like this:
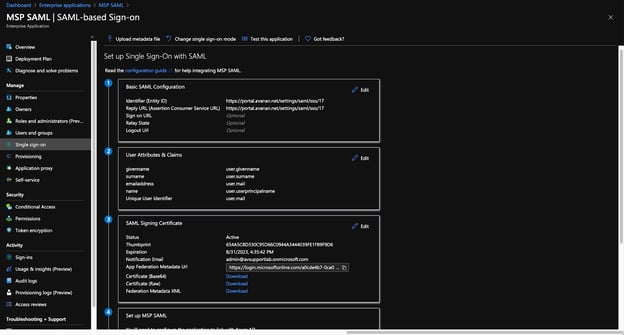
- Under SAML Signing Certificate, either download the metadata or copy the metadata URL (both options marked below).
- Based on your choice in the previous step, provide the metadata URL or upload the metadata file to the MSP portal Configure SAML modal.
Note - Make sure enable SAML is checked on the form.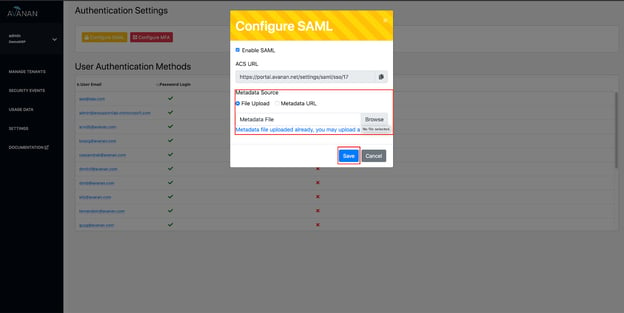
- Click Save.
- Make sure to add users to the SAML Application in your Azure Portal.
- Enable SAML Login under User Authentication Methods for the relevant users.